
For Eureka RapidClean Pro troubleshooting, check for blockages and clean the filters regularly. Ensure the battery is fully charged before use.
The Eureka RapidClean Pro is a popular cordless vacuum known for its efficiency and ease of use. Users occasionally face issues that can often be resolved with simple troubleshooting steps. Common problems include reduced suction, battery performance, and brush roll malfunctions.
Regular maintenance, such as cleaning filters and checking for obstructions, can prevent many of these issues. Proper care not only extends the vacuum’s lifespan but also ensures optimal performance. This guide provides straightforward solutions to common problems, helping you keep your Eureka RapidClean Pro in top shape. Follow these tips to maintain your vacuum and enjoy hassle-free cleaning.
Introduction To Eureka Rapidclean Pro
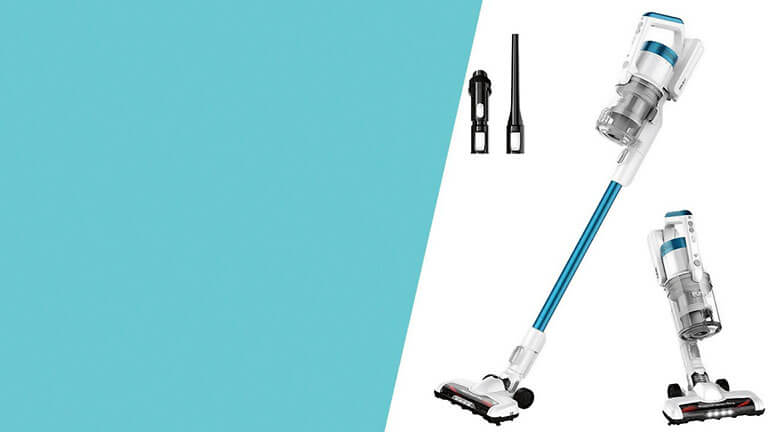
The Eureka RapidClean Pro is a powerful, lightweight vacuum cleaner. It’s designed for easy use and effective cleaning. This vacuum is ideal for busy homes.
Popular Features
- Powerful Suction: It picks up dirt and debris effortlessly.
- Lightweight Design: Easy to carry around the house.
- Swivel Steering: Maneuverable around furniture and corners.
- Long Battery Life: Cleans multiple rooms on a single charge.
- LED Headlights: Illuminates dark areas for better cleaning.
Common Issues Faced
| Issue | Possible Solutions |
|---|---|
| Weak Suction |
|
| Battery Not Charging |
|
| Brush Roll Not Spinning |
|
Power Problems
Power problems can be frustrating when using your Eureka RapidClean Pro. Below, we will cover common power issues and their solutions. Ensure your vacuum operates smoothly and efficiently.
Checking The Battery
First, inspect the battery. Ensure it is fully charged. A low battery can cause the vacuum to stop working.
- Remove the battery from the vacuum.
- Check for any visible damage.
- Charge the battery using the provided charger.
- Reconnect the battery and try to power on the vacuum.
If the battery does not charge, it may need replacement. Consider purchasing a new battery from an authorized dealer.
Power Button Malfunctions
Sometimes, the power button can malfunction. This issue is often due to dirt or debris.
- Turn off the vacuum and unplug it.
- Gently clean around the power button using a soft cloth.
- Ensure there is no dirt blocking the button.
- Press the power button firmly and see if it works.
If the power button still does not work, it may be an internal issue. Consider contacting Eureka customer support for further assistance.
Suction Issues
The Eureka Rapidclean Pro is a great vacuum cleaner. But sometimes, it might face suction issues. These problems can reduce its cleaning power. Here are some simple steps to fix these issues.
Emptying The Dust Cup
A full dust cup can block suction. Follow these steps to empty it:
- Turn off the vacuum.
- Remove the dust cup from the unit.
- Open the dust cup lid.
- Dump the contents into the trash.
- Wipe the dust cup clean if needed.
- Reattach the dust cup to the vacuum.
Keeping the dust cup empty helps maintain strong suction. Do this after every use.
Unclogging The Air Path
A blocked air path can also cause suction issues. Here’s how to clear it:
- Turn off the vacuum.
- Detach the hose from the unit.
- Check for blockages inside the hose.
- Use a long stick or rod to push out clogs.
- Inspect the vacuum head for debris.
- Remove any visible blockages.
Keeping the air path clear ensures the vacuum works efficiently. This can solve many suction problems.
| Issue | Solution |
|---|---|
| Full Dust Cup | Empty the dust cup regularly. |
| Clogged Hose | Clear the hose with a stick. |
| Blocked Vacuum Head | Remove debris from the vacuum head. |
Filter Maintenance
Maintaining your Eureka RapidClean Pro’s filters is crucial for optimal performance. Proper filter maintenance ensures the vacuum functions efficiently and prolongs its lifespan. This section will guide you through the essential steps of filter maintenance.
Cleaning The Filters
Regularly cleaning the filters is essential. Follow these steps to clean them effectively:
- Turn off and unplug the vacuum.
- Remove the dust cup from the vacuum.
- Take out the foam filter and the felt filter from the dust cup.
- Rinse both filters under cold water until the water runs clear.
- Gently squeeze out excess water from the filters.
- Let the filters air dry for 24 hours before reinserting them.
When To Replace Filters
Even with regular cleaning, filters need replacing over time. Here’s how to know when to replace them:
- The vacuum’s suction power decreases significantly.
- The filters appear damaged or torn.
- Strong odors persist even after cleaning the filters.
- The vacuum is used frequently or in dusty environments.
Generally, replace the filters every 3-6 months for optimal performance. Regular filter maintenance ensures your Eureka RapidClean Pro stays in top condition.
| Filter Type | Cleaning Frequency | Replacement Frequency |
|---|---|---|
| Foam Filter | Every month | Every 3-6 months |
| Felt Filter | Every month | Every 3-6 months |
Brushroll Complications
Experiencing issues with the brushroll of your Eureka RapidClean Pro? Brushroll complications can affect the vacuum’s performance and leave your floors dirty. Understanding how to troubleshoot these issues is essential for maintaining a clean home.
Removing Debris
The brushroll often gets clogged with hair, string, and other debris. Regular cleaning is necessary to ensure it functions properly.
- Turn off and unplug the vacuum.
- Flip the vacuum to access the brushroll.
- Use scissors to cut away tangled hair and string.
- Remove any large debris manually.
- Check the ends of the brushroll for clogs.
Resetting The Brushroll
If the brushroll stops spinning, a reset might be needed. Follow these steps:
- Turn off and unplug the vacuum.
- Locate the reset button near the brushroll.
- Press and hold the reset button for 10 seconds.
- Plug in and turn on the vacuum.
- Test if the brushroll is spinning again.
Regular maintenance can prevent brushroll complications. Clean your vacuum’s brushroll often to ensure optimal performance.
Charging Challenges
Experiencing charging challenges with your Eureka RapidClean Pro can be frustrating. Understanding the root causes helps in resolving issues efficiently. Let’s dive into some common troubleshooting steps for charging problems.
Evaluating The Charger
First, check if the charger is plugged into a working outlet. Sometimes, a loose connection can cause issues. Try plugging another device into the same outlet to confirm its functionality.
Inspect the charger for any visible damage. Look for frayed wires or bent prongs. Damaged chargers can fail to provide the necessary power.
| Charger Component | Issue to Check |
|---|---|
| Plug | Loose or bent prongs |
| Wire | Frayed or damaged wire |
| Adapter | Heat or burn marks |
If the charger shows any of these signs, consider replacing it.
Optimizing Charging Practices
Ensure your vacuum is turned off while charging. This helps the battery charge more efficiently.
- Place the vacuum in a cool, dry place.
- Avoid charging in direct sunlight.
- Use the original charger provided by Eureka.
Follow these steps to optimize charging:
- Turn off the vacuum.
- Connect the charger securely.
- Ensure the charging indicator light is on.
If the light does not turn on, recheck the connections. This can help fix minor issues.
Regularly cleaning the charging contacts can prevent build-up that affects charging. Use a dry cloth to wipe the contacts gently.
By following these simple steps, you can resolve many charging challenges with your Eureka RapidClean Pro.
Indicator Lights
Understanding the indicator lights on your Eureka RapidClean Pro can help maintain its efficiency. These lights offer valuable insights into the vacuum’s status and potential issues.
Interpreting Light Signals
The indicator lights on the Eureka RapidClean Pro convey different messages. Each color and pattern has a specific meaning.
- Green Light: The vacuum is functioning correctly.
- Orange Light: The battery is charging.
- Red Light: There is an issue that needs attention.
Troubleshooting Light Errors
If you see a red light, the vacuum needs troubleshooting. Follow these steps to resolve common issues:
- Check the Battery
- Ensure the battery is properly connected.
- If necessary, charge the battery.
- Clear Blockages
- Inspect the vacuum for blockages in the hose or filters.
- Remove any debris to restore normal operation.
- Inspect the Brush Roll
- Turn off the vacuum and check the brush roll.
- Remove any hair or debris wrapped around it.
Use this table to quickly resolve common light issues:
| Light Color | Meaning | Action |
|---|---|---|
| Green | Normal Operation | No action needed |
| Orange | Charging | Keep charging |
| Red | Issue Detected | Follow troubleshooting steps |
Noise And Vibrations
Experiencing noise and vibrations with your Eureka RapidClean Pro can be frustrating. This section will help you identify and mitigate these issues. Ensuring your vacuum runs smoothly is essential for efficient cleaning.
Identifying Unusual Noises
Unusual noises often indicate a problem with your vacuum. Identifying the cause can help in resolving it quickly. Below are common types of noises and their possible causes:
- Loud Whirring: This could mean a blockage in the vacuum hose.
- High-Pitched Screeching: Check for tangled debris in the brush roll.
- Rattling Sound: Loose parts or screws might be the cause.
Regular maintenance can prevent these noises. Clean the vacuum parts and check for wear and tear.
Mitigating Excessive Vibrations
Excessive vibrations can damage your vacuum and affect its performance. Follow these steps to reduce vibrations:
- Check the Brush Roll: Ensure it’s free from debris and properly aligned.
- Inspect the Wheels: Damaged wheels can cause vibrations. Replace if needed.
- Secure Loose Parts: Tighten any loose screws or components.
- Balance the Vacuum: Ensure the vacuum stands evenly on all wheels.
Regular inspection and maintenance can significantly reduce vibrations. Keep the vacuum clean and well-maintained.
Here’s a quick reference table for common noise and vibration issues:
| Issue | Possible Cause | Solution |
|---|---|---|
| Loud Whirring | Blockage in hose | Clear the hose |
| High-Pitched Screeching | Debris in brush roll | Clean the brush roll |
| Rattling Sound | Loose parts | Tighten screws |
| Excessive Vibration | Damaged wheels | Replace wheels |
Keep your Eureka RapidClean Pro in top condition by addressing noises and vibrations promptly.
Professional Repair Or Replace
Knowing whether to repair or replace your Eureka RapidClean Pro can be tricky. This section will help you make the best decision.
Seeking Professional Help
If your Eureka RapidClean Pro stops working, seek professional help. A professional can diagnose the issue quickly. Here are some steps to follow:
- Contact Eureka customer service.
- Provide the model and issue details.
- Ask for a repair estimate.
Professionals have the tools and knowledge to fix complex problems. They can also ensure your vacuum works efficiently again. If the repair cost is reasonable, it might be worth it.
Assessing Replacement Options
Sometimes, replacing the vacuum is the better option. Here are factors to consider:
| Factor | Description |
|---|---|
| Cost | Compare repair costs with a new vacuum price. |
| Age | Older vacuums might need more frequent repairs. |
| Features | New models may offer better features and efficiency. |
If the vacuum is old and costly to repair, a new one might be best. New models often have advanced features and better efficiency. Here are some benefits of upgrading:
- Improved suction power.
- Longer battery life.
- Modern design and features.
Weigh the pros and cons before deciding. Whether to repair or replace your Eureka RapidClean Pro depends on your situation.
Preventive Tips
Maintaining the Eureka Rapidclean Pro is essential for its longevity. Following some preventive tips ensures it works efficiently. Below are some helpful guidelines.
Routine Maintenance Schedule
Creating a routine maintenance schedule helps in keeping your vacuum in top shape. Here’s a simple table to guide you:
| Task | Frequency |
|---|---|
| Empty Dust Cup | After Every Use |
| Clean Filters | Every Month |
| Check Brush Roll | Bi-Weekly |
| Inspect for Blockages | Weekly |
Best Usage Practices
Following best usage practices can extend the life of your Eureka Rapidclean Pro. Here are some tips:
- Avoid Vacuuming Large Objects: Large objects can clog the vacuum.
- Use On Appropriate Surfaces: This vacuum is best for carpets and hard floors.
- Store Properly: Keep the vacuum in a cool, dry place.
- Charge Fully: Ensure the battery is fully charged before use.
- Clean After Each Use: Empty the dust cup and clean the filters regularly.
By following these preventive tips, you can ensure the optimal performance of your Eureka Rapidclean Pro.
Frequently Asked Questions
How To Reset Eureka Rapidclean Pro?
To reset, press the power button for 3-5 seconds until it restarts.
Why Is My Eureka Rapidclean Pro Not Charging?
Check if the power adapter is plugged in securely and outlet is functioning properly.
What To Do If Eureka Rapidclean Pro Loses Suction?
Clean the filters and remove debris from the brush roll and dust cup.
How To Clean Eureka Rapidclean Pro Filters?
Remove filters, rinse under water, and let them air dry for 24 hours.
Why Does Eureka Rapidclean Pro Stop Working Suddenly?
This could be due to overheating. Let the vacuum cool down for at least 30 minutes.
Conclusion
Mastering the Eureka RapidClean Pro troubleshooting steps can keep your vacuum running efficiently. Regular maintenance ensures longevity and optimal performance. Always refer to the user manual for specific issues. Keep your device clean and well-maintained. Troubleshooting common problems can save time and money, ensuring a hassle-free cleaning experience.