
Fluorescent light troubleshooting often involves checking the bulb, ballast, and wiring connections. Common issues include flickering, dim light, or no light at all.
Fluorescent lights are popular for their energy efficiency and long lifespan. Despite their benefits, they can sometimes malfunction. Troubleshooting these lights can save time and money. Identifying whether the issue stems from the bulb, ballast, or wiring is crucial. Faulty connections or a failing ballast are common problems.
Replacing the bulb or checking for loose wires can resolve many issues. Understanding the components and their functions helps in quick diagnosis. Proper maintenance ensures the longevity and efficiency of fluorescent lighting systems. This guide aims to simplify the troubleshooting process.
Introduction To Fluorescent Lighting
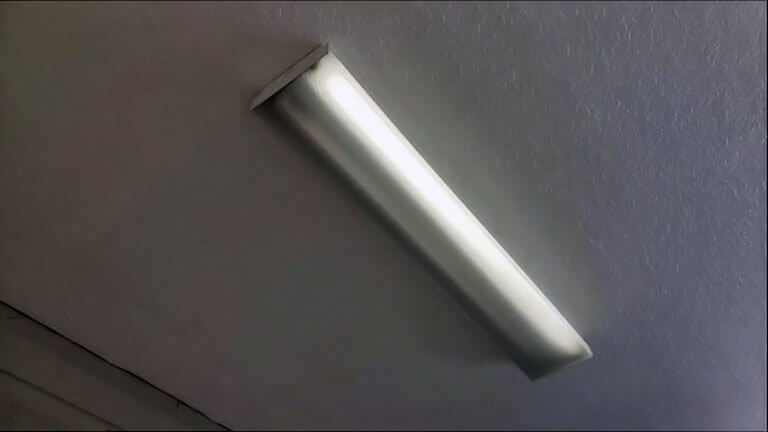
Fluorescent lights are common in homes and offices. They provide bright, energy-efficient lighting. Understanding their components and uses helps in troubleshooting.
Popularity And Uses
Fluorescent lights are very popular. They are found in many places.
- Homes
- Offices
- Schools
- Hospitals
They are used because they save energy. They also last longer than regular bulbs.
Basic Components
Fluorescent lights have several key parts. Knowing these helps in fixing problems.
| Component | Description |
|---|---|
| Tubes | Contain gas that lights up. |
| Ballast | Controls the current to the tubes. |
| Starter | Helps the light turn on. |
| Fixture | Holds all parts together. |
Each part plays an important role. If one part fails, the light may not work.
Common Issues With Fluorescent Lights
Fluorescent lights are common in homes and offices. They are energy-efficient and cost-effective. However, they can have some common issues. This section will cover flickering and dimming, buzzing sounds, and delayed start. Understanding these problems can help you troubleshoot and fix them quickly.
Flickering And Dimming
Flickering and dimming are common issues with fluorescent lights. These problems can be annoying and disrupt your work. Here are some common causes:
- Old or faulty ballast: The ballast regulates the current to the lamp. An old or faulty ballast can cause flickering.
- Loose connections: Check if all connections are tight. Loose connections can cause intermittent flickering.
- Temperature changes: Fluorescent lights are sensitive to temperature. Cold temperatures can cause flickering and dimming.
- End-of-life bulbs: Fluorescent bulbs have a lifespan. Near the end of their life, they may flicker or dim.
Check these factors to identify the issue. Replace the ballast or bulbs if needed.
Buzzing Sounds
Buzzing sounds from fluorescent lights can be irritating. Several factors may cause this problem:
| Cause | Description |
|---|---|
| Faulty ballast | A failing ballast can emit a buzzing sound. |
| Loose parts | Loose components inside the fixture can vibrate and buzz. |
| Electrical interference | Other devices can interfere and cause buzzing. |
Tighten any loose parts and consider replacing the ballast. Ensure there is no electrical interference.
Delayed Start
Sometimes, fluorescent lights take time to start. This delay can be frustrating. Here are some reasons for a delayed start:
- Old ballast: An aging ballast can delay the start.
- Cold temperatures: Cold weather can slow the start-up time.
- Old bulbs: Bulbs near the end of their life can cause delays.
Replace the ballast or bulbs to resolve this issue. Ensure the fixture is suitable for the temperature in your area.
Safety First: Preparing For Troubleshooting
Fluorescent lights can sometimes stop working. You can fix them quickly. This guide provides easy solutions. Follow these steps to troubleshoot your fluorescent light.
Tube Replacements
If your fluorescent light flickers, the tube may need replacing. Here’s how to do it:
- Turn off the power to the light fixture.
- Remove the light cover to access the tube.
- Gently twist the tube to release it from the socket.
- Insert the new tube and twist to secure it.
- Replace the cover and turn the power back on.
Ensure you use the correct type of tube. This prevents further issues. Always handle tubes carefully to avoid breaking them.
Starter Checks
A faulty starter can cause the light to flicker or not turn on. Follow these steps to check the starter:
- Turn off the power to the light fixture.
- Locate the starter near the tube.
- Twist the starter counterclockwise to remove it.
- Inspect the starter for any visible damage.
- If damaged, replace it with a new starter.
- Twist the new starter clockwise to secure it.
- Turn the power back on and test the light.
Starters are inexpensive and easy to replace. Ensure you use the correct starter type for your light fixture.
Quick fixes can often solve immediate problems. This saves time and money. Check tubes and starters first. They are common causes of issues.
Quick Fixes For Immediate Problems
The ballast is crucial for fluorescent lights. It regulates the current. A malfunctioning ballast can cause flickering or no light. Knowing how to troubleshoot it can save time and money.
Identifying Ballast Issues
First, check for any visible damage. Look for burnt marks or leaks. These are signs of a faulty ballast.
Next, listen for any unusual sounds. A buzzing sound often indicates a problem. Ensure the ballast is properly grounded. Poor grounding can cause malfunction.
Use a multimeter to check the voltage. A faulty ballast might show incorrect readings. Compare the readings with the manufacturer’s specifications.
Check the light’s behavior. Flickering, dimming, or no light can indicate ballast issues. Confirm by testing the bulbs in another fixture. If the bulbs work, the ballast is likely faulty.
Replacement Process
Before replacing, turn off the power. Safety is crucial.
- Remove the light cover. This gives access to the ballast.
- Disconnect the wires. Note their positions for reconnection.
- Unscrew the ballast. Carefully remove it from the fixture.
- Install the new ballast. Secure it with screws.
- Reconnect the wires. Follow the noted positions.
- Replace the light cover. Ensure it is properly fixed.
- Turn on the power. Test the light to ensure it works.
Using a new ballast can solve many problems. Always choose a compatible ballast for your fixture. Following these steps ensures a successful replacement. Proper maintenance extends the life of your fluorescent lights.
Fluorescent Light Troubleshooting The Ballast
Fluorescent lights often flicker or fail due to faulty starters. Assessing the starters is a crucial step in troubleshooting. Starters help ignite the light by providing a necessary voltage surge. Let’s dive into understanding the function of starters and when to replace them.
Function Of Starters
Starters are small cylindrical devices located near the tubes. They contain a gas-filled tube and a bimetallic strip. When you turn on the light, the starter sends a high voltage surge to the tube. This surge helps the gas inside the tube to ionize, producing light. The starter then opens the circuit, allowing the light to glow steadily.
Without a functioning starter, the tube may flicker or not light at all. This small but vital component ensures the proper operation of your fluorescent light.
When To Replace
Knowing when to replace a starter can save you from frustration. Look for these signs:
- Flickering Light: If the light flickers, the starter may be failing.
- Light Does Not Turn On: A completely non-functional light often indicates a bad starter.
- Dim Light: A dim light may signal a weak starter.
If you notice these signs, it’s time to replace the starter. You can find the starter type by checking the label on the starter itself.
Follow these simple steps to replace a starter:
- Turn off the light and unplug the fixture.
- Locate the starter near the tube.
- Twist the starter counterclockwise to remove it.
- Insert the new starter and twist clockwise to secure it.
- Plug in the fixture and turn on the light.
Replacing the starter is a simple task that can restore your light’s functionality.
Assessing The Starters
Ensuring proper electrical connections is crucial in troubleshooting fluorescent lights. Faulty connections can lead to flickering, dimming, or complete failure. This section will guide you through the essential steps to inspect and clean connections.
Wiring Inspections
Start by turning off the power. Safety first!
Next, inspect the wiring inside the fixture. Look for loose wires or damaged insulation. Use a voltage tester to ensure no current flows. Check the wire nuts for tightness.
| Inspection Point | Action |
|---|---|
| Loose Wires | Tighten connections |
| Damaged Insulation | Replace wires |
| Wire Nuts | Ensure tight fit |
Contact Cleanliness
Dirty contacts can cause poor electrical flow. Use a clean cloth to wipe the contacts. For stubborn dirt, a bit of rubbing alcohol helps.
Check the contacts on the light tube and the fixture. Dirty contacts can cause flickering or non-working lights.
- Remove the light tube
- Clean the contacts with a cloth
- Use rubbing alcohol for tough grime
- Reinsert the light tube
Reinstall the light tube after cleaning. Turn the power back on. Check if the light works properly. If not, further inspection may be needed.
Electrical Connection Checks
Fluorescent lights can be tricky to fix. Deciding between professional help or DIY depends on the issue. Some problems need an expert. Others, you can handle yourself with the right tools and knowledge.
When To Call An Electrician
Some problems require an electrician. Flickering lights can mean a wiring issue. Buzzing sounds might indicate faulty ballast. Burnt smells suggest a fire risk. These are serious. Call a professional immediately.
Frequent bulb replacements can signal deeper issues. Circuit breaker trips often. That’s a sign of electrical overload. An electrician can diagnose and fix these problems safely.
Old fixtures might need updating. Newer models are safer and more efficient. Electricians can upgrade your lighting system.
Resources For Diy Repair
Some issues can be fixed at home. Replacing bulbs is a simple task. Checking connections can resolve loose wire issues. You need basic tools and safety gear.
Refer to the user manual for your light fixture. It offers troubleshooting tips. Online tutorials and forums are also helpful. They provide step-by-step guides and advice from other users.
Here are some common DIY fixes:
| Problem | Solution |
|---|---|
| Light won’t turn on | Check the bulb and starter |
| Dim light | Clean the fixture and replace the bulb |
| Flickering light | Ensure the bulb is seated properly |
Always remember safety first. Turn off the power before starting any repairs. Use a voltage tester to ensure no electricity flows to the fixture. Wear insulated gloves for extra protection.
- Replace bulbs with the correct type and wattage.
- Check and tighten all connections.
- Consult an expert if unsure.
DIY repairs can save money. But know your limits. Complex issues need professional attention.
Professional Help Or Diy
Fluorescent lights are a staple in many homes and offices. They are energy-efficient and long-lasting. But, they need proper care to last. Follow these maintenance tips for better performance and longer life.
Regular Cleaning
Dust and dirt can accumulate on fluorescent lights. This can reduce their efficiency. Regular cleaning helps keep them bright and efficient.
- Turn off the light and let it cool.
- Use a soft cloth or duster to remove dust.
- For stubborn dirt, use a damp cloth.
- Check the fixture for any signs of damage.
Timely Replacements
Fluorescent lights have a limited lifespan. Timely replacements ensure continuous, bright lighting.
- Replace the bulbs every 1-2 years.
- Look for flickering or dimming signs.
- Always have spare bulbs on hand.
Replacing the bulbs on time can prevent damage to the fixture. It also ensures that you always have good lighting. Regular checks can save you from unexpected outages.
Maintenance Tips For Longevity
Fluorescent lights have long been a staple in homes and offices. They are energy-efficient and provide bright light. But, LED lights offer numerous benefits over traditional fluorescent lights. Upgrading to LED can enhance energy savings and performance. Here’s how to make the switch smoothly.
Led Retrofits
LED retrofits are an easy way to upgrade your existing fixtures. They fit into the same sockets as your fluorescent bulbs. This means you don’t need to replace the entire fixture. Simply remove the old fluorescent tubes and insert the new LED ones.
- Ease of Installation: No need for new fixtures.
- Cost-Effective: Saves money on new fixtures.
- Longer Lifespan: LED bulbs last longer than fluorescent tubes.
Ensure that you choose the correct type of LED retrofit for your fixture. Check the specifications for compatibility. This will help you avoid any electrical issues.
Energy Efficiency Considerations
LED lights are known for their energy efficiency. They consume less power than fluorescent lights. This can lead to significant savings on your electricity bill.
| Lighting Type | Energy Consumption | Lifespan |
|---|---|---|
| Fluorescent | 32W per bulb | 10,000 hours |
| LED | 15W per bulb | 50,000 hours |
By switching to LED, you can reduce your energy use by up to 50%. This also means fewer bulb replacements. Fewer replacements translate to lower maintenance costs.
- Assess your current lighting setup.
- Choose the appropriate LED retrofit.
- Install the new LED bulbs.
- Enjoy the energy savings!
Upgrading to LED is a smart choice for both your wallet and the environment. Make the switch today and enjoy brighter, more efficient lighting.
Upgrading Your Fluorescent Lighting
Keeping your fluorescent lights working is important. Proper care and quick fixes help a lot. This section will help you keep your lights on.
Recap Of Tips
Let’s quickly review the tips:
- Check for loose or burnt-out bulbs.
- Inspect the starter and ballast for issues.
- Clean the tubes and fixtures for better performance.
- Replace parts that show wear or damage.
Using these tips will keep your lights bright. Regular checks are key. Look for signs of trouble early.
Encouragement For Proper Maintenance
Maintenance is very important. It helps your lights last longer. Follow a simple schedule:
- Check lights once a month.
- Clean fixtures every three months.
- Replace old parts as needed.
Keep a checklist to track your tasks. This makes it easy to remember. Proper care saves money and time.
Don’t wait for problems to grow. Fix small issues quickly. This ensures your space stays bright and safe. Happy lighting!
Frequently Asked Questions
Why Is My Fluorescent Light Flickering?
A faulty ballast or a loose starter can cause flickering.
How Do I Fix A Buzzing Fluorescent Light?
Replace the ballast or check for loose components to fix buzzing sounds.
What Causes A Fluorescent Light To Dim?
A dim light may result from a weak ballast or aging bulbs.
Can A Bad Starter Prevent My Light From Working?
Yes, a bad starter can stop the light from turning on.
How Often Should I Replace Fluorescent Tubes?
Replace fluorescent tubes every 12 to 18 months for optimal performance.
Conclusion
Mastering fluorescent light troubleshooting ensures a brighter home or workspace. Follow these steps for quick, effective solutions. Regular maintenance can prevent issues. Safe and efficient lighting enhances productivity and comfort. Keep your lights in top condition and enjoy a well-lit environment.
Troubleshooting doesn’t have to be complicated with the right knowledge.