
To troubleshoot a GE refrigerator ice maker, check the water supply and ensure the ice maker is turned on. Verify proper temperature settings and inspect for blockages.
A malfunctioning ice maker can be frustrating, but most issues are fixable with basic troubleshooting. First, ensure the water supply is connected and flowing properly. Check the ice maker’s switch to confirm it is on and operational. Adjust the freezer temperature to the optimal range, typically between 0°F and 5°F.
Inspect the ice maker for any visible blockages or ice jams. Cleaning the ice maker and surrounding area can often resolve minor issues. Regular maintenance and timely inspections can prevent most ice maker problems, ensuring a steady supply of ice for your needs.
Introduction To Ge Refrigerator Ice Maker Issues
GE refrigerators are known for their reliability. Yet, ice maker problems can still occur. Knowing how to troubleshoot these issues can save you time and money. This guide will help you identify and fix common ice maker problems.
Common Signs Of Malfunction
Identifying a malfunction early can prevent bigger problems. Here are some common signs:
- No ice production: The ice maker isn’t making ice.
- Small or misshapen ice cubes: Ice cubes are not the right size or shape.
- Ice with strange taste or odor: Ice has an unusual taste or smell.
- Leaking water: Water leaks from the ice maker area.
- Unusual noises: Strange sounds come from the ice maker.
Benefits Of Diy Fixes
Fixing the ice maker yourself has several benefits:
- Cost-effective: Save money on repair bills.
- Convenience: No need to wait for a technician.
- Learning experience: Gain knowledge about your appliance.
| Issue | Possible Solution |
|---|---|
| No ice production | Check the water supply line. |
| Small or misshapen ice | Inspect the ice mold for obstructions. |
| Ice with strange taste | Replace the water filter. |
| Leaking water | Check for loose connections. |
| Unusual noises | Ensure the ice maker is level. |
Initial Assessment Steps
When your GE refrigerator ice maker stops working, frustration can set in. But don’t worry, fixing it might be easier than you think. Follow these initial assessment steps to troubleshoot the problem.
Checking The Power Supply
First, ensure your refrigerator is plugged in properly. Look behind it to check the power cord.
- Make sure the plug is fully inserted into the outlet.
- Confirm that the outlet is working by plugging in another device.
If the outlet is not working, inspect your home’s circuit breaker. Reset it if needed. Sometimes, power surges can trip the breaker.
Next, check the refrigerator’s internal power settings. Ensure the ice maker switch is in the “On” position.
Inspecting The Water Supply Line
The ice maker needs water to function. Check the water supply line for issues.
- Ensure the water valve is open.
- Inspect the line for kinks or bends.
- Check for leaks or drips around the connections.
If the line looks damaged, consider replacing it. You can find replacement parts at most hardware stores.
Also, make sure the water filter is not clogged. A dirty filter can block water flow.
Here’s a quick checklist for inspecting the water supply line:
| Task | Action |
|---|---|
| Water Valve | Ensure it’s open |
| Supply Line | Check for kinks or bends |
| Connections | Inspect for leaks |
| Water Filter | Ensure it’s clean |
These steps can resolve many common ice maker issues. If the problem persists, further inspection may be needed.
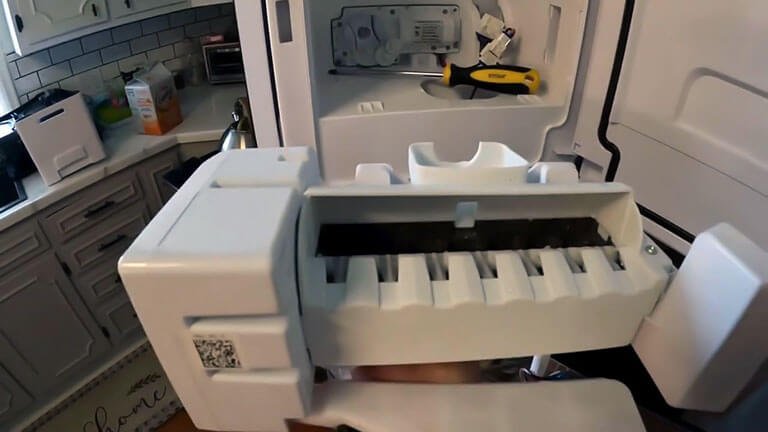
Troubleshooting The Ice Maker Mechanism
The ice maker in your GE refrigerator may stop working. Understanding the ice maker mechanism is crucial. This section will help you troubleshoot common issues. We will focus on the ice ejection system and the ice mold heater.
Evaluating The Ice Ejection System
The ice ejection system pushes ice from the mold. First, check if ice is stuck in the mold. Use a soft cloth to remove any blockages. Listen for a clicking sound when the ejector blades move. If you hear no sound, the motor might be faulty.
Examine the ejector blades for damage. Bent or broken blades need replacement. Check the motor connections. Loose wires can cause the motor to stop. Secure any loose connections.
Assessing The Ice Mold Heater
The ice mold heater helps release ice from the mold. If ice is stuck, the heater might be defective. Use a multimeter to test the heater’s continuity. No continuity means the heater is broken.
Check the heater’s connections for any loose wires. Secure any loose connections. Look for visible signs of damage like burns or breaks. Replace the heater if damaged.
| Component | Action |
|---|---|
| Ice Ejection System | Check for ice blockages |
| Ice Ejection System | Listen for clicking sound |
| Ice Mold Heater | Test for continuity |
| Ice Mold Heater | Check for damage |
Ensure all components are in good condition. This ensures your ice maker works efficiently.
Water Inlet Valve Examination
The water inlet valve in your GE refrigerator ice maker plays a crucial role. It supplies water to the ice maker, ensuring you get ice cubes. Examining the water inlet valve can solve many ice maker issues.
Testing For Proper Function
First, unplug the refrigerator to ensure safety. Locate the water inlet valve, usually at the back of the fridge. Use a multimeter to test the valve’s electrical continuity. Set the multimeter to the lowest Ohms setting. Touch the meter’s probes to the valve’s terminals. The reading should be between 200 and 500 Ohms. If the reading is outside this range, replace the valve.
Identifying Blockages And Leaks
Check for any blockages in the water inlet valve. Disconnect the water line from the valve. Inspect the valve and water line for debris or ice build-up. Clean any blockages you find.
Next, check for leaks around the valve. Look for any water puddles or moisture. Tighten any loose connections. If the valve itself is leaking, a replacement may be necessary.
| Issue | Action |
|---|---|
| No continuity in valve | Replace valve |
| Blockage in valve | Clean valve |
| Leak around valve | Tighten connections or replace valve |
Filter And Water Line Issues
Ice maker problems can often be traced back to the filter and water line. Ensuring these components function properly is essential. This section dives into common issues and solutions.
Replacing The Water Filter
A clogged or dirty filter can block water flow. This can result in no ice production. Follow these steps to replace it:
- Locate the filter. It’s usually inside the fridge.
- Turn the filter counterclockwise to remove it.
- Insert the new filter and turn it clockwise.
- Run water through the dispenser for five minutes.
Make sure to replace the filter every six months. Regular replacement ensures clean water and ice.
Unclogging The Water Line
The water line can get clogged with debris. This stops water from reaching the ice maker. Here are the steps to unclog it:
- Turn off the refrigerator’s water supply.
- Disconnect the water line from the fridge.
- Use a small brush to clean the inside of the line.
- Flush the line with water to remove any debris.
- Reconnect the water line and turn on the water supply.
Regular cleaning prevents clogs. This ensures a steady water flow to the ice maker.
Note: Always check the user manual for specific instructions.
Thermostat And Sensor Checks
Thermostat and Sensor Checks are vital for ensuring your GE Refrigerator Ice Maker functions correctly. In this section, we’ll explore how to calibrate the ice maker thermostat and diagnose sensor malfunctions. These steps can help you maintain a reliable ice supply and avoid unnecessary repairs.
Calibrating The Ice Maker Thermostat
The thermostat controls the ice maker’s temperature. If it’s not set correctly, ice production can stop. Follow these steps to calibrate the thermostat:
- Locate the thermostat inside the ice maker.
- Use a thermometer to measure the current temperature.
- Adjust the thermostat to the desired temperature (usually 0°F or -18°C).
- Wait a few hours and check the temperature again.
- Repeat adjustments until the correct temperature is maintained.
Tip: Ensure your freezer is set to the recommended temperature. This helps the ice maker function properly.
Sensor Malfunction Diagnosis
Sensors play a crucial role in ice production. A malfunctioning sensor can cause the ice maker to stop working. Here’s how to diagnose sensor issues:
- Inspect the sensor for visible damage or dirt.
- Clean the sensor with a soft cloth if dirty.
- Check the sensor’s connection to the control board.
- Use a multimeter to test the sensor’s electrical resistance.
- Compare the reading to the manufacturer’s specifications.
If the sensor readings are off, it may need replacement. Consult your GE Refrigerator manual for specific sensor types and replacement procedures.
Table: Common Sensor Issues and Solutions
| Issue | Solution |
|---|---|
| Dirty Sensor | Clean with a soft cloth |
| Loose Connection | Reconnect sensor securely |
| Incorrect Resistance | Replace sensor |
Keeping your thermostat and sensors in check ensures your GE Refrigerator Ice Maker runs smoothly. Regular maintenance can prevent many common issues.
Ice Maker Module And Gear Testing
Is your GE refrigerator’s ice maker giving you trouble? It might be an issue with the ice maker module or the drive gear. These components play a crucial role in the ice-making process. Let’s dive into how to test and troubleshoot these parts effectively.
Inspecting The Control Module
The control module is the brain of the ice maker. It regulates the ice-making cycle. First, unplug the refrigerator to ensure safety. Then, locate the ice maker module. It is usually behind the front cover of the ice maker.
Check for any visible damage or burned-out components. Use a multimeter to test the electrical contacts. Set the multimeter to the lowest ohms setting. Touch the probes to the terminals labeled “L” and “N”. If the reading is zero or infinite, the module is faulty.
| Test Point | Expected Reading |
|---|---|
| L and N | 0 ohms or infinite |
| V and N | 120 volts |
If the control module does not meet these readings, replace it immediately.
Checking The Drive Gear
The drive gear moves the ice maker’s ejector blades. This action pushes the ice out of the mold. To inspect the gear, remove the ice maker from the freezer. Look for any broken or worn-out teeth on the gear.
If the gear appears damaged, replace it. You can also manually rotate the gear. This helps in checking if it moves smoothly. If it sticks or jams, this indicates a problem. A jammed gear could halt the ice-making process.
- Remove ice maker from freezer
- Inspect for broken teeth
- Manually rotate the gear
- Replace if necessary
By inspecting and testing these components, you can ensure your GE refrigerator’s ice maker runs smoothly.
Final Steps And Prevention Tips
It’s frustrating when your GE refrigerator ice maker stops working. Troubleshooting can solve many issues. Follow these final steps to fix and prevent future problems. Use our easy-to-follow tips to keep your ice maker in good shape.
Performing A Reset On The Ice Maker
Sometimes, a simple reset can fix the ice maker. Follow these steps to reset it:
- Locate the ice maker’s power switch. It’s usually on the side or top.
- Turn the power switch off for 30 seconds.
- Turn the power switch back on.
- Wait for the ice maker to start producing ice. This can take a few minutes.
If the reset doesn’t work, check the manual. It may have specific reset instructions.
Regular Maintenance To Prevent Future Issues
Maintaining your ice maker is crucial. It prevents future issues. Here are some tips for regular maintenance:
- Clean the ice maker every three months. Use a mild detergent and warm water.
- Check the water filter. Replace it every six months.
- Inspect the water supply line. Make sure it’s not kinked or blocked.
- Test the ice maker’s functionality monthly. Ensure it makes ice properly.
Regular maintenance keeps your ice maker working smoothly. It also extends its lifespan.
| Maintenance Task | Frequency |
|---|---|
| Cleaning | Every three months |
| Water Filter Replacement | Every six months |
| Water Line Inspection | Monthly |
Follow these tips to enjoy a reliable ice maker. Regular care prevents many common issues.
Frequently Asked Questions
How To Reset Ge Refrigerator Ice Maker?
To reset, locate the reset button on the ice maker and press it for 10 seconds.
Why Is My Ge Ice Maker Not Working?
Common issues include clogged filters, faulty water inlet valves, or the ice maker being accidentally turned off.
How To Clean Ge Refrigerator Ice Maker?
Use a mixture of warm water and mild detergent. Gently scrub the ice maker components with a soft cloth.
What Causes Ge Ice Maker To Freeze Up?
Freezing issues can be due to a blocked water line, faulty thermostat, or incorrect freezer temperature settings.
How To Test Ge Ice Maker Water Supply?
Disconnect the water line and check for consistent water flow. Replace the filter if the flow is weak.
Conclusion
Troubleshooting your GE refrigerator ice maker doesn’t have to be daunting. Follow these simple steps to identify and fix issues. Regular maintenance can prevent future problems. A well-functioning ice maker enhances your kitchen experience. Always consult the user manual or a professional for complex issues.
Enjoy hassle-free ice every day!