
Struggling with your Hunter Pro C irrigation controller? You’re not alone.
Many users face common issues with this popular device. The Hunter Pro C is a trusted name in irrigation systems. It’s known for its reliability and ease of use. But even the best devices can have problems. Whether it’s a blank display, zones not working, or programming errors, these issues can be frustrating.
Understanding the root cause is the first step in fixing your system. This guide will help you troubleshoot the Hunter Pro C controller. We’ll cover common problems and simple fixes to get your system back on track. Let’s dive in and solve those pesky issues together!
Introduction To Hunter Pro C
If you’re a homeowner who values a lush, green lawn, you’ve probably heard about the Hunter Pro C irrigation system. This reliable and user-friendly controller is designed to help you manage your watering schedule effortlessly. But like any piece of technology, it can encounter issues. Let’s dive into the Hunter Pro C and understand how to troubleshoot common problems you might face.
Overview
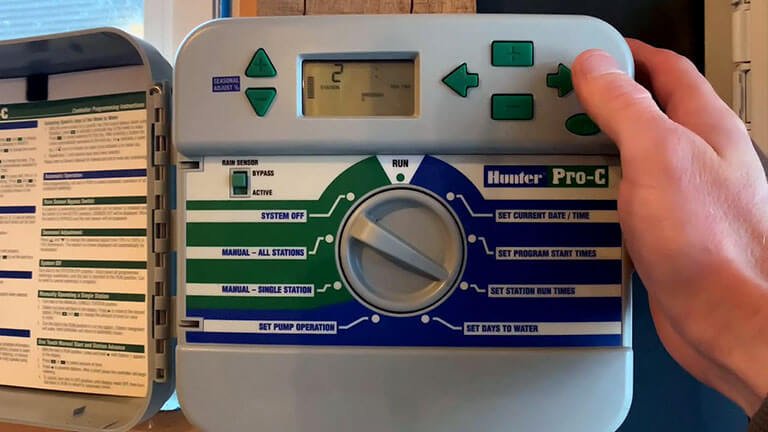
The Hunter Pro C is a popular irrigation controller known for its versatility and ease of use. It allows you to program multiple watering schedules and adjust them according to your garden’s needs. Whether you have a small backyard or a large garden, this controller can handle it all. It even offers features like seasonal adjustments and rain sensors to save water.
Have you ever wondered why your lawn looks patchy despite regular watering? It could be due to incorrect settings on your Hunter Pro C. Understanding its functions can make a big difference in your lawn’s health. This controller is designed to give you maximum control with minimal effort.
Common Issues
Even the best systems can run into problems. One common issue with the Hunter Pro C is the failure to start a scheduled watering program. This can be frustrating, especially during the hot summer months. Check if the controller is set to “Run” mode and ensure the start times are correctly programmed.
Another issue you might face is the controller displaying an error message. This could be due to a wiring problem or a faulty sensor. Make sure all connections are secure and check if any wires are damaged. Sometimes, a simple reset can resolve the issue.
Have you ever noticed that one zone isn’t watering while others are? This can be due to a valve issue or a problem with the solenoid. Inspect the valve for any debris and clean it if necessary. Replacing a faulty solenoid can often fix the problem.
Are you experiencing low water pressure in certain zones? It might be due to clogged nozzles or pipes. Regular maintenance, like cleaning the nozzles and checking for leaks, can prevent this issue. Keeping an eye on your system can save you a lot of hassle in the long run.
What steps do you take to ensure your Hunter Pro C is running smoothly? Regular checks and timely troubleshooting can help maintain your irrigation system. Your lawn will thank you for it.
Diagnosing Power Issues
Diagnosing power issues with Hunter Pro C involves checking connections and ensuring the controller receives adequate electricity. Identifying faulty wiring or a malfunctioning transformer can resolve common problems quickly.
When your Hunter Pro C irrigation controller isn’t functioning properly, diagnosing power issues is a crucial step. Power problems can halt your entire watering schedule, leaving your lawn and plants thirsty. If your controller display is blank or the system isn’t responding, it’s time to roll up your sleeves and troubleshoot.
Checking Connections
Start by inspecting the power connections. Ensure the plug is firmly inserted into the electrical outlet. Sometimes, the solution is as simple as a loose plug.
Next, look at the wiring inside the controller. Open the front panel and check if all wires are securely connected to their respective terminals. A loose wire could disrupt the power supply.
It’s also wise to examine the power outlet itself. Plug in another device to see if it works. This helps you determine if the issue is with the outlet or your Hunter Pro C.
Testing Transformer
If the connections are secure, the next step is to test the transformer. The transformer converts high voltage from your home to the low voltage needed by the controller.
First, unplug the controller from the outlet. Then, use a multimeter to measure the voltage output of the transformer. You should see a reading around 24 volts. If the reading is significantly lower, the transformer might need replacement.
Don’t forget to inspect the transformer for visible damage. A burnt or damaged transformer can often be the root cause of power issues.
By following these steps, you can diagnose and address power issues with your Hunter Pro C irrigation controller. Have you ever had a power issue with your irrigation controller? How did you resolve it? Sharing your experience can help others facing similar problems.
Solving Display Problems
When your Hunter Pro C controller starts acting up, it can be frustrating. Display problems are among the most common issues users face. Fortunately, these problems are often easy to fix. Below, we’ll dive into some practical solutions for common display problems.
Blank Screen
A blank screen on your Hunter Pro C can be alarming. The first step is to check the power source. Make sure the controller is plugged in and receiving power. If the outlet works, but the screen remains blank, try resetting the controller by unplugging it for a few minutes and then plugging it back in.
If that doesn’t work, inspect the fuse. A blown fuse can cause a blank screen. Replace it with a new one and see if the display comes back to life. Sometimes, the issue might be as simple as a loose connection. Ensure all wires and connections are secure.
Flickering Display
A flickering display can be a sign of several issues. Start by checking the power source, as inconsistent power can cause flickering. Ensure the controller is plugged into a stable power outlet.
If the power source is stable, the problem might be with the controller’s internal components. Open the controller and carefully inspect the wires and connections. Look for any loose or frayed wires that might be causing the flicker. Secure any loose connections and replace damaged wires.
Sometimes, a flickering display can be caused by environmental factors such as extreme temperatures. Make sure the controller is installed in a location with a stable temperature. Consider moving it to a more suitable spot if necessary.
Have you encountered these display problems with your Hunter Pro C? What solutions worked for you? Share your experiences and tips in the comments!
Addressing Valve Issues
Addressing valve issues with your Hunter Pro C irrigation system can be a bit challenging, but don’t worry. With a bit of patience and some handy tips, you’ll have your system up and running smoothly. Whether the valve won’t open or it refuses to close, understanding the root cause is key.
Valve Not Opening
Nothing is more frustrating than a valve that refuses to open. This issue can often be traced back to a few common culprits. First, check the electrical connections. Loose or disconnected wires can prevent the valve from receiving the signal to open.
Another possibility is a clogged valve. Debris can get stuck in the valve, blocking the flow of water. Regular cleaning and maintenance can prevent this from happening.
If you suspect a wiring problem, use a multimeter to test the solenoid. The resistance should be between 20-60 ohms. If the reading is outside this range, you might need to replace the solenoid.
Valve Not Closing
If your valve won’t close, it could lead to overwatering and high water bills. One common cause is a damaged diaphragm. The diaphragm is a flexible membrane that opens and closes the valve. Over time, it can wear out or tear.
Inspect the diaphragm and replace it if necessary. This small part is relatively inexpensive and can save you a lot of headaches.
Another issue could be debris stuck in the valve. Even a small piece of dirt can keep the valve from closing properly. Cleaning the valve can often solve the problem.
Lastly, ensure the solenoid is not stuck in the open position. Sometimes, a simple tap can free it up. If the issue persists, you may need to replace the solenoid.
Have you faced any specific valve issues with your Hunter Pro C? What troubleshooting steps worked for you? Share your experiences in the comments below!
Troubleshooting Wiring Problems
Wiring issues can cause significant problems with your Hunter Pro C controller. These issues can lead to erratic behavior, missed watering schedules, or a non-functioning system. Troubleshooting wiring problems is essential to ensure your irrigation system works correctly. Let’s delve into some essential steps for identifying and fixing wiring issues.
Checking For Shorts
Short circuits are a common cause of wiring issues. To check for shorts, turn off the power to your controller. Inspect all wiring connections for any visible damage. Look for frayed wires, loose connections, or exposed metal. Make sure all wires are securely connected and properly insulated.
Next, use a multimeter to test for shorts. Set the multimeter to the continuity setting. Touch the multimeter probes to the wiring terminals. If the multimeter beeps, there is a short circuit. Carefully trace the wiring to find and fix the source of the short.
Testing Continuity
Continuity tests ensure that electrical currents can flow through the wires. To test continuity, disconnect the wires from the controller. Use a multimeter set to the continuity setting. Touch the probes to each end of the wire being tested.
If the multimeter beeps, the wire has good continuity. If it does not, the wire may be broken or damaged. Replace any wires that fail the continuity test to restore proper function.
Regular testing and maintenance can prevent wiring issues. Ensure your irrigation system operates smoothly by addressing any wiring problems promptly.
Resolving Sensor Faults
Dealing with sensor faults in your Hunter Pro C irrigation system can be frustrating. However, resolving these issues doesn’t have to be complicated. With a few practical steps, you can get your system back on track. Let’s dive into some common sensor problems and how to fix them.
Rain Sensor Issues
Rain sensors are essential for preventing over-watering during rainy days. However, they can sometimes malfunction. Have you checked the placement of your rain sensor recently? It’s crucial that the sensor is not obstructed by trees or buildings.
Ensure the sensor is clean and free of debris. A dirty sensor can give false readings. Simply wipe it down with a damp cloth.
If your rain sensor is still not working, it might be a wiring issue. Inspect the wires for any signs of damage. If you find any, replacing the wires could solve the problem.
Soil Moisture Sensor Problems
Soil moisture sensors help maintain optimal moisture levels. If you notice dry spots in your lawn, your soil moisture sensor might be the culprit.
First, check the placement of the sensor. It should be in an area that represents the average moisture level of your lawn. Avoid placing it in overly dry or wet spots.
Test the sensor by manually watering the area and observing if the system responds. If it doesn’t, the sensor might need calibration. Refer to your manual for calibration instructions.
Still having issues? The sensor might be faulty. Consider replacing it if it’s been in use for a long time.
Remember, regular maintenance can prevent many of these issues. How often do you check your sensors? A quick monthly inspection can save you a lot of hassle.
Fixing Zone Malfunctions
Fixing zone malfunctions in your Hunter Pro C system can seem challenging. But it doesn’t have to be. Whether you’re dealing with a single zone not working or multiple zones not functioning, you can troubleshoot these issues with ease. Let’s dive into the common problems and their solutions.
Single Zone Not Working
If one zone is not working, start by checking the controller. Ensure the zone is activated in the program settings. Sometimes, a simple reset can fix the issue. Next, inspect the wiring. Loose or damaged wires can disrupt the connection. Replace any faulty wires.
Another common issue is a malfunctioning solenoid. The solenoid controls the water flow to the zone. Test the solenoid with a multimeter. If it shows no continuity, replace it. Lastly, check the valves. Dirt or debris can block the valves. Clean them and ensure they open and close properly.
Multiple Zones Not Working
When multiple zones fail, the problem might be with the controller or power source. Check the controller’s display for error messages. Reset the controller if needed. Ensure it receives power. Sometimes, a blown fuse or tripped breaker can cut off power.
Inspect the main wiring connections. Look for loose, frayed, or damaged wires. Repair or replace as necessary. If the wiring is intact, check the common wire. A broken common wire can cause several zones to stop working. Use a multimeter to test the continuity of the common wire.
If all else fails, consider the possibility of a malfunctioning controller. It might need a professional inspection. Replacing an old or damaged controller can solve multiple zone issues.
Maintaining Your Hunter Pro C
Fixing issues with your Hunter Pro C irrigation system ensures a healthy lawn. Check connections, inspect for leaks, and reset the controller. Proper troubleshooting keeps your system running smoothly.
Maintaining your Hunter Pro C irrigation system is essential for ensuring your lawn and garden stay healthy and green. Regular maintenance can prevent unexpected issues and save you time and money in the long run. Let’s dive into some practical tips for keeping your system in top shape.
Regular Inspections
Regular inspections are crucial for identifying potential issues before they become major problems. Make it a habit to check your system at least once a month.
Look for visible signs of wear and tear, such as cracked pipes or broken sprinkler heads. These small issues can quickly escalate if not addressed promptly.
Check for leaks or blockages. A simple way to do this is by turning on the system and observing each zone. If you notice any areas with weak water pressure or puddling, there might be a problem that needs fixing.
Seasonal Adjustments
Seasonal adjustments are vital for ensuring your system operates efficiently throughout the year. As the weather changes, so should your irrigation schedule.
During summer, your lawn may need more frequent watering. In contrast, during cooler months, you might need to reduce the watering schedule to prevent overwatering.
Adjusting the timer settings accordingly can help you save water and keep your plants healthy. Remember to also check the rain sensor. It should be functioning properly to avoid unnecessary watering during rainy periods.
Maintaining your Hunter Pro C doesn’t have to be complicated. Regular inspections and seasonal adjustments go a long way in keeping your system running smoothly. Have you noticed any issues with your irrigation system recently? What steps have you taken to maintain it? Share your experiences and tips in the comments below!
Frequently Asked Questions
What Does The Flashing Sprinkler Head Mean On Hunter Pro-c?
A flashing sprinkler head on Hunter Pro-C indicates a wiring issue or a problem with the solenoid. Check connections and replace faulty parts.
Why Is My Hunter Watering System Not Working?
Your Hunter watering system may not be working due to power issues, clogged nozzles, or faulty valves. Check for proper settings, clean nozzles, and inspect valves for damage. Ensure connections are secure and the controller is programmed correctly.
How Do I Reset My Hunter Pro-c Controller?
To reset your Hunter Pro-C controller, press and hold the “PRG” button. While holding, press the “Reset” button. Release both buttons simultaneously. Your controller should reset.
Why Is My Hunter Pro Spray Not Rotating?
The Hunter Pro spray may not rotate due to debris blockage, low water pressure, or a damaged gear. Check for obstructions and clean the nozzle. Ensure adequate water pressure. Replace any broken parts.
How Do I Reset Hunter Pro C Controller?
To reset Hunter Pro C, press and hold the reset button for 5 seconds.
Conclusion
Troubleshooting the Hunter Pro C system can be straightforward. Follow the steps carefully. Regular checks help maintain system efficiency. Ensure power supply is stable. Inspect wiring for damage. Replace faulty components promptly. Keep user manuals handy for reference. Proper maintenance extends device life.
Seek professional help if issues persist. Enjoy a smoothly functioning irrigation system. Your garden will thank you. Stay proactive with upkeep. Happy gardening!