
To troubleshoot a Keurig Mini, check if the water reservoir is properly filled and the machine is correctly plugged in. Ensure there are no blockages in the needle or water line.
The Keurig Mini is a convenient and popular single-serve coffee maker. Despite its ease of use, it can occasionally encounter issues. Users often face problems such as the machine not turning on, slow brewing, or coffee not dispensing. Simple troubleshooting steps can resolve most of these issues.
Common fixes include ensuring the water reservoir is filled, checking for blockages in the needle, and ensuring the machine is plugged in properly. Regular maintenance and cleaning can also help keep the Keurig Mini running smoothly, ensuring a perfect cup of coffee every time.
Introduction To Keurig Mini Issues
The Keurig Mini is a convenient coffee maker. It brews a cup quickly. But sometimes, it has issues. This blog will help fix common problems. Learn how to troubleshoot your Keurig Mini easily.
Common Inconveniences
The Keurig Mini can have several problems. These are the most common:
- Not Brewing: The machine doesn’t brew coffee.
- Slow Brewing: Coffee drips too slowly.
- Water Leakage: Water leaks from the machine.
- Strange Noises: The machine makes odd sounds.
Benefits Of Diy Fixes
Fixing your Keurig Mini yourself has many benefits. Here are some:
- Save Money: No need to pay for repairs.
- Save Time: No waiting for service appointments.
- Learn New Skills: Improve your troubleshooting skills.
- Immediate Results: Get your coffee machine working fast.
Below is a table summarizing common issues and quick DIY fixes:
| Issue | Quick Fix |
|---|---|
| Not Brewing | Check water reservoir, clean needles |
| Slow Brewing | Descale the machine |
| Water Leakage | Check for cracks, tighten parts |
| Strange Noises | Clean internal parts, descale |
Power Problems: When Your Keurig Won’t Start
Is your Keurig Mini not turning on? Power issues can be frustrating. Let’s troubleshoot and get your coffee maker working again. Follow these steps to resolve the problem.
Checking The Power Source
First, ensure your Keurig is properly plugged in. Check the outlet by plugging in another device. This will confirm if the outlet is working. If the outlet is fine, examine the power cord for any visible damage. A damaged cord can prevent the machine from starting.
Next, verify the power button. Press it firmly and hold for a few seconds. Sometimes, a quick press might not register. Ensure there’s no debris around the power button, which can obstruct proper function.
| Step | Action |
|---|---|
| 1 | Check the outlet with another device. |
| 2 | Inspect the power cord for damage. |
| 3 | Press and hold the power button. |
| 4 | Ensure no debris around the power button. |
Resetting The Machine
If checking the power source doesn’t help, try resetting the Keurig Mini. Unplug the machine from the outlet. Wait for at least five minutes. This allows the machine’s internal components to reset.
- Unplug the Keurig Mini.
- Wait for five minutes.
- Plug the machine back in.
- Press the power button.
After five minutes, plug the machine back in. Press the power button again. If the machine still won’t start, consider trying a different outlet. Sometimes, the issue might be with the power supply in a specific area.
Note: Ensure your Keurig Mini is in a well-ventilated area. Overheating can also cause power issues. Keeping it cool helps maintain its functionality.
Water Woes: Resolving Non-dispensing Issues
Your Keurig Mini may stop dispensing water for various reasons. These issues can often be resolved with simple steps. Let’s dive into some common solutions.
Filling The Reservoir Correctly
Ensure you are filling the reservoir to the appropriate level. Overfilling or underfilling can cause problems.
- Always use fresh, cold water.
- Fill to the marked line; don’t exceed it.
- Check for any debris in the reservoir.
Here’s a quick guide:
| Step | Action |
|---|---|
| 1 | Remove the reservoir. |
| 2 | Fill with cold water. |
| 3 | Place it back correctly. |
Unclogging The Water Lines
Clogged water lines can stop your Keurig Mini from dispensing water. Follow these steps to unclog:
- Turn off and unplug the machine.
- Remove the water reservoir.
- Use a straightened paper clip to clear the needle.
- Run a water-only cycle to check.
Repeat these steps if necessary. Regular maintenance can prevent clogging.
Remember, cleaning the water lines ensures better performance.
Temperature Troubles: Fixing Heating Glitches
Is your Keurig Mini not heating properly? This can be frustrating, especially when you need your morning coffee. Let’s explore some common heating issues and how to fix them.
Ensuring Proper Warm-up Time
Your Keurig Mini needs enough warm-up time. If your coffee maker is not heating, it might be due to a short warm-up period. Follow these steps to ensure a proper warm-up:
- Plug in your Keurig Mini.
- Press the power button.
- Wait for the heating light to turn off.
- This process should take about 2-3 minutes.
If the light stays on longer, check for blockages or mineral buildup. Clean the machine if necessary.
Dealing With Inconsistent Temperatures
Inconsistent temperatures can ruin your coffee experience. Here’s how to handle it:
| Possible Cause | Solution |
|---|---|
| Mineral Buildup | Descale your Keurig Mini. |
| Water Reservoir Issues | Ensure it’s properly seated. |
| Heating Element Problems | Contact customer service. |
Regular cleaning prevents many issues. Always use filtered water to reduce mineral deposits.
Descale Your Brewer: Clearing Mineral Buildup
Mineral buildup can affect your Keurig Mini’s performance. Descaling helps maintain your brewer and keeps your coffee tasting fresh. Learn how to descale your Keurig Mini effectively in this section.
Recognizing The Need To Descale
Mineral deposits, also known as scale, can clog your machine. This affects water flow and heating efficiency. Signs you need to descale include:
- Slow brewing
- Weird tastes in your coffee
- Brewer makes loud noises
- Brewer stops working
If you notice any of these signs, it’s time to descale.
Step-by-step Descaling Process
Follow these steps to descale your Keurig Mini:
- Turn off and unplug the brewer.
- Empty the water reservoir.
- Mix a descaling solution with water.
- Pour the solution into the reservoir.
- Run a brew cycle without a K-Cup.
- Let the brewer sit for 30 minutes.
- Rinse the reservoir thoroughly.
- Fill the reservoir with fresh water.
- Run multiple brew cycles to flush the system.
Note: Always follow the manufacturer’s guidelines for descaling.
| Step | Description |
|---|---|
| 1 | Turn off and unplug the brewer. |
| 2 | Empty the water reservoir. |
| 3 | Mix descaling solution with water. |
| 4 | Pour solution into the reservoir. |
| 5 | Run a brew cycle without a K-Cup. |
| 6 | Let brewer sit for 30 minutes. |
| 7 | Rinse the reservoir thoroughly. |
| 8 | Fill reservoir with fresh water. |
| 9 | Run multiple brew cycles to flush the system. |
Descaling ensures your Keurig Mini works efficiently. Regular descaling keeps your coffee tasting great.
Pod Problems: When Coffee Won’t Brew
Nothing ruins a morning like a Keurig Mini not brewing coffee. Often, the problem lies with the K-Cup pod. Identifying and fixing pod problems can save your day. Let’s explore some common issues and their solutions.
Inserting K-cups Properly
First, ensure you are inserting the K-Cup correctly. Place the K-Cup in the pod holder. Push down firmly until you hear a click. This ensures the needle punctures the pod. If the pod is not seated correctly, the machine won’t brew.
- Check for any obstructions in the pod holder.
- Ensure the K-Cup is not damaged or misshapen.
- Use only official K-Cups for best results.
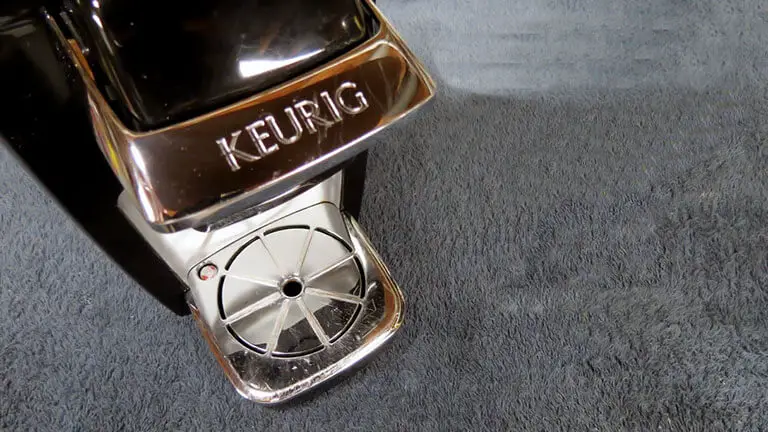
Troubleshooting The Needle
The needle can get clogged with coffee grounds. This can prevent proper brewing. To clean the needle, follow these steps:
- Turn off and unplug the machine.
- Lift the handle and remove the K-Cup holder.
- Use a paperclip to clear any debris from the needle.
- Rinse the K-Cup holder under warm water.
- Reassemble the machine and try brewing again.
If the needle is still clogged, repeat the cleaning process. Regular maintenance can prevent future issues.
By ensuring proper insertion and keeping the needle clean, your Keurig Mini will brew smoothly.
Cleaning And Maintenance: Keeping Your Brewer In Top Shape
The Keurig Mini is a fantastic coffee machine. To keep it running smoothly, regular cleaning and maintenance are essential. This guide will help you maintain your Keurig Mini. Follow these steps to ensure your machine stays in top shape.
Regular Cleaning Schedule
A regular cleaning schedule ensures your Keurig Mini works efficiently. Clean your brewer at least once a month. This helps remove coffee residue and mineral buildup.
- Daily: Clean the drip tray and water reservoir.
- Weekly: Wipe down the exterior with a damp cloth.
- Monthly: Descale the machine to remove mineral deposits.
To descale, fill the water reservoir with a mixture of vinegar and water. Run a brew cycle without a K-Cup. Repeat with fresh water to rinse.
Replacing Keurig Mini Parts
Over time, parts of your Keurig Mini may wear out. Replacing these parts can extend the life of your machine. Here are some parts you might need to replace.
| Part | When to Replace |
|---|---|
| Water Filter | Every 2 months |
| K-Cup Holder | When it shows signs of wear |
| Drip Tray | If cracked or damaged |
To replace the water filter, remove the old one from the reservoir. Soak the new filter in water for five minutes. Insert it into the filter holder and place it back in the reservoir.
For the K-Cup holder and drip tray, refer to your Keurig Mini manual. It provides detailed instructions on removing and replacing these parts.
Keeping your Keurig Mini clean and well-maintained ensures you get the best coffee every day. Follow this guide to keep your brewer in top shape.
Advanced Fixes: When To Contact Support
Sometimes, basic troubleshooting steps don’t resolve the issues with your Keurig Mini. You might need to consider advanced fixes. This section guides you on assessing the problem and when to contact support for professional help.
Assessing The Issue
Start by identifying the problem. Check if the machine powers on. Look for any error messages or lights. Listen for unusual sounds during operation. Use this checklist to pinpoint the issue:
- Power Issues: Ensure the machine is plugged in.
- Water Flow Problems: Check the water reservoir.
- Unusual Noises: Listen for grinding or buzzing sounds.
- Brewing Inconsistencies: Note if the coffee is weak or too strong.
If these checks don’t solve the problem, you may need to seek advanced fixes.
Warranty And Repair Information
Check if your Keurig Mini is still under warranty. You can find the warranty information in the user manual or on the Keurig website. Here are the steps to follow:
- Locate Your Warranty: Check the purchase date and terms.
- Contact Support: Use the support contact details provided in the manual.
- Prepare for Repair: Have your receipt and product serial number ready.
Contacting support ensures you get professional help and might save you from further issues.
| Issue | Possible Cause | Action |
|---|---|---|
| No Power | Loose Plug | Check the outlet and plug |
| Water Not Heating | Faulty Heater | Contact Support |
| Weak Coffee | Clogged Needle | Clean the needle |
Prevention Tips: Avoiding Future Troubles
Keeping your Keurig Mini in top shape requires regular care and attention. Implementing some basic prevention tips can help avoid future troubles. By following these guidelines, you can enjoy a smooth coffee experience every day.
Best Practices For Daily Use
Daily maintenance is crucial for the longevity of your Keurig Mini. Here are some best practices for daily use:
- Clean the Drip Tray: Empty and rinse the drip tray after each use to prevent overflow.
- Wipe the Exterior: Use a damp cloth to clean the machine’s exterior daily.
- Remove Used Pods: Always remove the used coffee pod after brewing to prevent clogging.
- Run a Water-Only Cycle: Run a water-only cycle daily to flush out coffee residue.
Importance Of Water Quality
Using the right water is essential for your Keurig Mini’s performance. Poor water quality can lead to issues like clogging and scaling. Here are some tips to ensure good water quality:
- Use Filtered Water: Use filtered water to reduce mineral buildup.
- Avoid Distilled Water: Distilled water can damage the machine over time.
- Change Water Regularly: Replace the water in the reservoir daily to keep it fresh.
- Descale the Machine: Descale your Keurig Mini every 3-6 months to remove mineral deposits.
By following these simple yet effective tips, you can prevent many common issues and keep your Keurig Mini running smoothly.
Conclusion: Enjoying A Seamless Brewing Experience
After troubleshooting your Keurig Mini, you should enjoy a seamless brewing experience. Knowing how to fix small issues ensures a smooth coffee routine every morning. Let’s summarize the main points and encourage mastering these troubleshooting skills.
Recap Of Quick Fixes
Here is a quick recap of the troubleshooting steps:
- Check the power source: Ensure your Keurig Mini is plugged in properly.
- Clean the machine: Regular descaling and cleaning prevent blockages.
- Inspect the water reservoir: Fill it to the appropriate level.
- Check the needle: Make sure it’s free from coffee grounds.
- Reset the machine: Unplug and plug back in after a few minutes.
Encouragement To Master Troubleshooting
Mastering these troubleshooting steps is easy and rewarding. You can enjoy your coffee without interruptions.
Here are some benefits of mastering troubleshooting:
- Save time: Quickly fix any issues that arise.
- Save money: Avoid unnecessary repairs or replacements.
- Peace of mind: Enjoy your coffee knowing your machine works well.
Take pride in knowing how to keep your Keurig Mini in top shape. Your daily coffee routine will be smoother and more enjoyable.
Frequently Asked Questions
Why Is My Keurig Mini Not Brewing?
Your Keurig Mini might have a clogged needle. Clean it to resolve the brewing issue.
How To Fix Keurig Mini Power Issues?
Check the power cord and outlet. Ensure they are connected properly and try resetting the machine.
Why Does My Keurig Mini Make Noise?
Noises can occur due to air bubbles or mineral buildup. Descale the machine to reduce noise.
How To Clean Keurig Mini Water Reservoir?
Remove the reservoir and wash it with warm, soapy water. Rinse thoroughly before reattaching.
Why Is Keurig Mini Coffee Tasting Bad?
Old coffee grounds or mineral deposits can affect taste. Clean the machine and use fresh water.
Conclusion
Troubleshooting your Keurig Mini can save time and frustration. Follow these tips to keep your machine running smoothly. Regular maintenance ensures a longer lifespan. Don’t overlook simple fixes that can make a big difference. Keep enjoying your favorite brews without interruption.
Happy brewing!