
To troubleshoot a Kitchenaid ice maker, ensure the unit is plugged in and the water supply is connected. Check for ice blockages or a full ice bin.
Kitchenaid ice makers are convenient but can face occasional issues. Common problems include power supply interruptions, water line blockages, or a full ice bin. Always verify the unit is properly connected to power and water. Regular maintenance helps prevent many issues.
Cleaning the ice maker and checking connections can improve performance. If problems persist, consult the user manual or contact customer support. Troubleshooting steps often resolve minor issues quickly. By following these tips, you can keep your ice maker running smoothly. A well-maintained ice maker ensures a steady supply of ice for your needs.
Introduction To Kitchenaid Ice Maker Issues
The Kitchenaid ice maker is a valuable appliance in many homes. It provides a steady supply of ice for drinks and parties. But sometimes, it can face issues. Knowing the signs and solving them quickly is important.
Common Signs Of Malfunction
Ice makers can show many signs of problems. Here are some common ones:
- No ice production: The ice maker stops making ice.
- Slow ice production: Ice is made, but very slowly.
- Small or misshaped ice cubes: The ice cubes are not normal size or shape.
- Strange noises: Unusual sounds come from the ice maker.
- Water leaks: Water is leaking from the ice maker.
Importance Of Timely Troubleshooting
Fixing ice maker issues quickly is very important. Here are some reasons why:
- Prevent further damage: Early fixes stop bigger problems.
- Save money: Small repairs cost less than big ones.
- Maintain ice supply: Quick fixes keep the ice supply steady.
- Ensure safety: Fixing leaks and noises keeps the kitchen safe.
Regular checks and quick fixes help your Kitchenaid ice maker last longer. Stay alert to the common signs and act fast to enjoy continuous ice production.
Initial Assessment Steps
When your KitchenAid ice maker isn’t working, start with an initial assessment. This helps identify obvious issues before any complex troubleshooting.
Safety First: Unplugging The Appliance
Safety is the top priority when troubleshooting. Always unplug the ice maker before inspecting or repairing it. This prevents any electrical accidents.
Visual Inspection For Obvious Problems
Begin with a visual inspection. Look for any loose or disconnected wires. Check for any visible damage to the appliance.
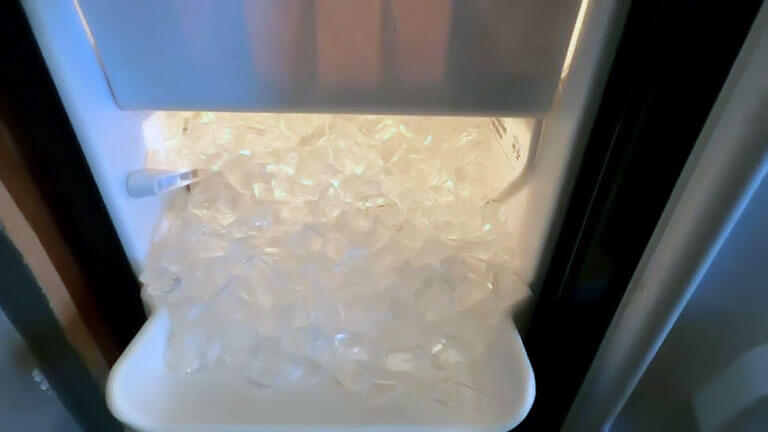
- Check the ice bin. Ensure it’s not overfilled or jammed.
- Inspect the water line. Ensure it’s properly connected and not leaking.
- Look at the ice maker’s inlet valve. Ensure it isn’t clogged or damaged.
If you notice any of these issues, address them first. Many times, these simple fixes can get your ice maker running again.
Power And Electrical Concerns
KitchenAid ice makers are reliable appliances. But power and electrical issues can disrupt their performance. This section will guide you through common electrical problems. Follow these steps to get your ice maker working again.
Checking The Power Source
First, check if the ice maker is plugged in properly. Ensure the outlet is working. You can test the outlet with another device. If the device works, the outlet is fine. If it doesn’t, you may need to reset the circuit breaker.
Look for any signs of damage on the power cord. Replace it if it looks frayed or broken. Sometimes, the problem lies in a loose connection. Make sure the plug fits snugly into the outlet.
Resetting The Ice Maker
Sometimes a reset can fix the problem. Unplug the ice maker from the power source. Wait for about 10 minutes before plugging it back in. This can clear minor electronic glitches.
Some models have a reset button. Consult your user manual for its location. Press and hold the button for a few seconds. Release it and wait for the ice maker to restart.
| Step | Action |
|---|---|
| 1 | Check if the ice maker is plugged in. |
| 2 | Test the outlet with another device. |
| 3 | Inspect the power cord for damage. |
| 4 | Reset the ice maker by unplugging it. |
| 5 | Press the reset button, if available. |
Water Supply Challenges
The KitchenAid ice maker relies on a steady water supply. Any disruption can halt ice production. Knowing how to troubleshoot these challenges can save you time and frustration.
Inspecting Water Lines For Kinks
First, check the water lines behind your ice maker. Ensure they are not pinched or bent. A kinked line can stop water flow completely.
Steps to inspect water lines:
- Turn off the water supply to your ice maker.
- Carefully pull the ice maker away from the wall.
- Examine the water lines for any bends or kinks.
- Straighten any bent sections gently.
If the water line is damaged, replace it immediately. A damaged line can cause leaks.
Testing Water Pressure
Low water pressure can affect ice production. Ensure your water pressure is adequate for proper ice making.
How to test water pressure:
- Turn off the ice maker’s water supply.
- Disconnect the water line from the ice maker.
- Place a container under the water line.
- Turn on the water supply briefly.
- Observe the water flow into the container.
If the flow is weak, your water pressure might be low. You may need a plumber to fix this issue.
Water pressure requirements:
| Pressure Type | Range |
|---|---|
| Minimum Pressure | 20 psi |
| Optimal Pressure | 40-60 psi |
Ensuring proper water pressure is crucial for consistent ice production.
Filter And Inlet Valve Examination
Regular maintenance of your KitchenAid ice maker is essential. Two key components to check are the water filter and the inlet valve. These parts can affect the performance of your ice maker significantly.
When To Replace The Water Filter
Water filters need regular replacement. Over time, they get clogged with debris and contaminants.
- Replace the filter every six months.
- Check for any signs of dirt or discoloration.
- Look for slower ice production as a signal.
Follow these steps for an easy filter replacement:
- Turn off the ice maker.
- Locate the water filter.
- Remove the old filter by twisting it counterclockwise.
- Insert the new filter by twisting it clockwise.
- Turn on the ice maker again.
Cleaning The Inlet Valve
The inlet valve controls water flow. It can get clogged or dirty, affecting ice production.
| Step | Action |
|---|---|
| 1 | Turn off the ice maker and unplug it. |
| 2 | Locate the inlet valve at the back of the machine. |
| 3 | Disconnect the water supply line. |
| 4 | Clean the valve using a small brush and vinegar. |
| 5 | Reconnect the water supply line. |
| 6 | Plug in the machine and turn it on. |
Maintaining your KitchenAid ice maker ensures it works efficiently. Regularly check and clean the water filter and inlet valve.
Temperature And Sensor Check
When your KitchenAid ice maker stops working, checking the temperature and sensors is crucial. Proper temperature settings and functional sensors ensure your ice maker operates efficiently.
Adjusting Freezer Temperature
First, ensure your freezer is set to the correct temperature. The ideal setting for an ice maker is between 0°F and 5°F (-18°C and -15°C).
- Locate the freezer thermostat.
- Adjust the dial to the recommended range.
- Wait 24 hours for the temperature to stabilize.
Check if the ice maker starts producing ice after this adjustment. Consistent temperature is key for ice production.
Sensor Functionality Test
The ice maker relies on sensors to monitor ice levels and operations. Testing these sensors helps identify potential issues.
- Open the freezer door.
- Locate the ice maker’s sensor arm.
- Gently move the sensor arm up and down.
If the arm moves freely, the sensor is likely functioning. If it sticks or doesn’t move, it may need replacement.
| Step | Description |
|---|---|
| 1 | Open the freezer door |
| 2 | Locate the sensor arm |
| 3 | Move the sensor arm |
Regular checks on the freezer temperature and sensor functionality help maintain your ice maker’s performance. Adjust settings and test sensors to ensure everything runs smoothly.
Ice Ejector And Mold Thermostat Issues
Experiencing issues with your KitchenAid ice maker can be frustrating. Problems often arise with the ice ejector and mold thermostat. These components are crucial for smooth ice production. Let’s dive into resolving these common issues.
Clearing Obstructions From The Ejector Arm
The ice ejector arm pushes ice out of the mold into the bin. If it gets stuck, your ice maker won’t work properly. Here’s how to clear obstructions:
- First, unplug the ice maker to ensure safety.
- Remove the ice bin to access the ejector arm.
- Inspect the arm for any visible obstructions.
- Use a soft cloth to gently remove any ice or debris.
- Plug the ice maker back in and test the arm’s movement.
If the arm moves freely, the problem is likely resolved. If not, further inspection may be needed.
Testing The Mold Thermostat
The mold thermostat monitors the ice mold’s temperature. If it malfunctions, ice production stops. Follow these steps to test the thermostat:
- Unplug the ice maker to avoid any electrical hazards.
- Locate the mold thermostat, usually near the ice mold.
- Use a multimeter to check the thermostat’s continuity.
- Set the multimeter to the ohms setting.
- Touch the probes to the thermostat terminals.
- If the reading shows continuity, the thermostat is fine.
- If there’s no continuity, the thermostat may need replacement.
Testing the mold thermostat ensures it is functioning properly. This step is vital for maintaining ice production.
These troubleshooting steps help address common KitchenAid ice maker issues. Regular maintenance keeps your ice maker running smoothly.
Maintenance And Cleaning Tips
Maintaining your KitchenAid Ice Maker is crucial for its optimal performance. Regular maintenance and proper cleaning ensure your ice maker functions efficiently. Let’s explore some essential maintenance and cleaning tips to keep your ice maker in top shape.
Regular Cleaning Schedule
It’s important to clean your ice maker regularly. Create a cleaning schedule and stick to it. Here’s a simple plan:
- Weekly: Wipe down the exterior with a soft cloth.
- Monthly: Clean the ice bin and remove any ice buildup.
- Quarterly: Perform a deep clean of all components.
Keeping a regular cleaning schedule prevents the build-up of mold and bacteria. This ensures your ice remains clean and safe to consume.
Using The Right Cleaning Solutions
Using the correct cleaning solutions is vital for your ice maker. Avoid harsh chemicals that can damage the unit. Here are some recommended solutions:
| Component | Cleaning Solution |
|---|---|
| Exterior | Mild soap and water |
| Ice Bin | 1:1 solution of water and vinegar |
| Water Lines | Commercial ice maker cleaner |
Always follow the manufacturer’s instructions when using cleaning solutions. This ensures you do not void the warranty or damage the machine. Regular cleaning with the right solutions will prolong the life of your ice maker.
Professional Help And Support
Having trouble with your Kitchenaid Ice Maker? Sometimes you need professional help. This section covers when to call a technician and your warranty and service options.
When To Call A Technician
Some issues need a technician. Here are signs you need professional help:
- Ice maker not producing ice even after troubleshooting steps.
- Unusual noises coming from the ice maker.
- Water leakage around the ice maker.
- Ice quality issues like cloudy or small ice cubes.
These problems often require specialized tools and expertise. A technician can fix them quickly.
Warranty And Service Options
Check your warranty before calling for help. Kitchenaid offers various warranty options:
| Warranty Type | Coverage |
|---|---|
| Standard Warranty | One year of full coverage. |
| Extended Warranty | Additional years of protection. |
To find your warranty details, check your user manual or Kitchenaid’s website. Always keep your purchase receipt and warranty card handy.
For service, contact Kitchenaid’s customer support. They can guide you through the process and connect you with certified technicians.
Prevention Strategies
Keeping your KitchenAid ice maker in top shape requires some proactive steps. By following these prevention strategies, you can extend the life of your appliance and ensure its efficiency.
Preventative Measures For Long-term Care
Regular maintenance is key to long-term care of your ice maker. Here are some important preventative measures:
- Clean the ice maker every three months to remove any buildup.
- Check the water filter and replace it every six months.
- Inspect the water supply line for leaks or blockages.
- Keep the ice bin free from old ice to avoid clumping.
- Ensure proper ventilation around the unit to prevent overheating.
Understanding Common User Errors
Many problems arise from common user errors. Understanding these can help you avoid them:
| User Error | Prevention Tip |
|---|---|
| Overfilling the ice bin | Empty the bin regularly to prevent jams. |
| Using dirty water | Always use filtered water to make ice. |
| Ignoring error codes | Address error codes promptly to avoid damage. |
| Improper installation | Follow the manual for correct setup. |
| Neglecting regular maintenance | Set reminders for cleaning and inspections. |
Frequently Asked Questions
Why Is My Kitchenaid Ice Maker Not Working?
Your Kitchenaid ice maker may not work due to clogged water lines or a faulty water inlet valve.
How Do I Reset My Kitchenaid Ice Maker?
To reset, unplug the ice maker for 5 minutes, then plug it back in.
Why Is My Kitchenaid Ice Maker Leaking?
A leaking ice maker can be caused by a misaligned water line or a broken water inlet valve.
How Do I Clean My Kitchenaid Ice Maker?
Clean your ice maker by removing ice, then wiping the interior with a solution of vinegar and water.
Why Is My Kitchenaid Ice Maker Making Noise?
Noises often result from ice buildup or a malfunctioning motor. Check and clear any ice obstructions.
Conclusion
Regular maintenance can prevent many issues with your Kitchenaid ice maker. Follow our tips to keep it running smoothly. Troubleshooting common problems can save time and money. If issues persist, consult a professional technician. Proper care ensures your appliance lasts longer and performs efficiently.
Enjoy hassle-free ice making with these simple solutions.