
Are you frustrated with your Liftmaster garage door opener flashing ten times? You’re not alone.
This common error can interrupt your day, leaving you stuck and searching for answers. But don’t worry, you’ve come to the right place. Understanding what those 10 flashes mean can save you time and hassle. In this guide, you’ll discover what triggers this error and, more importantly, how you can fix it.
Ready to take control and get your garage door back on track? Let’s dive in and solve this issue together, ensuring a smooth and stress-free experience.
Common Causes Of 10 Flashes
Liftmaster error codes with 10 flashes often indicate issues like a blocked sensor, misaligned photo eyes, or faulty wiring. These problems can disrupt the garage door’s normal operation, needing quick attention to ensure safety and functionality. Regular maintenance helps prevent such common issues.
When your Liftmaster garage door opener suddenly stops working and flashes an error code with 10 blinks, it can be both confusing and frustrating. Understanding the common causes of these 10 flashes can help you troubleshoot and get your garage door back in action. Let’s dive into what might be triggering this error code and how you can address it.1. Power Surge Or Outage
A power surge or outage can disrupt the normal functioning of your Liftmaster opener. After a surge, the system may reset itself, causing the 10 flashes. Try unplugging the opener for a minute and then plugging it back in to reset the system.2. Sensor Alignment Issues
Your garage door has safety sensors that need to be properly aligned. If these sensors are misaligned or blocked, your opener might flash 10 times. Check that nothing is obstructing the sensors and that they are facing each other directly.3. Obstruction In The Door Path
An object in the path of your garage door can cause the opener to flash the error code. Inspect the area around the door for anything that might be blocking its path. Even small objects can trigger the safety mechanism.4. Loose Or Damaged Wiring
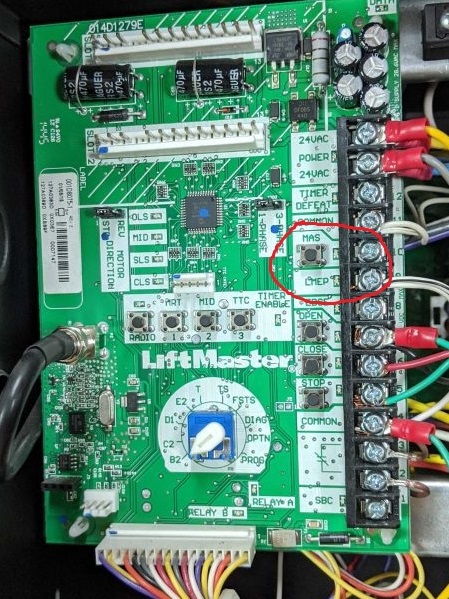
Wiring issues can also lead to error codes. Over time, wires can become loose or damaged, affecting the connection between the opener and the sensors. Carefully inspect the wires for any signs of wear or damage. Tighten any loose connections you find.5. Malfunctioning Control Board
Sometimes, the problem lies within the control board itself. If none of the above solutions work, the control board may need to be repaired or replaced. This might require professional assistance, but it’s worth considering if other troubleshooting steps fail. Have you experienced any of these issues with your Liftmaster opener? Addressing these common causes can often solve the problem and save you the hassle of calling in a technician. If you have more tips or experiences, feel free to share them in the comments. Your insights could help someone else facing the same issue.Identifying Error Code Patterns
Understanding Liftmaster error codes is essential for effective garage door maintenance. Error codes are like a secret language your garage door uses to communicate issues. Identifying patterns in these codes can save time and reduce stress. It helps in diagnosing issues quickly and efficiently.
Error codes often follow certain patterns. These patterns can indicate specific issues with your Liftmaster garage door opener. Recognizing these patterns is crucial for accurate troubleshooting. For instance, multiple flashes can signify different types of errors. Each flash has a meaning that points to a unique problem.
Understanding Flash Sequences
Flash sequences are a key part of error code patterns. The number of flashes can tell you about the nature of the problem. Ten flashes, for instance, might indicate a particular issue related to safety sensors. Knowing what each sequence means is vital for quick fixes. By understanding these sequences, you can address problems efficiently.
Common Error Code Patterns
Some error codes appear frequently due to common issues. Patterns like repetitive flashes can signal sensor alignment problems. Regular maintenance can prevent these errors from occurring. Keeping track of common patterns helps in predicting potential issues. It ensures your garage door operates smoothly.
Visual Inspection Techniques
Visual inspections are useful for identifying error code patterns. Look for visible signs of wear or damage on sensors. Check if the garage door is obstructed or misaligned. These inspections can reveal the root cause of error codes. Observing changes in the flash sequence is helpful.
Documenting Patterns For Future Reference
Documenting error code patterns is beneficial for future troubleshooting. Keep a record of flash sequences and their solutions. This documentation assists in quick identification of recurring issues. It helps in understanding the behavior of your garage door system over time. Having a reference guide simplifies maintenance tasks.
Safety Sensor Troubleshooting
Liftmaster error codes can indicate various issues. Ten flashes often signal a problem with safety sensors. Check sensor alignment and wiring for any faults. Ensure nothing obstructs the sensor path to fix the error effectively.
Safety sensors are crucial to the smooth operation of your Liftmaster garage door opener. These sensors ensure that the door doesn’t close on anything or anyone. But when you see 10 flashes on your Liftmaster, it’s a signal that something’s amiss with the safety sensors. Understanding these issues can help you fix the problem quickly and get your garage door working safely again. Let’s explore some common challenges and solutions.Sensor Alignment Issues
Proper alignment is essential for safety sensors to function correctly. Imagine a laser beam that needs to hit a target—if it’s off by even a little, it won’t work. Similarly, when the sensors aren’t aligned, they can’t communicate effectively. This can lead to your door refusing to close. To fix this, check the positioning of your sensors. They should face each other directly. Sometimes, a minor bump can knock them out of position, so a quick adjustment can solve the problem.Wiring And Connection Problems
Wiring issues are another frequent cause of sensor malfunctions. Have you ever pulled at a tangled cord only to find the connection weak or broken? The same can happen with your sensor wires. Check the wires for damage or loose connections. Ensure they are securely plugged into the garage door opener. If the wires look frayed or damaged, replacing them might be necessary. A good rule of thumb is to keep an eye out for any visible wear and tear.Dirt And Obstruction Challenges
Think of your sensors like a pair of eyes—they need a clear view to work properly. Dirt and debris can obscure their vision, causing your Liftmaster to flash error codes. Regular cleaning of the sensor lenses with a soft cloth can prevent this issue. It’s amazing how a simple wipe can make a big difference. Also, check for any objects obstructing the sensors. Sometimes, even a small item can block the signal and cause your garage door to misbehave. Have you ever faced these challenges with your Liftmaster? What solutions have worked for you? Share your thoughts and insights in the comments below!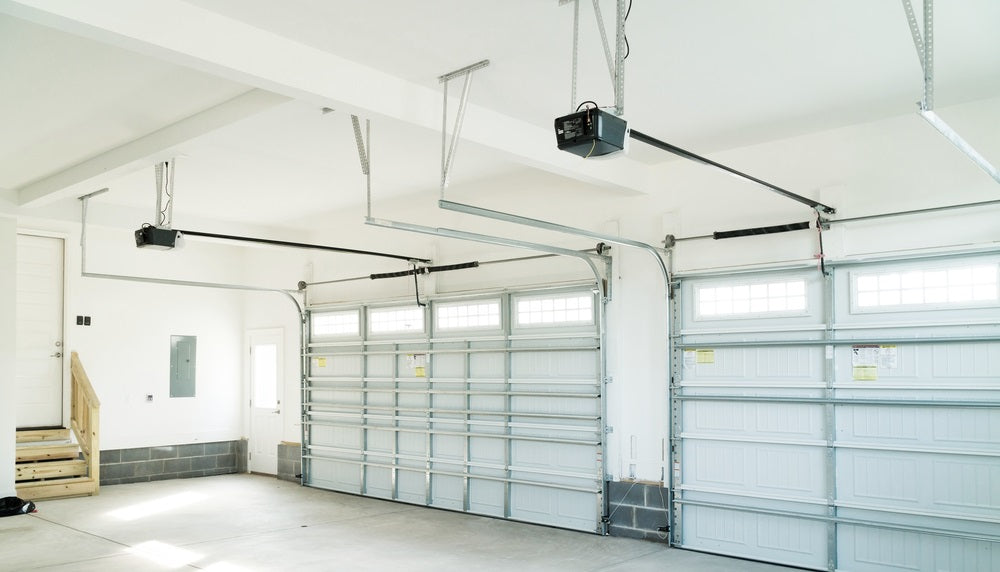
Credit: allsecurityequipment.com
Remote Control Malfunctions
Facing Liftmaster error codes with 10 flashes can signal remote control issues. This common malfunction often relates to miscommunication between the remote and the garage door opener. Regular checks on batteries and settings might help resolve these errors effectively.
Remote control malfunctions can be a significant hassle, especially when you’re in a rush to get into your garage. You press the button, but nothing happens. It’s frustrating, isn’t it? LiftMaster error codes, specifically the 10 flashes, often indicate issues with remote control. Let’s dive into two common culprits: battery concerns and signal interference.Battery Concerns
The first place to check is the battery. It’s surprising how often this simple fix is overlooked. Has it been a while since you changed the battery? Remote controls rely on a steady power source. A weak or dead battery can prevent your remote from functioning. Make it a habit to replace batteries periodically. Keep spares handy—this small preparation can save you a lot of hassle. If you’ve replaced the battery but the issue persists, ensure the batteries are inserted correctly. Sometimes, even a small misalignment can cause malfunctions. A quick check can make all the difference.Signal Interference
Signal interference is another common issue that might not be on your radar. Many devices in your home can disrupt the signal between your remote and the garage door opener. Consider if new electronics have been added to your home setup. Devices like Wi-Fi routers, cordless phones, and even microwaves can interfere with the remote’s signal. Could this be affecting your garage door? To troubleshoot, try using the remote closer to the garage door opener. If the problem resolves, interference might be the issue. Moving or turning off certain devices temporarily can help identify the culprit. It’s crucial to assess your environment and make adjustments. This could be as simple as repositioning your router or changing the frequency channel to reduce interference. Have you ever experienced these issues with your LiftMaster remote? Taking a few proactive steps can save you time and frustration. Keep your remote functioning smoothly, and enjoy the convenience it brings to your daily routine.Motor And Mechanical Checks
Liftmaster error codes, flashing 10 times, often signal motor or mechanical issues. Check for obstructions or damaged components in the system. Regular maintenance can prevent future errors and ensure smooth operation.
When your Liftmaster garage door opener starts showing 10 flashes, it’s an alert that something might be amiss with the motor or mechanical parts. Tackling these issues might seem daunting, but breaking it down into manageable checks can make the process straightforward. Have you ever spent a frustrating afternoon trying to figure out what’s wrong with your garage door opener? You’re not alone. Let’s explore some practical steps you can take to get your garage door back in working order.Gear And Track Inspection
Start by inspecting the gears and tracks. These components often bear the brunt of daily wear and tear. Look for any obvious signs of damage or misalignment. If you notice any worn-out gears, they might need replacement. Check the track for debris or obstructions. Sometimes, even a small object can prevent the door from moving smoothly. If the track is bent, it might require adjustment to ensure the door operates correctly.Lubrication Needs
A well-lubricated garage door mechanism is crucial for smooth operation. Lack of lubrication can cause the motor to overwork and trigger the 10-flash error. Regularly applying a suitable lubricant to the moving parts can prevent this. Focus on the rollers, hinges, and tracks. These are the primary areas where friction occurs. Use a silicone-based lubricant for the best results. Avoid using grease, as it can attract dust and debris. Is your garage door making unusual noises? This could be a sign that it needs lubrication. Addressing this promptly can save you time and money in the long run. Taking the time to perform these motor and mechanical checks can extend the life of your Liftmaster garage door opener. By being proactive, you not only solve the current issue but also prevent future problems. Have you checked your garage door opener recently? It might be time for a little TLC.Diy Fixes And Tips
Encountering Liftmaster Error Code 10 Flashes can be frustrating. But don’t worry. You can often fix it yourself. With a bit of guidance and some handy tools, you’ll be on your way. This section will guide you through simple adjustments and essential tools.
Simple Adjustments
Start with checking the sensor alignment. Misaligned sensors cause error flashes. Ensure they face each other directly. Clean the sensors gently. Dust can obstruct their signals. Check the wires for any loose connections. Reattach them securely if needed.
Check the garage door tracks. They should be clear of debris. Lubricate them with a silicone-based lubricant. It helps the door move smoothly. Inspect the remote control batteries. Weak batteries can cause errors. Replace them if necessary.
Tools To Keep Handy
Keep a basic tool kit ready. Include a screwdriver and pliers. A multimeter helps check electrical connections. Ensure you have a step ladder. It aids in reaching sensors and tracks. A soft cloth is useful for cleaning sensors.
Silicone-based lubricant is essential. It helps in maintaining moving parts. Keep spare batteries for your remote. Having these tools handy saves time. It prepares you for quick fixes.
When To Call A Professional
Encountering Liftmaster error codes can be frustrating. Especially when you see 10 flashes. Sometimes, resolving these errors requires professional help. Knowing when to call a technician saves time and stress. Below are scenarios where expert intervention is advisable.
Complex Issues
Some problems involve intricate electrical systems. Tinkering without expertise may worsen the situation. Professionals have the right tools and knowledge. They handle complex repairs efficiently. Attempting these on your own risks further damage. Save yourself the hassle and call an expert.
Warranty And Service Options
Checking your warranty is important. Repairs by unauthorized people might void your warranty. Professionals maintain compliance with warranty terms. They also offer service options that DIY repairs cannot. Ensure your Liftmaster’s longevity by choosing certified technicians. Protect your investment with professional service.

Credit: www.reddit.com
Credit: ddmgaragedoors.com
Frequently Asked Questions
What Does 10 Flashes Mean On Liftmaster?
10 flashes indicate a safety sensor issue. It usually signals misalignment or obstruction in the sensor path.
How Can I Fix Liftmaster 10 Flashes Error?
Check sensor alignment. Ensure nothing blocks them. Clean sensor lenses. Secure any loose wires or connections.
Why Is My Liftmaster Sensor Misaligned?
Misalignment can occur from accidental bumping or vibrations. It affects door operation. Regular checks help prevent issues.
Can Weather Affect Liftmaster Sensors?
Yes, extreme weather can impact sensor function. Cold or rain may cause misalignment or temporary malfunctions.
Do I Need To Replace Liftmaster Sensors?
Not always. Try cleaning and realigning first. If problems persist, consider sensor replacement for reliable operation.
Conclusion
Troubleshooting Liftmaster error codes can be straightforward. Understanding the 10 flashes helps. It guides you through the repair process. You save time and avoid frustration. Proper maintenance enhances performance. It prevents future issues. Regular checks are wise. They ensure smooth garage door operation.
Stay informed about common error signals. This knowledge aids in quick fixes. You protect your investment and ensure safety. A working Liftmaster offers peace of mind. Keep your garage door functioning well. Reliable operation is essential. Always refer to your user manual.
It provides valuable insights. Address issues promptly for best results.