
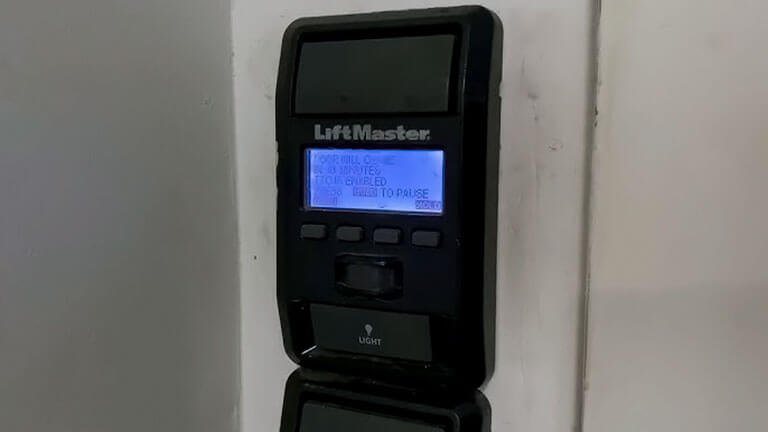
Imagine you’re in a hurry, ready to leave your home, and your Liftmaster garage door opener is acting up. Instead of smoothly opening your garage door, it starts flashing error codes.
The frustration sets in, especially when you see the dreaded seven flashes. What does it mean? How can you fix it quickly and get on with your day? You’re not alone in this. Many homeowners face similar issues, and understanding what these error codes signify can save you time, stress, and perhaps even a costly repair bill.
We’re diving deep into the Liftmaster error codes, focusing specifically on the seven flashes. You’ll learn what causes this error, how you can troubleshoot it, and whether it’s something you can tackle on your own or if you need to call in the pros. By the end, you’ll have the confidence to handle this hiccup efficiently, ensuring your garage door opener is back to its reliable self. Keep reading to unravel the mystery behind those flashing lights and regain control over your garage door opener.
Common Causes Of 7 Flashes
Understanding the common causes behind Liftmaster error codes, particularly the 7 flashes, can save you time and frustration. Whether your garage door is stuck half-open or won’t budge, knowing the root of the problem is crucial. The 7 flashes usually indicate issues with the safety sensors or wiring—let’s dive into these common culprits.
Misaligned Sensors
Misalignment in your sensors is a frequent cause of the dreaded 7 flashes. Imagine aiming a flashlight at your friend across the room, but slightly off-target. They won’t catch the light, right? Similarly, your garage door sensors need perfect alignment to function. Check if the sensor lights are steady; flickering lights mean they are misaligned. Adjust them until the lights are solid.
Obstructed Sensor Path
Sometimes, the path between your sensors gets blocked without you even noticing. Think of a stray leaf, a forgotten toy, or even dust accumulation. These simple obstructions can trigger the error. Inspect the area between the sensors. Remove any debris or objects that might be in the way. A clear path ensures the sensors communicate effectively.
Faulty Wiring
Faulty wiring is another potential cause of the 7 flashes error. Have you ever had headphones that cut out because of a frayed wire? Your garage door system is no different. Check for loose or damaged wires connecting the sensors. Tighten any loose connections and replace damaged wires. Secure wiring ensures a reliable signal between components.
Could a simple adjustment or cleanup be the fix your garage door needs? Address these common causes, and you might find yourself with a smoothly functioning garage door once again. Remember, a bit of regular maintenance goes a long way in avoiding these issues altogether. Do you have any tips or tricks for keeping your garage door running smoothly? Share them below!
Identifying Sensor Issues
Experiencing Liftmaster error codes with 7 flashes indicates potential sensor issues. Check alignment and clean the sensors for proper function. This simple step often resolves the problem, ensuring smooth garage door operation.
Identifying sensor issues with your LiftMaster garage door opener can be frustrating yet crucial for ensuring smooth operation. Error codes, like the 7 flashes, often indicate a problem with the sensors that help the door open and close safely. Understanding how to identify and resolve these sensor issues is a valuable skill that can save you time and hassle. Have you ever wondered why your garage door suddenly stops working? It’s often related to sensor problems, which can be tricky but are typically easy to solve with the right guidance.
Checking Sensor Alignment
Ensure that your sensors are properly aligned. Misalignment can cause the sensors to send incorrect signals, leading to malfunctions. Start by examining the position of the sensors on either side of the door. They should be facing each other directly. Use a level to check if they are at the same height. If they aren’t, adjust them until they are aligned. A simple adjustment can sometimes resolve the error code issue.
Testing Sensor Functionality
Once alignment is confirmed, test the functionality of the sensors. Do they respond when the door is in motion? Stand clear of the door path and observe the sensors during operation. You can also use an object to break the sensor beam to see if the door stops closing. This test helps determine if the sensors are working correctly. If the sensors fail to respond or stop the door, consider cleaning them. Dust and grime can interfere with their operation, leading to the 7 flashes error code. Have you experienced a similar issue with your garage door sensors? Share your thoughts or solutions in the comments below!
Troubleshooting Wiring Problems
Dealing with Liftmaster error codes can be frustrating, especially when you’re faced with 7 flashes indicating wiring problems. But don’t worry; troubleshooting these issues is often easier than it seems. Wiring problems are common and can cause your garage door opener to malfunction. By understanding how to inspect and repair wiring connections, you can often resolve these issues yourself, saving time and avoiding unnecessary service calls.
Inspecting Wiring Connections
Begin by turning off the power to your garage door opener to ensure safety. Carefully examine the wiring connections on the device. Are they secure? Loose wires can lead to intermittent operation. You might be surprised by how often a simple reconnection solves the problem.
Check the terminals for signs of corrosion or dust. Clean them gently with a dry cloth. Corroded connections can impede electrical flow, causing error codes. Remember, your garage door opener relies on clean, tight connections to function correctly.
Ever had your heart sink as you watched the garage door struggle to open, only to find it was a loose wire causing havoc? It’s a common scenario, easily rectified with a bit of attention and care.
Repairing Damaged Wires
During inspection, look for any damaged wires. Cracked or frayed wires can disrupt the electrical signal, leading to errors. If you find any, it’s time to repair them. Cut out the damaged section and strip the wire ends to expose fresh copper.
Use wire connectors to join the repaired sections securely. Ensure the connection is snug and insulated. This not only restores functionality but also prevents future issues. Have you ever thought about how a small tear in a wire could halt your daily routine?
Consider using electrical tape to reinforce areas prone to wear. This proactive step can prevent damage before it occurs. As you finish, double-check each connection to ensure everything is tight and secure. Wiring problems can be daunting, but with a bit of patience and attention, you can often resolve them with minimal hassle.
Do you feel more confident about handling Liftmaster error codes now? Remember, solving wiring issues yourself can be empowering and cost-effective.
Clearing Obstructions
Liftmaster garage door openers often show error codes to indicate issues. Seven flashes suggest obstruction problems. Remove objects blocking the door for smooth operation.
When dealing with Liftmaster Error Codes, 7 flashes often indicate an obstruction issue. Clearing obstructions is crucial to ensure your garage door operates smoothly. Let’s dive into practical steps you can take to resolve this issue efficiently.
Removing Physical Barriers
First, check for any physical barriers blocking the garage door. Items like brooms, bicycles, or even small toys can obstruct the path. Carefully inspect the area around the door and remove any objects that may be in the way. Next, examine the door tracks for any debris or dirt that could hinder movement. A simple sweep with a broom can make a big difference. Regularly maintaining a clean track ensures your door operates without hiccups. Is there a time when you found an unexpected object jamming your door? Share your stories; they might help others avoid similar pitfalls.
Cleaning Sensor Lenses
Sensors are vital for the safe operation of your garage door. Dirty lenses can cause malfunctioning, which might trigger error codes. Use a soft, damp cloth to gently clean the lenses of the sensors. Ensure that the sensors are aligned correctly. Misalignment can lead to operational errors. Adjust them as needed, ensuring they face each other directly without any obstructions. Have you ever considered how often you should clean your sensors? Regular cleaning every few months can prevent many issues. Clearing obstructions is not just about fixing a current problem—it’s about preventing future ones. By keeping your garage door area tidy and sensors clean, you ensure a hassle-free experience. Have you checked your garage door today?
Resetting The System
Experiencing Liftmaster error codes can be frustrating. The 7 flashes error indicates a common issue. Resetting the system often resolves the problem. Follow these steps to reset your Liftmaster opener.
Power Cycling The Opener
Power cycling is the first step. It helps clear temporary glitches. Unplug the opener from the power source. Wait for about one minute. Plug the opener back in. This simple step can often resolve minor issues.
Performing A System Reset
If power cycling doesn’t help, try a system reset. Locate the “Learn” button on your opener. Press and hold the button for about six seconds. Release it once the light turns off. This action resets the opener’s settings. Test your opener to see if the error persists.
Preventative Maintenance Tips
Regular maintenance can prevent Liftmaster error codes like 7 flashes. It’s crucial for smooth operation. Without it, you might face frequent interruptions. Simple checks can enhance performance and extend lifespan.
Regular Sensor Checks
Sensors play a key role in garage door safety. Ensure they are clean and aligned. Dirt or misalignment can cause malfunctions. Check for any obstructions blocking the sensors. Regular cleaning helps maintain their effectiveness.
Routine Wiring Inspections
Wiring issues might lead to error codes. Inspect wires for any visible damage. Look for signs of wear or fraying. Secure any loose connections. Regular inspections can prevent unexpected issues.
When To Call A Professional
Liftmaster error codes can be tricky. Especially the 7 flashes error. Sometimes, fixing it yourself is not the best idea. There are moments when professional help is necessary. Knowing when to call a professional is key. It can save time and prevent bigger issues.
Persistent Error Issues
If the error keeps showing up, you might need expert help. Persistent issues often mean deeper problems. Professionals have the tools to diagnose such problems. They can find the root cause quickly. This ensures your Liftmaster runs smoothly again.
Complex Wiring Problems
Wiring problems can be dangerous. They often need specialized skills to fix. If wiring seems complex, it’s best to call a professional. They know how to handle electrical components safely. Incorrect wiring can cause further damage or even hazards.
Frequently Asked Questions
What Does Liftmaster Error Code 7 Flashes Mean?
Error code 7 flashes signals a problem with the motor. It often means overheating.
How Do I Fix Liftmaster Error Code 7?
Let the motor cool down. Check for obstructions. Ensure proper wiring.
Why Is My Liftmaster Motor Overheating?
Overuse or blocked tracks can cause overheating. Ensure the tracks are clear.
Can A Professional Help With Error Code 7?
Yes, a professional can diagnose and fix the issue. They have the right tools.
How To Prevent Liftmaster Error Code 7?
Regular maintenance helps. Keep tracks clean. Avoid excessive use.
Conclusion
Understanding Liftmaster error codes is essential for smooth garage operations. Seven flashes indicate a specific issue. Address it promptly to avoid further complications. Regular maintenance can prevent most errors. Always consult your manual for guidance. Professional help is available if needed.
Keep your garage system in top shape. Save time and avoid frustration. Your Liftmaster deserves proper care. Error-free operation enhances convenience. Stay informed and proactive with your garage door system.