
To troubleshoot Nest Thermostat, start by manual restart or trying to fix any simple problem that might be affecting its functioning. It is crucial to troubleshoot the thermostat before contacting Nest support, as some of the problems can be solved easily by anyone.
From faulty wiring to a clogged air filter, common problems with Nest Thermostat can range, and it is essential to try and identify the specific problem before attempting to fix it. If your thermostat won’t turn on, the batteries might be drained, or there could be a power issue.
Additionally, there are several other problems you might encounter, such as the Nest mounting issues, hot air instead of cold air, and wire labels, among others. Luckily, most of these can be fixed by following easy steps, such as restarting your thermostat or checking the wiring.
Hot Air Instead Of Cold Air
Experiencing hot air instead of cold air from your Nest thermostat? This could be due to a variety of reasons such as blown fuses, wiring issues, or mounting problems. It’s important to follow troubleshooting steps or contact Nest support before seeking professional help.
If your Nest thermostat is blowing hot air instead of cold air, there are a few troubleshooting steps you can take to try and fix the issue. Check for wire connection issues by inspecting the wires that connect to your Nest thermostat. Make sure they are secure and properly connected. If this doesn’t resolve the issue, refer to the Interactive Wiring Guide provided by Nest to ensure the wiring is correct. If everything looks good, manually check the breaker and fuse. Ensure they are both in the “on” position and haven’t been tripped or blown. By taking these steps, you should be able to get your Nest thermostat working properly again.
Wire Labels
When installing a Nest Thermostat, it’s important to understand each wire and its purpose. The wire labels can be found on the installation manual and should always be referred to for details. Making sure that the wiring connections are correct is crucial for the thermostat to work properly and keep your home comfortable. In this section, we will provide more information about wire labels and share some tips to ensure that your Nest Thermostat is wired correctly.
Understand each wire and its purpose
Before you start installing your Nest Thermostat, you need to understand the function of each wire and where it should be connected to the thermostat. The most common wires that you will encounter are Rh, Rc, Y, W, and G. The Rh and Rc wires are used for heating and cooling systems, respectively, while the Y, W, and G wires are used to control the air conditioning, furnace, and fan.
Refer to manual for details
To make sure that your Nest Thermostat is wired correctly, always refer to the wiring diagram provided in the installation manual. The wiring diagram includes details on how to connect each wire to the thermostat, and it also shows the color-coding of the wires. Double check the wiring connections to ensure that they correspond to the diagram.
Double check wiring connections
Before testing the Nest Thermostat, double check the wiring connections to make sure they are secure and correctly attached. Loose wiring is a common cause of thermostat failures, so ensure that each wire is firmly attached to the terminals. Additionally, it is advisable to test the wiring using a multimeter to confirm that each wire is receiving the correct voltage.
By understanding each wire label, referring to the manual for details, and double checking the wiring connections, you can ensure that your Nest Thermostat is correctly wired and functioning correctly. Following these simple steps will help you avoid any thermostat issues and keep your home comfortable year-round.
Nest Thermostat Mounting Issues
If you’re experiencing issues with mounting your Nest thermostat, there are several common problems you can troubleshoot. These may include faulty wiring, a disconnected WiFi connection, or a low battery. Try manually restarting your thermostat or contacting Nest support for further assistance.
Installing a Nest Thermostat can sometimes become a daunting task, especially when it comes to mounting it. Mounting the thermostat on your own may lead to various issues such as improper installation, unlevelled mounting plate, or unsecured screws. These issues can affect the efficiency of the thermostat, which may result in poor heating or cooling. In this section, you will get to know about the common Nest mounting issues and their solutions.
Check For Proper Installation
Before mounting the Nest Thermostat, always make sure that it’s compatible with your current heating and cooling system. Also, check for the required voltage and wiring. Improper installation can lead to various problems such as heating or cooling failure, flickering screen, and low Wi-Fi connection. If you are not comfortable with the installation process, try consulting a professional.
Mounting Plate Should Be Levelled
A Nest Thermostat requires a leveled mounting plate for proper functioning. Leveling the plate can be challenging, especially when the thermostat is being installed on uneven surfaces. In such cases, use a bubble level to ensure that the mounting plate is leveled correctly. After mounting, check the level again to ensure that the thermostat is mounted properly.
Use Additional Screws If Needed
If the mounting plate is not secure, it may cause the thermostat to move or become unmounted from the wall. To prevent this issue, use additional screws if needed. Check for the right screw size and make sure that it’s long enough to penetrate the wall. By doing this, you can ensure that the thermostat is secure and stable.
In conclusion, mounting issues can affect the efficiency of your Nest Thermostat. Therefore, it’s crucial to install it correctly and securely. By following the tips mentioned above, you can prevent common mounting issues, ensuring proper heating or cooling in your home.
Low Battery Fix
If your Nest Thermostat is experiencing low battery issues, there are several troubleshooting steps you can take to fix this problem. These range from checking the wiring, resetting the thermostat, or flipping the circuit breaker. You can also watch online tutorials that provide step-by-step guidance to help you resolve the issue and get your thermostat working again.
mostat may display a message saying “low battery”. In this case, the solution is simple: replace the batteries. The Nest Thermostat uses AAA batteries, which can be easily replaced by following the steps below.
Remove Base And Check Red Wire
To replace the batteries in your Nest Thermostat, start by removing the thermostat from its base. This can be done by pulling on the bottom of the thermostat until it pops off the base. Once you’ve removed the thermostat from the base, check the red wire to make sure it’s securely connected.
Replace Aaa Batteries
Once you’ve removed the thermostat from its base and checked the red wire, it’s time to replace the AAA batteries. To do this, simply remove the old batteries and insert new ones. Be sure to insert the batteries in the proper orientation, with the positive and negative ends facing the correct direction. Once the batteries are replaced, reattach the thermostat to its base and wait for it to power on.
Flip Circuit Breaker
If your Nest Thermostat is still displaying the “low battery” message after replacing the batteries, the next step is to flip the circuit breaker that controls your HVAC system. This will reset the system and may resolve the issue. Locate your circuit breaker panel and find the breaker that controls your HVAC system. Flip the breaker to the “off” position, wait a few seconds, and then flip it back to the “on” position. This should reset your system and may resolve the “low battery” issue.
In conclusion, if you’re experiencing a “low battery” issue with your Nest Thermostat, the solution is usually simple. Start by replacing the AAA batteries and checking the red wire to ensure it’s securely connected. If the issue persists, try flipping the circuit breaker that controls your HVAC system. If you’re still having trouble, contact Nest support or consult with a licensed HVAC professional for further assistance.
Thermostat Won’t Turn On
A Nest thermostat that won’t turn on can be caused by several issues, such as drained batteries or a power issue. Before contacting Nest support, try troubleshooting the problem by manually restarting the thermostat, checking the batteries, and ensuring there are no power issues.
Online guides offer plenty of solutions to ensure your Nest thermostat is up and running again.
ssue, it’s possible that the power supply to your thermostat has been interrupted. Whatever the cause, it can be frustrating when the thermostat won’t turn on as it can affect the comfort of your home. In this article, we’ll provide some troubleshooting tips for when your Nest Thermostat won’t turn on. We’ll cover how to check for drained batteries, power supply issues, and perform a manual restart.
Check For Drained Batteries
One of the most common reasons why your Nest Thermostat won’t turn on is due to drained batteries. If you notice that your thermostat display is off, check the battery indicator icon on the display. If the battery indicator is red, it means that the batteries need to be replaced. To replace the batteries:
- Turn the thermostat off
- Remove the thermostat from its base
- Remove the batteries from the back of the thermostat
- Insert new AAA alkaline batteries into the battery compartment
- Reattach the thermostat to its base and turn it back on
If the battery indicator is not red, but your thermostat still won’t turn on, move on to the next troubleshooting step.
Power Supply Issues
If your Nest Thermostat won’t turn on and you’ve ruled out drained batteries, the next step is to check for power supply issues. First, check to see if there’s a power outage in your area. If there’s no power outage, check the circuit breaker that controls the power supply to your thermostat. If the circuit breaker has tripped, reset it by flipping it back on. If the circuit breaker is not the issue, you may need to check the wiring. Check to see if the wires are loose, frayed, or damaged.
Perform Manual Restart
If you’ve replaced the batteries and ruled out power supply issues, the next step is to perform a manual restart of your Nest Thermostat. Here’s how:
- Remove your thermostat from its base
- Remove the batteries from the back of the thermostat
- Wait for two minutes to allow any residual power to drain
- Insert new AAA alkaline batteries into the battery compartment
- Reattach the thermostat to its base and turn it back on
Performing a manual restart should clear any potential firmware issues or bugs that may have caused your thermostat to malfunction.
In conclusion, if your Nest Thermostat won’t turn on, there could be several reasons why. Checking for drained batteries, power supply issues, and performing a manual restart are all troubleshooting steps you can take to get your thermostat up and running again. If you’ve tried all the troubleshooting steps and your thermostat still won’t turn on, contact Nest support for further assistance.
Useful Tips
Are you struggling with troubleshooting your Nest Thermostat and need some useful tips to resolve the issue? It’s important to understand that common issues can range from faulty wiring to the device being unable to connect to the Wi-Fi network. Instead of getting frustrated and calling for professional help, try to troubleshoot the issue yourself by following these useful tips:
Reset Nest Thermostat
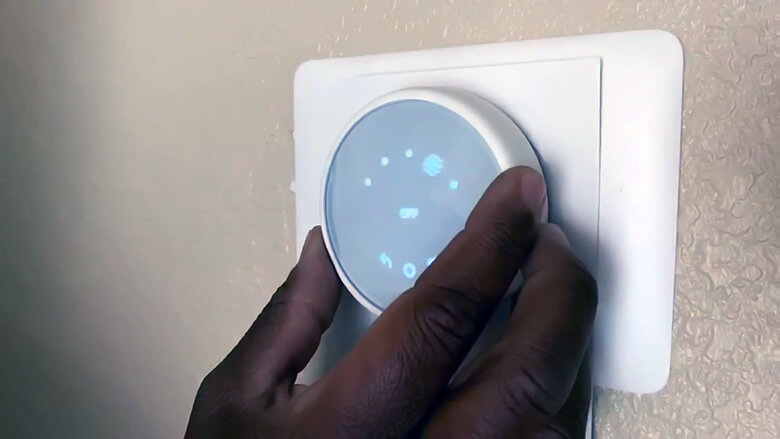
If your Nest Thermostat is unresponsive, try performing a manual restart by removing it from its base and removing the AAA batteries. After replacing the batteries, press the thermostat back onto the base until it clicks into place. The thermostat may take a few moments to restart and turn back on. Additionally, there is a reset button on the Nest Thermostat that you can use if needed.
Troubleshoot Nest Thermostat Help Codes
In case you receive any error codes on your Nest Thermostat, you can simply search for a solution on the Google Nest website or by contacting their support team. One common issue could be a low battery. If that’s the case, try removing the thermostat from the base and charging it with a USB cord.
Guidelines to troubleshoot other issues
Here are some troubleshooting guidelines to resolve other issues you may encounter with your Nest Thermostat:
- Check the breaker and make sure it’s not tripped
- Check for blown fuses and replace them if needed
- Recheck the wire labels and making sure they are correctly installed
- Check for any Nest mounting issues and resolve them if needed
- Check if the Nest Thermostat is connected to the Wi-Fi network or not
These useful tips for Nest Thermostat troubleshooting can help you resolve common issues and save you time and money. If the issue still persists, you can always contact professional HVAC technicians for further assistance.
Frequently Asked Questions
What Is A Common Problem With Nest Thermostats?
Nest Thermostat problems can vary from faulty wiring to a clogged air filter or difficulty connecting to Wi-Fi. Basic troubleshooting steps like checking the batteries, resetting, or charging the thermostat can fix these issues. Contact Nest support if the problem persists.
How Do I Fix An Unresponsive Nest Thermostat?
To fix an unresponsive Nest Thermostat, try manually restarting it by taking it off its base, removing the AAA batteries, replacing the batteries, and pressing the thermostat onto the base until it clicks into place. Allow the thermostat a few moments to turn on and restart.
If this doesn’t work, contact Nest support.
Is There A Reset Button On Nest Thermostat?
Yes, there is a reset button on the Nest Thermostat. You can perform a manual reset by going to the thermostat’s menu, selecting “Settings,” scrolling down to “Reset,” and selecting “All Settings. ” This will reset your thermostat to its default settings.
Alternatively, you can press and hold the Nest’s display until the reset options appear.
Why Is My Nest Not Doing Anything?
If your Nest Thermostat is unresponsive, try manually restarting it by turning it off and then back on again. If it won’t turn on at all, remove it from the base and charge it using a USB cord plugged into a wall charger or computer.
You can also troubleshoot common problems such as faulty wiring or a clogged air filter. Contact Nest support for further assistance.
Conclusion
Troubleshooting your Nest thermostat can be a simple and easy process. Whether you are experiencing issues with the wiring or the Nest thermostat being unable to connect to WiFi, there are many resources available to help you solve the problem.
From resetting the thermostat manually to checking the circuit breaker, these simple steps can help you troubleshoot the issue and get your Nest thermostat up and running in no time. By following these guidelines, you can ensure that your Nest thermostat is working efficiently and effectively.