
To troubleshoot a Primo water dispenser, check for power supply issues and ensure proper water bottle installation. Clean the dispenser regularly to avoid blockages.
Primo water dispensers provide a convenient way to access clean drinking water at home or in the office. Despite their reliability, occasional issues can arise that require troubleshooting. Common problems include power supply disruptions, improper bottle placement, and clogged spouts.
Addressing these issues promptly ensures the dispenser functions efficiently. Regular maintenance, like cleaning, helps prevent most problems. Always refer to the user manual for specific guidance. With a few simple steps, you can resolve most issues and ensure a continuous supply of fresh water. This guide aims to help you maintain and troubleshoot your Primo water dispenser effectively.
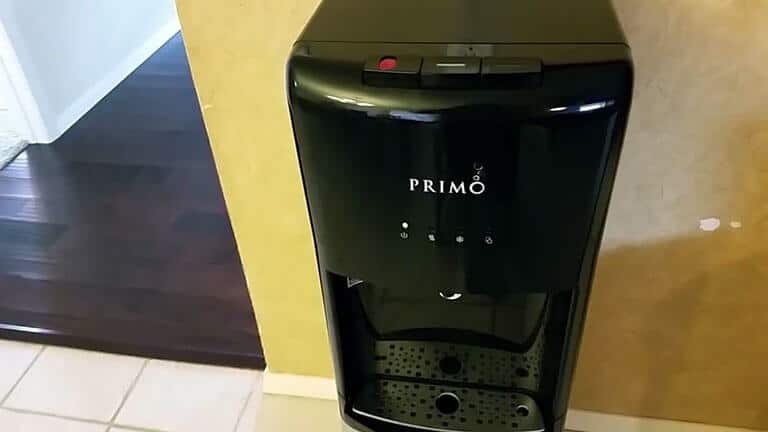
Introduction To Primo Water Dispenser Issues
Primo Water Dispensers are popular for providing clean, cold, and hot water. Sometimes, users face issues that can disrupt their daily routine. Understanding these issues helps in quick troubleshooting and maintaining the dispenser’s efficiency.
Common Challenges With Water Dispensers
Primo Water Dispensers may encounter various challenges. Some of the most common issues include:
- Water Leakage: Often caused by improper bottle placement or damaged components.
- No Water Dispensing: This might be due to air locks or empty water bottles.
- Strange Tastes or Odors: Usually from old filters or contaminated water lines.
- No Heating or Cooling: May result from faulty thermostats or electrical issues.
- Noise Issues: Often linked to internal components or improper placement.
Benefits Of Quick Troubleshooting
Quick troubleshooting of Primo Water Dispenser issues offers several benefits:
- Cost Savings: Avoid expensive repairs or replacements.
- Convenience: Maintain a steady supply of hot and cold water.
- Health Safety: Ensure the water remains clean and safe.
- Longer Lifespan: Regular troubleshooting extends the dispenser’s life.
- Reduced Downtime: Minimize the time spent without a working dispenser.
By understanding common issues and benefits of quick fixes, users can ensure their Primo Water Dispenser remains functional and efficient.
Identifying Your Primo Model
When your Primo water dispenser faces issues, identifying the model is crucial. This helps in finding accurate troubleshooting steps and guidance. Let’s dive into how to identify your Primo model.
Types Of Primo Water Dispensers
Primo offers a range of water dispensers tailored for various needs. Understanding the type you own is the first step.
| Type | Description |
|---|---|
| Top Loading | Water bottle is placed on top. Easy to see water level. |
| Bottom Loading | Water bottle is stored at the bottom. Easier to load. |
| Countertop | Compact size. Fits on kitchen counters. |
| Portable | Small and lightweight. Ideal for small spaces. |
Locating Model-specific Manuals
Each Primo model comes with a specific manual. Knowing how to locate it is essential.
- Check the Label: Look for a label on the back or bottom of the dispenser. It contains the model number.
- Visit Primo’s Website: Go to the Primo Water website. Enter your model number in the search bar.
- Contact Support: Reach out to Primo customer support. Provide them with your model number.
Having the right manual can streamline troubleshooting. Make sure to keep it handy.
No Water Flowing
Experiencing no water flow from your Primo Water Dispenser can be frustrating. It’s a common issue with simple fixes. Let’s dive into the troubleshooting steps.
Checking For Bottle Issues
First, examine the water bottle. Ensure it is correctly positioned on the dispenser. An improperly placed bottle can restrict water flow. Lift and reseat the bottle firmly onto the dispenser spike.
Next, check if the bottle is empty. Sometimes, the simplest solution is often overlooked. Replace the bottle if it is empty or near empty.
Inspect the bottle for any damages. Cracks or leaks can affect water flow. Replace the bottle if any damage is found.
Inspecting Dispenser Valves
After checking the bottle, move on to the dispenser valves. These valves regulate water flow and may become clogged or stuck.
Start by unplugging the dispenser. Safety first! Remove the bottle and examine the valves. Look for any visible debris or obstructions.
- Clean the valves with a soft cloth.
- Gently press the valves to see if they move freely.
If the valves are stuck, try using warm water to loosen any blockages. Rinse thoroughly and reassemble the dispenser.
Finally, plug the dispenser back in and test for water flow. Ensuring all parts are clean and functional often resolves the issue.
Water Is Not Cold
Is your Primo water dispenser not giving you cold water? This can be frustrating, especially during hot days. Let’s dive into some troubleshooting steps to fix this issue. We will check the thermostat and cooling system.
Thermostat Adjustments
The thermostat controls water temperature. If it’s set too high, the water won’t be cold. Locate the thermostat on your Primo water dispenser. Usually, it’s at the back or inside the unit.
Follow these steps to adjust it:
- Unplug the dispenser from the power source.
- Find the thermostat dial.
- Turn the dial counterclockwise to lower the temperature.
- Plug the dispenser back in.
- Wait a few hours to see if the water gets colder.
Cooling System Checks
If adjusting the thermostat doesn’t work, check the cooling system. The cooling system keeps the water cold. It consists of several parts, such as the compressor, fan, and cooling coils.
Here are some steps to check the cooling system:
- Compressor: Ensure the compressor is running. You should hear a low hum.
- Fan: Check if the fan is working. It helps dissipate heat.
- Cooling Coils: Inspect the coils for dust or debris. Clean them if needed.
If any of these parts are not working, you may need professional help. Faulty parts can prevent the water from cooling properly.
By following these steps, you can resolve the issue of your Primo water dispenser not cooling water. Adjust the thermostat and check the cooling system to enjoy cold water again.
Water Tastes Bad
Is the water from your Primo Water Dispenser tasting bad? Don’t worry. There are simple steps to fix it. Follow our troubleshooting guide to enjoy fresh-tasting water again.
Cleaning And Sanitizing
Regular cleaning and sanitizing can prevent bad tastes. Here’s how to clean your dispenser:
- Unplug the dispenser.
- Remove the water bottle.
- Mix a solution of one tablespoon of bleach with one gallon of water.
- Pour the solution into the dispenser’s reservoir.
- Let it sit for 10 minutes.
- Drain the solution through the cold water tap.
- Rinse the reservoir with clean water.
- Plug the dispenser back in and replace the water bottle.
Filter Replacement Guide
Replacing the filter can improve water taste. Follow these steps:
- Check the user manual for filter type.
- Purchase the correct filter.
- Unplug the dispenser.
- Locate the filter compartment.
- Remove the old filter.
- Insert the new filter.
- Close the filter compartment.
- Plug the dispenser back in.
Regular maintenance ensures your water tastes fresh. Clean and replace filters regularly for the best results.
Leakage Problems
Experiencing leakage with your Primo Water Dispenser can be frustrating. Understanding the common causes and solutions can help you fix the problem quickly. This section will guide you through inspecting seals, spouts, and troubleshooting the drip tray.
Seal And Spout Inspections
Check the seals on your Primo Water Dispenser regularly. Over time, seals can wear out and cause leaks. Follow these steps to inspect and replace them:
- Unplug the dispenser for safety.
- Remove the water bottle and set it aside.
- Locate the seal at the top of the dispenser.
- Inspect the seal for cracks or wear.
- Replace the seal if you see any damage.
Next, inspect the spout. Leaks can also occur here if the spout is damaged or improperly attached. Follow these steps:
- Check for any visible cracks on the spout.
- Ensure the spout is securely attached.
- If the spout is damaged, replace it immediately.
Troubleshooting The Drip Tray
The drip tray can overflow and cause leaks if not maintained. Follow these steps to troubleshoot:
- Remove the drip tray and empty it.
- Clean the tray with warm, soapy water.
- Dry the tray completely before reattaching it.
- Check the tray for cracks or damage.
- Replace the tray if you find any issues.
Regular maintenance of your Primo Water Dispenser can prevent leaks and extend its life. By inspecting seals, spouts, and the drip tray, you ensure a smooth and leak-free experience.
Noise During Operation
Experiencing noise during operation is common with Primo Water Dispensers. Some sounds are normal, while others indicate a problem. Knowing the difference can save time and frustration.
Normal Sounds Vs. Problem Noises
Primo Water Dispensers make various sounds during operation. Normal sounds include soft humming, water bubbling, and occasional clicks. These are typical and mean the dispenser is working correctly.
Problem noises are louder and more disruptive. These include:
- Loud humming or buzzing
- Grinding or rattling
- Continuous clicking
Such sounds may indicate mechanical issues or parts needing replacement. Identifying these noises early can prevent further damage.
When To Seek Professional Help
Some issues can be fixed at home. But sometimes, you need a professional.
Seek help if you notice:
- Loud, persistent noises
- Water leaking
- Dispenser not cooling or heating water
These signs often require expert attention. Attempting to fix them yourself can worsen the problem.
Regular maintenance helps prevent many issues. Clean the dispenser and replace filters as needed.
| Normal Sounds | Problem Noises |
|---|---|
| Soft humming | Loud humming |
| Water bubbling | Grinding |
| Occasional clicks | Continuous clicking |
Electrical Glitches
Electrical glitches can be frustrating. They can disrupt the functionality of your Primo Water Dispenser. Understanding the common issues can help you fix them quickly. Let’s explore some common electrical problems and their solutions.
Power Source Verification
First, check if the dispenser is connected to a working outlet. Ensure the plug is secure. Sometimes, outlets can be faulty. Try plugging another device to check the outlet.
Use a voltage tester to verify the outlet’s power. If the outlet has power, the issue might be with the dispenser. Inspect the power cord for any visible damage. A damaged cord can prevent the dispenser from working.
If you find any damage, replace the cord immediately. Avoid using the dispenser with a damaged cord.
Resetting The Dispenser
Sometimes, a simple reset can fix electrical glitches. Unplug the dispenser from the outlet. Wait for at least 5 minutes before plugging it back in. This can help reset the internal electronics.
Locate the reset button on the dispenser. It is usually at the back or bottom. Press and hold the reset button for about 10 seconds. Release the button and check if the dispenser starts working.
If the reset doesn’t work, consult the user manual. Some models have different reset procedures. Always follow the manufacturer’s instructions for the best results.
Remember, regular maintenance can prevent many electrical issues. Clean your dispenser and check for any signs of wear. This helps in maintaining its efficiency and longevity.
Diy Maintenance Tips
Keeping your Primo Water Dispenser in top condition ensures clean, fresh water. Regular maintenance prevents issues and extends your dispenser’s life. Here are some simple DIY maintenance tips for your Primo Water Dispenser.
Regular Cleaning Routines
Regular cleaning ensures your water remains pure. Follow these steps:
- Unplug the dispenser before cleaning.
- Remove the water bottle and drain the reservoir.
- Clean the dispenser with a mixture of vinegar and water.
- Rinse thoroughly with clean water.
- Dry with a clean cloth before plugging it back in.
Perform this cleaning routine every three months. It keeps your dispenser hygienic and functioning well.
Preventive Measures For Longevity
Taking preventive measures can extend your water dispenser’s life. Here are some tips:
- Use filtered water to reduce mineral buildup.
- Check the seals regularly to prevent leaks.
- Keep the dispenser in a cool place to avoid overheating.
- Inspect the dispenser for any cracks or damage periodically.
- Replace any worn-out parts immediately to avoid further damage.
These simple steps ensure your Primo Water Dispenser lasts longer and works efficiently.
When To Contact Primo Support
Primo water dispensers are known for their reliability and efficiency. But like any appliance, they may need troubleshooting. Knowing when to contact Primo Support can save you time and hassle. Here’s what you need to know.
Warranty And Service Information
Primo offers a comprehensive warranty for their water dispensers. The warranty period varies depending on the model. Typically, it covers parts and labor for a specific duration.
Check your user manual for warranty details. If your dispenser is under warranty, Primo Support should be your first call. They can guide you through the service process.
To make a warranty claim, have your model number and purchase receipt handy. These details speed up the support process.
Professional Repair Vs. Replacement
Sometimes, a repair is more cost-effective than a replacement. If your dispenser has minor issues, professional repair might be the best option.
Here’s a simple table to help you decide:
| Issue | Repair or Replace? |
|---|---|
| Leaking | Repair |
| Not Cooling/Heating | Repair |
| Electrical Problems | Replace |
| Old Model | Replace |
If your dispenser has significant damage, consider a replacement. New models often come with improved features and energy efficiency.
Always consult Primo Support for advice. They can provide professional assessments and recommendations.
Frequently Asked Questions
How Do I Reset My Primo Water Dispenser?
Unplug the dispenser, wait 10 minutes, then plug it back in. This resets the system.
Why Is My Primo Water Dispenser Not Cooling?
Check if the cooling switch is on. Ensure the unit is plugged in and the thermostat is set correctly.
What Causes Water Leakage From My Primo Dispenser?
Inspect the bottle for cracks. Ensure the bottle is seated properly and check for any loose connections.
Why Is My Primo Water Dispenser Not Dispensing Water?
Ensure the bottle is not empty. Check for airlocks by tilting the bottle slightly to release trapped air.
How Do I Clean My Primo Water Dispenser?
Unplug the unit, remove the bottle, and clean the reservoir with a vinegar and water solution. Rinse thoroughly.
Conclusion
Troubleshooting your Primo Water Dispenser can be straightforward with the right guidance. Follow these steps to resolve common issues. Ensure regular maintenance for optimal performance. This keeps your water dispenser efficient and long-lasting. Share your experiences and tips in the comments below.
Your feedback helps everyone maintain their Primo Water Dispensers better.