
Rain Bird sprinkler system troubleshooting involves checking for clogged nozzles, valve issues, and ensuring proper water pressure. Inspect wiring and controller settings for possible faults.
Rain Bird sprinkler systems are known for their durability and efficiency, but occasional issues may arise. Common problems include clogged nozzles, malfunctioning valves, and improper water pressure, which can affect performance. Regular maintenance and inspection can help identify and resolve these issues quickly.
Checking the wiring and controller settings is also essential to ensure the system operates smoothly. By understanding these common problems and solutions, you can keep your Rain Bird sprinkler system functioning optimally, ensuring your lawn or garden remains lush and healthy. Proper troubleshooting saves time, water, and effort.
Introduction To Rain Bird Sprinkler Systems
Rain Bird Sprinkler Systems are popular for home irrigation. They keep lawns green and gardens healthy. Understanding how they work helps maintain their efficiency. Proper maintenance ensures your lawn stays beautiful.
Common Issues In Home Irrigation
Home irrigation systems can face several issues. Here are some common problems:
- Clogged nozzles: Dirt and debris block the water flow.
- Leaking valves: Worn-out seals cause water wastage.
- Poor coverage: Misaligned sprinklers leave dry spots.
- Low water pressure: Affects the sprinkler’s range.
| Issue | Description |
|---|---|
| Clogged nozzles | Dirt blocks water flow. |
| Leaking valves | Worn seals cause leaks. |
| Poor coverage | Misaligned sprinklers miss spots. |
| Low water pressure | Affects sprinkler range. |
Benefits Of An Efficient Sprinkler System
An efficient sprinkler system offers many benefits. Here are some key advantages:
- Water conservation: Uses water efficiently.
- Cost savings: Reduces water bills.
- Healthier plants: Provides consistent watering.
- Convenience: Automates the watering process.
Efficient systems save water and money. They keep your garden thriving. Automated systems make life easier. Enjoy a lush lawn with less effort.
Identifying The Problem
Identifying issues with your Rain Bird sprinkler system can save time and water. Recognizing problems early ensures your garden stays lush and green. Here are some tips to help you identify the problem.
Visual Inspection Tips
Perform a visual inspection of your sprinkler system regularly. Look for signs of wear and tear. Check the sprinkler heads for damage or blockages.
- Make sure the sprinkler heads pop up properly.
- Check for any water pooling around the heads.
- Ensure there are no visible leaks in the pipes.
- Observe the spray patterns for consistency.
Use a flashlight to inspect areas in low light. Look for any unusual wet spots on your lawn. These might indicate an underground leak.
Signs Of Sprinkler System Failure
Several signs indicate a sprinkler system failure. Being aware of these can prevent major issues.
- Water Pressure Issues: Low or high pressure affects spray patterns.
- Uneven Watering: Dry patches or overly wet areas on your lawn.
- Inconsistent Timing: Sprinklers not following the set schedule.
- Strange Noises: Hissing or bubbling sounds indicate air or water leaks.
Keep an eye on your water bill. A sudden increase could mean there’s a leak in the system.
Clogged Nozzles And Sprinkler Heads
A common issue with Rain Bird sprinkler systems is clogged nozzles and sprinkler heads. These clogs can reduce water flow and affect your lawn’s health. Understanding how to fix this can save you time and money.
Cleaning Techniques
To clean a clogged nozzle, first, turn off the water supply. Remove the nozzle and inspect it for debris. Use a small brush or a toothpick to clear any blockages. Rinse the nozzle with clean water before reattaching it.
For sprinkler heads, unscrew the head and remove the filter. Clean the filter under running water. If the head is still clogged, soak it in a vinegar solution to dissolve mineral deposits. Reassemble and test the sprinkler.
Preventive Measures
Taking preventive measures can reduce the likelihood of clogs. Install a filter at the main water supply to trap debris before it reaches the nozzles.
Regularly inspect your sprinkler system for signs of wear and tear. Clear any visible debris from the nozzles and heads. Schedule a monthly maintenance check to keep the system running smoothly.
Use a cover over your sprinkler heads during the off-season to protect them from dirt and debris. This will prolong their life and maintain their efficiency.
| Issue | Solution |
|---|---|
| Clogged Nozzle | Clean with a brush or toothpick |
| Clogged Sprinkler Head | Soak in vinegar solution |
| Preventive Maintenance | Install a filter and schedule checks |
Leaking Valves And Pipes
Dealing with leaking valves and pipes in your Rain Bird Sprinkler System can be frustrating. Leaks waste water and can damage your landscape. Identifying and fixing these issues is crucial for maintaining an efficient irrigation system.
Detecting Leaks In Your System
Finding leaks in your sprinkler system is the first step. Look for wet spots around the valves and pipes. These spots indicate a possible leak. Inspect the sprinkler heads for constant water flow when the system is off. This could be a sign of a faulty valve.
Use a water meter to check for leaks. Turn off all water sources in your home. If the meter still moves, there is a leak. Another method is to monitor your water bill. A sudden increase might indicate a leak in your sprinkler system.
Step-by-step Repair Guide
Repairing leaking valves and pipes can be simple. Follow these steps:
- Turn off the water supply to the sprinkler system.
- Locate the damaged valve or pipe. Use the detection methods mentioned above.
- For leaking valves, remove the valve cover. Inspect the diaphragm and seals for damage. Replace any worn parts.
- For leaking pipes, identify the cracked or broken section. Use a pipe cutter to remove the damaged part.
- Obtain the correct size pipe and fittings for replacement. Ensure the new pipe matches the system’s specifications.
- Join the new pipe section with the fittings. Use PVC glue or appropriate connectors for a secure fit.
- Once repaired, turn the water supply back on. Check for any remaining leaks.
It’s important to maintain the integrity of your Rain Bird Sprinkler System. Regular inspections and timely repairs can prevent larger issues. A well-maintained system ensures efficient water usage and a healthy landscape.
Electrical Issues And Solenoid Failures
Electrical issues in your Rain Bird Sprinkler System can be frustrating. These problems often lead to solenoid failures. Solenoids are crucial for controlling water flow. Understanding how to troubleshoot these components can save you time and money.
Troubleshooting The Electrical Components
First, check the power supply to your sprinkler system. Ensure that the system is plugged in and the circuit breaker is not tripped. Use a voltage tester to verify power at the outlet.
Next, inspect the control panel for any error messages or warning lights. Refer to the manual for specific error codes. If you see any issues, reset the system and see if the problem persists.
Check the wiring connections between the control panel and the solenoids. Loose or damaged wires can cause electrical issues. Ensure all wires are secure and in good condition.
If everything looks fine, use a multimeter to test the resistance of the solenoids. A normal reading should be between 20-60 ohms. Any reading outside this range indicates a faulty solenoid.
Replacing A Faulty Solenoid
First, turn off the water supply to the sprinkler system. This will prevent any water flow during the replacement process.
Locate the faulty solenoid. They are usually found on the valve manifold. Unscrew the solenoid from the valve. Be careful, as some water may still be in the system.
Take the new solenoid and screw it into the valve. Ensure it is tight and secure. Reconnect any wiring to the new solenoid. Use waterproof wire connectors for a secure fit.
Turn the water supply back on. Test the system to ensure the new solenoid is working properly.
| Step | Action |
|---|---|
| 1 | Turn off water supply |
| 2 | Locate faulty solenoid |
| 3 | Remove old solenoid |
| 4 | Install new solenoid |
| 5 | Reconnect wiring |
| 6 | Turn on water supply |
| 7 | Test system |
Water Pressure Problems
Water pressure problems can affect the efficiency of your Rain Bird sprinkler system. Low pressure can result in uneven watering, while high pressure can damage sprinkler heads. It’s essential to identify and address these issues promptly.
Assessing Pressure Irregularities
To assess pressure irregularities, start by checking the main water valve. Ensure it is fully open. Use a pressure gauge to measure the water pressure at the source. Ideal pressure ranges from 30 to 50 psi.
If the pressure is too high or too low, inspect the pipes for blockages or leaks. Look for any visible signs of damage. Check the filters and screens for debris. Clean or replace them as needed.
It’s also important to consider the time of day. Watering during peak usage times can affect pressure. Try watering early in the morning or late in the evening.
Adjusting Pressure Settings
Once you have assessed the pressure, you may need to adjust the settings. Use a pressure regulator if the pressure is too high. Install it at the main water supply to protect your sprinkler system.
If the pressure is too low, you might need a booster pump. This will increase the water pressure to an optimal level. Ensure the pump is compatible with your Rain Bird system.
Adjust the sprinkler heads to match the new pressure settings. Rotate the heads to ensure even coverage. Test the system to make sure it operates smoothly.
Remember to regularly maintain your system. Check for any new issues and address them promptly. Proper maintenance will ensure efficient and reliable operation.
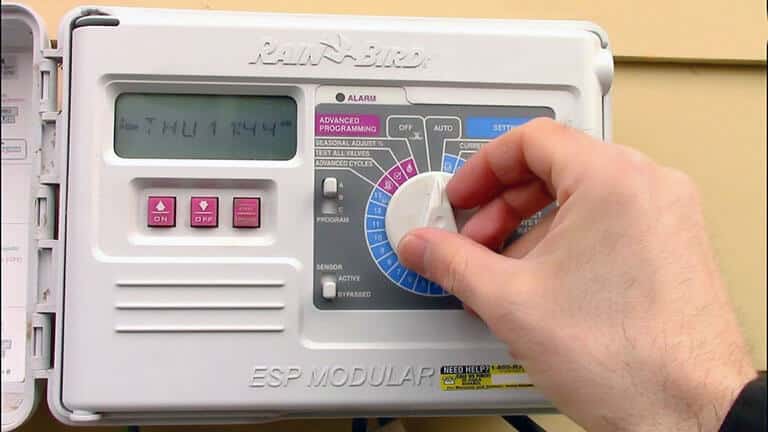
Controller And Timer Malfunctions
The Rain Bird sprinkler system relies on a well-functioning controller and timer. These components ensure your lawn gets the right amount of water. But sometimes, they can malfunction. Fixing these issues can save you time and water.
Resetting The Controller
Sometimes, the controller needs a reset to fix issues. Follow these simple steps:
- Locate the reset button on your controller.
- Press and hold the button for about 10 seconds.
- Wait for the display to restart.
If the reset does not work, check the power source. Make sure the controller is plugged in and the outlet is working. If the power source is fine, consider replacing the batteries.
Programming The Timer Correctly
A correctly programmed timer ensures efficient watering. Here’s how to do it:
| Step | Action |
|---|---|
| 1 | Select the correct zone for watering. |
| 2 | Set the start time for each zone. |
| 3 | Adjust the duration for each watering cycle. |
| 4 | Choose the days you want to water. |
Ensure you do not overwater. Check the timer settings regularly. This helps in maintaining a healthy lawn while conserving water.
For complex issues, refer to the Rain Bird manual. It provides detailed troubleshooting tips.
Seasonal Maintenance And Adjustments
Maintaining your Rain Bird Sprinkler System ensures a lush, green lawn. Seasonal adjustments are key. These tasks keep the system efficient and prevent damage. Regular upkeep prolongs the life of your sprinkler system.
Winterizing Your Sprinkler System
Proper winterizing prevents damage from freezing temperatures. Follow these steps to protect your system:
- Turn off the water supply to the sprinkler system.
- Drain all the water from the pipes and valves.
- Use compressed air to blow out any remaining water.
- Insulate exposed pipes and valves.
Draining the system is crucial. Water left in the system can freeze and cause cracks. Use a manual drain valve or an automatic drain valve. Ensure all the water is removed.
Blowing out the system with compressed air ensures no water is left. Connect the air compressor to the blow-out port. Open each valve until only air comes out.
Insulating pipes helps prevent freezing. Use foam pipe covers or insulation tape. Cover all exposed pipes and valves.
Preparing For The Growing Season
Getting your sprinkler system ready for spring is vital. Follow these steps to ensure your system works properly:
- Check the system for any damage or leaks.
- Clean the sprinkler heads to remove debris.
- Adjust the sprinkler heads for proper coverage.
- Test the system to ensure all zones are working.
Inspecting the system helps identify any issues. Look for cracked pipes, broken sprinkler heads, or leaks. Fix any problems before turning on the system.
Cleaning the sprinkler heads ensures proper water flow. Remove any dirt, grass, or debris. Use a soft brush or cloth.
Adjusting the sprinkler heads ensures even water coverage. Turn the adjustment screw to change the spray pattern. Make sure all areas receive water.
Testing the system ensures all zones work correctly. Turn on the system and check each zone. Make sure the sprinkler heads pop up and spray water properly.
Professional Help Vs Diy
Troubleshooting your Rain Bird Sprinkler System can be challenging. You may decide to fix the problem yourself or seek professional help. Both options have their pros and cons. This guide will help you decide the best course of action.
When To Call An Expert
Sometimes, a sprinkler system problem is too complex. Here are situations where calling an expert is best:
- Major leaks or water pressure issues
- Electrical problems with the controller
- Sprinkler heads not rotating or popping up
- System-wide malfunctions
Professionals have the tools and experience to fix these issues. They can diagnose problems quickly. This saves time and prevents further damage.
Resources For Diy Troubleshooting
If you prefer a hands-on approach, many resources are available:
- Owner’s Manual: The Rain Bird manual offers step-by-step guides.
- Online Tutorials: YouTube has many helpful videos.
- Community Forums: Ask questions and get advice from other users.
- Customer Support: Rain Bird’s website has a support section.
Here are some common DIY troubleshooting steps:
| Issue | Possible Solution |
|---|---|
| Low Water Pressure | Check for leaks and clean filters. |
| Controller Not Working | Check the power source and reset the controller. |
| Clogged Sprinkler Heads | Clean the heads and replace damaged parts. |
DIY troubleshooting can save money. It also gives a sense of accomplishment. Always ensure you have the right tools and follow safety guidelines.
Frequently Asked Questions
How Do I Reset My Rain Bird Controller?
To reset, press and hold the “Reset” button until the display clears.
Why Is My Rain Bird Sprinkler Not Working?
Check for clogged nozzles, damaged wires, or low water pressure.
How Do I Fix A Leaking Rain Bird Sprinkler?
Replace faulty seals or damaged sprinkler heads to stop leaks.
Why Is My Rain Bird Timer Not Working?
Ensure it’s plugged in, check the battery, and verify power supply.
How Do I Adjust Rain Bird Sprinkler Heads?
Twist the nozzle for spray pattern and use the screw for spray distance.
Conclusion
Mastering Rain Bird sprinkler system troubleshooting can save you time and money. Follow the steps outlined to diagnose and fix issues. Regular maintenance ensures optimal performance. Enjoy a lush, green lawn with a properly functioning sprinkler system. Happy watering!