
For Rohl faucet repair troubleshooting, start by checking if the valve under the sink is open, as it is the most common issue. If it is not the problem, check for clogs, dislodged parts, or breakage.
If the faucet cartridge needs replacement, turn off the water supply, remove the faucet handle and cartridge, then replace it. Regarding warranty, Rohl has a limited lifetime warranty for manufacturing defects only. However, it does not cover improper maintenance, finish maintenance, or wear and tear.
House of Rohl’s website provides support, FAQs, and troubleshooting tips for customers. We will delve into more information about troubleshooting, maintaining, and repairing Rohl faucets to help you solve any issues efficiently and effectively.
Common Rohl Faucet Issues
If your Rohl faucet is giving you trouble, there are a few things you can try to troubleshoot and repair it. Common issues include leaks, low water pressure, and problems with the cartridge. Follow the manufacturer’s instructions to remove and clean the cartridge, replace the diverter, and check for any other damage or issues.
Leaking Spout
A leaking spout can be a frustrating problem, especially if it causes water damage to your countertop or floor. One of the main reasons for a leaking spout is a worn-out O-ring or cartridge. To fix the issue, you need to remove the spout and check the O-ring and cartridge for wear and tear. If you notice any damage, replace them with new ones.
Dripping Faucet
A dripping faucet is not only annoying, but it can also increase your water bills. The most probable cause of a dripping faucet is a worn-out washer or cartridge. To solve the problem, shut off the water supply to the faucet and remove the handle to access the washer or cartridge. Check them for damage and replace them if necessary.
Low Water Pressure
Low water pressure can make it difficult to wash dishes or take a shower. The most common reason for low water pressure in Rohl faucets is a clogged aerator. Remove the aerator and clean it thoroughly with vinegar and a small brush. If cleaning the aerator does not solve the issue, the problem might be with the valve or cartridge, and you may need to seek professional assistance.
Conclusion
By following the above troubleshooting tips, you can solve common Rohl faucet issues and prolong the life of your faucet. Remember to ensure that you turn off the water supply and follow manufacturer’s instructions before attempting any repairs.
Tools And Materials You’ll Need
To repair your malfunctioning Rohl faucet, you’ll need a few tools and materials. These include a screwdriver set, pliers, grease, replacement cartridge, O-rings, and packing material. Follow the manufacturer’s instructions or seek professional help if necessary.
If you have a Rohl faucet that needs repair, there are several tools and materials you’ll need to get the job done right. Don’t worry, you don’t need to be an expert plumber – with just a few basic tools and a little bit of know-how, you can troubleshoot and fix most common problems with your faucet. Here’s what you’ll need:
Adjustable Wrench
An adjustable wrench is a must-have tool for any plumbing repair job. It allows you to tighten or loosen nuts and bolts of different sizes, so you can get a tight fit on your faucet without risking damage to the surrounding fixtures.
Screwdriver
You’re going to need a screwdriver to remove the screws that hold the faucet handle and spout in place. A flat-head screwdriver should work for most Rohl faucets, but you may need a Phillips head if your faucet has different types of screws.
Cartridge Puller
If you’re replacing a faulty cartridge in your Rohl faucet, you’ll need a cartridge puller to remove the old part. This tool allows you to grip the sides of the cartridge and pull it out of the faucet body without damaging any of the surrounding components.
Replacement Cartridges
Of course, you’ll also need replacement cartridges for your Rohl faucet if you’re swapping out an old or damaged part. Make sure you purchase the correct type of cartridge for your specific faucet model – a quick search online should help you find the right part.
With these tools and materials in hand, you should be able to troubleshoot and fix most common problems with your Rohl faucet. Whether you need to tighten a loose handle, clean out a clogged spout, or replace a faulty cartridge, having the right tools makes the job much easier. So don’t stress – you’ve got this!
Removing The Handle
If your Rohl faucet is not functioning correctly, you may need to troubleshoot and repair it. One of the first steps in repairing your faucet is to remove the handle. This step-by-step guide will help you to do just that.
Shut Off the Water Supply
Before you begin any work on your Rohl faucet, it is important to turn off the water supply. This will prevent any water from flowing while you work on your faucet. The water supply valve is typically located underneath the sink. Shut off the supply valve by turning it clockwise until it stops.
Loosen the Handle Set Screw
Once you have turned off the water supply, you can begin to remove the handle. Start by finding the set screw on the handle. This screw can usually be found on the side of the handle, and it holds the handle in place on the faucet. Use a screwdriver to loosen the set screw by turning it counterclockwise.
Remove the Handle
Now that the set screw is loose, you can remove the handle. Grip the handle firmly and pull it straight out towards you. If the handle is difficult to remove, you can wiggle it back and forth while pulling it towards you. If the handle still will not come off, you may need to use a handle puller tool to remove it.
In Conclusion
Removing the handle of your Rohl faucet is just the first step towards troubleshooting and repairing your faucet. If you have difficulty removing the handle, you can always seek professional help or refer to the Rohl faucet manual. By following this step-by-step guide, you can successfully remove the handle and begin your faucet repair work.
Removing And Replacing The Cartridge
As a homeowner, having a faucet that leaks can be a frustrating experience. It can often be tempting to call a plumber to come and fix the problem, but in many cases, the issue can be fixed with some basic troubleshooting. In this guide, we will be going over the step-by-step process of removing and replacing the cartridge in a Rohl faucet. This guide will help you save money and time by addressing the issue yourself.
Remove the Locking Pin
The first step is to remove the locking pin that secures the handle to the faucet. To remove the locking pin, follow these steps:
- Use a flathead screwdriver to remove the decorative cap on top of the handle.
- Loosen the screw that holds the handle in place.
- Remove the handle by pulling it off the stem.
- Locate the locking pin on the stem and remove it by pulling it out.
Remove the Retaining Nut
Once the locking pin is removed, the next step is to remove the retaining nut that holds the cartridge in place. To remove the retaining nut, follow these steps:
- Use a pair of pliers or an adjustable wrench to unscrew the retaining nut that is holding the cartridge in place.
- Once the retaining nut is unscrewed, remove it carefully.
Remove the Cartridge
Once the retaining nut is removed, the cartridge should be able to be pulled out easily. However, sometimes the cartridge can be stubborn and not come out as easily as expected. In this case, you can use a pair of pliers to gently wiggle the cartridge until it comes loose. To remove the cartridge, follow these steps:
- Use a pair of pliers to wiggle the cartridge until it comes loose.
- Pull the cartridge out of the faucet carefully.
Install the New Cartridge
Now that the old cartridge is out, it is time to install the new one. To install the new cartridge, follow these steps:
- Insert the new cartridge into the faucet, making sure that it is properly aligned.
- Use the pliers to gently wiggle the cartridge until it is securely in place.
- Screw the retaining nut back onto the faucet stem, tightening it with the pliers or adjustable wrench.
- Put the handle back onto the stem and secure it with the screw.
- Replace the locking pin and cap and test the faucet to make sure it is working properly.
By following these steps, you should be able to easily remove and replace the cartridge in your Rohl faucet. If you have any issues or concerns, please consult a plumber or contact the manufacturer for further assistance.
Testing And Cleaning The Faucet
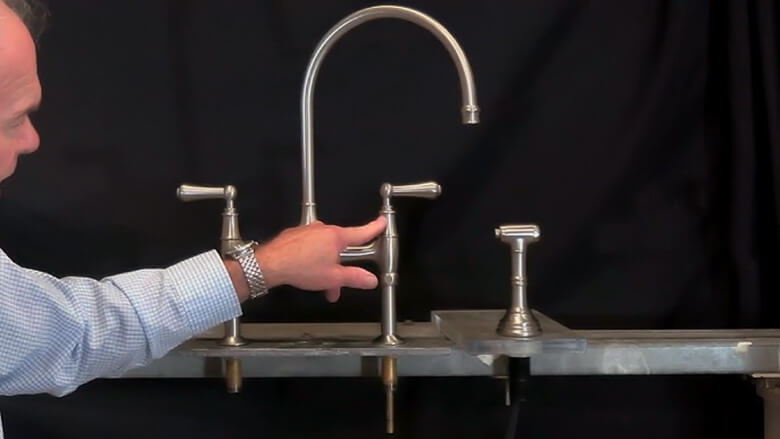
Learn how to test and clean your Rohl faucet with this step-by-step guide. Follow along with Dino Pinch’s YouTube video to remove the handle and cartridge, test the faucet, and clean the hot side inlet. Be sure to consult with Rohl’s limited lifetime warranty and troubleshoot any issues as needed.
the water supply before attempting any repair work on your Rohl faucet. In this step-by-step guide, we will walk you through testing and cleaning your faucet to maintain its performance. We have also included troubleshooting tips to help you identify problems and resolve them quickly. Follow this guide to ensure your Rohl faucet remains functional and efficient for years to come.
Run Water Through The Faucet
The first step to testing your Rohl faucet is to run water through it. Turn on both the hot and cold water supply, and then turn on the faucet. Check if the water flows properly from the faucet. If the water flow is weak, it could indicate a clog inside the faucet. Next, turn off the water supply and disassemble the faucet for cleaning.
Cleaning The Hot Side Inlet
Cleaning the hot side inlet is essential to maintain the Rohl faucet’s performance. To do this, remove the handle and cartridge from the faucet body. Next, insert a small brush into the hot side inlet and clean it thoroughly. This will clear any debris or mineral build-up that can cause low water pressure or uneven flow. After cleaning, reassemble the faucet and turn on the water supply.
In conclusion, testing and cleaning your Rohl faucet is essential to maintaining its performance. It is crucial to identify any leaks, low water pressure, or uneven water flow and take corrective action promptly. Follow our step-by-step guide to keep your Rohl faucet functioning efficiently for years to come.
Frequently Asked Questions
How Do You Remove A Rohl Faucet Cartridge?
To remove a Rohl faucet cartridge, turn off the water supply and remove the faucet handle. Next, remove the cartridge by pulling it out of the faucet body. Refer to manufacturer guidelines for more detailed instructions.
Does Rohl Have Lifetime Warranty?
Yes, Rohl offers a lifetime warranty but is limited to the original owner and covers manufacturing defects only. The warranty does not cover damage caused by abuse, improper finish maintenance, or wear and tear.
Why Would A Faucet Suddenly Stop Working?
There are several reasons why a faucet can suddenly stop working. The simplest possibility is that the valve below the sink is closed. The fixture could also be clogged, dislodged, bent, or broken. In worst-case scenarios, you may need to replace the faucet, but this isn’t a big deal.
How Do You Replace A Faucet Cartridge?
To replace a faucet cartridge, turn off the water supply, remove the faucet handle, and then remove the cartridge. Install the new cartridge and turn on the water supply. Test the faucet for any leaks.
Conclusion
If your Rohl faucet is experiencing issues, it’s certainly not the end of the world. From leaks to cartridge changes, there are many troubleshooting options available. It’s recommended to check for simple solutions first, such as making sure the valve under the sink is open.
Remember, Rohl offers a limited lifetime warranty for manufacturing defects, so be sure to explore that option as well. By following the tips and tricks outlined you’ll be able to get the most out of your Rohl faucet and enjoy its authentic luxury for years to come.