
If your Liftmaster gate opener isn’t working, check power supply and remote batteries first. Inspect for obstructions and clean sensors.
Liftmaster gate openers are reliable, but occasional issues can arise. Common problems include power supply interruptions, dead remote batteries, and sensor obstructions. Regular maintenance can prevent many of these issues. Begin troubleshooting by ensuring the gate opener is receiving power.
Check the remote control batteries and replace them if necessary. Clear any debris or obstructions that might block the sensors. If the gate still doesn’t operate, consult the user manual or contact customer support for further assistance. Proper care and timely troubleshooting can extend the lifespan of your Liftmaster gate opener, ensuring it functions smoothly.
Introduction To Liftmaster Gate Openers
Contents
- 1 Introduction To Liftmaster Gate Openers
- 2 Identifying Your Liftmaster Model
- 3 Power Supply Checks
- 4 Remote Control And Access Panel Issues
- 5 Obstruction And Sensitivity Adjustments
- 6 Gears And Mechanical Components
- 7 Electronic Components And Wiring
- 8 Professional Help Vs. Self-troubleshooting
- 9 Preventive Measures And Regular Maintenance
- 10 Frequently Asked Questions
- 11 Conclusion
Liftmaster gate openers are popular for their reliability and ease of use. They provide security and convenience for homeowners. Yet, like all devices, they can face issues. Knowing how to troubleshoot can save time and money.
Common Issues Faced By Users
Users often encounter several common problems. Here are the most frequent ones:
- Gate not opening or closing: This can be due to power issues.
- Remote control not working: Batteries might be dead or need reprogramming.
- Obstruction detection: Sensors might be dirty or misaligned.
- Strange noises: Check for mechanical wear or loose parts.
Benefits Of Diy Troubleshooting
DIY troubleshooting offers several benefits:
- Cost-saving: Avoid expensive technician fees.
- Quick fixes: Resolve minor issues promptly.
- Learning experience: Understand your gate opener better.
Below is a table summarizing the common issues and their simple fixes:
| Issue | Possible Cause | Solution |
|---|---|---|
| Gate not opening or closing | Power issues | Check power supply |
| Remote control not working | Dead batteries | Replace batteries |
| Obstruction detection | Dirty sensors | Clean sensors |
| Strange noises | Mechanical wear | Inspect and tighten parts |
By understanding these issues, users can keep their gate openers running smoothly. Always ensure safety first while troubleshooting. Happy DIY troubleshooting!
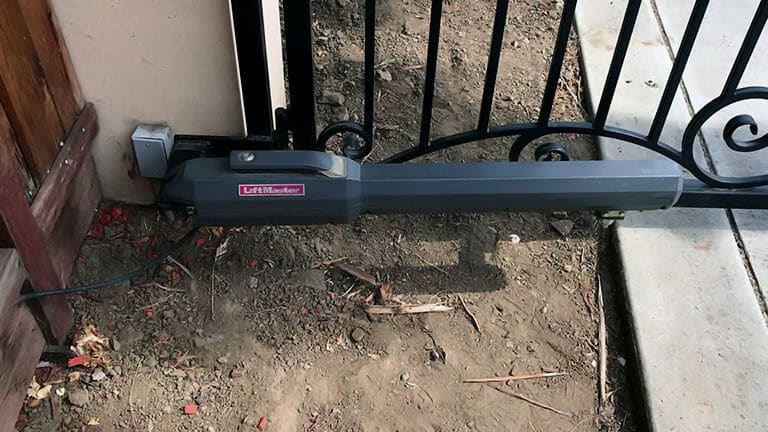
Identifying Your Liftmaster Model
Before troubleshooting your Liftmaster gate opener, identify its model. Each model has unique features and specific troubleshooting steps. Knowing your model saves time and ensures accurate fixes.
Where To Find The Model Number
The model number can usually be found on the motor unit of the gate opener. Look for a label or sticker on the back or side of the motor. It should contain a series of letters and numbers.
Here is a quick guide on where to locate your model number:
| Location | Description |
|---|---|
| Motor Unit | Check the back or side of the motor unit. |
| User Manual | Find the model number on the cover or first page. |
| Remote Control | Some remotes have the model number printed on them. |
Why Model Identification Is Crucial
Identifying your Liftmaster model is crucial for several reasons:
- Correct Troubleshooting Steps: Different models have different troubleshooting procedures.
- Spare Parts: Ensure you buy the right parts for your specific model.
- User Manual: Access the correct user manual for detailed instructions.
Knowing your model helps you follow the right steps and avoid mistakes. It ensures you get the correct support from Liftmaster customer service. Always keep your model number handy for future reference.
Power Supply Checks
Experiencing issues with your Liftmaster gate opener? Start by checking the power supply. Ensuring a stable power source can resolve many problems.
Verifying Electrical Connections
First, check all electrical connections. Ensure wires are tightly connected. Loose connections can cause malfunction. Look for any signs of wear or damage.
- Inspect the power cord for any cuts.
- Ensure plugs are securely in the outlet.
- Check the wiring inside the gate opener.
| Connection Point | Action |
|---|---|
| Power Cord | Inspect for cuts or damage. |
| Plugs | Ensure they are tight in the outlet. |
| Internal Wiring | Check for wear and secure connections. |
Testing The Power Source
Next, test the power source. Use a multimeter to measure the voltage. Ensure the power source provides the correct voltage.
- Set the multimeter to measure AC voltage.
- Place the probes on the power source terminals.
- Compare the reading to the gate opener’s requirements.
If the voltage is too low or too high, it can cause issues. Use a surge protector to safeguard the gate opener.
Ensuring a stable power source is crucial. It prevents many operational problems.
Remote Control And Access Panel Issues
Having trouble with your Liftmaster gate opener? Often, remote control and access panel issues are the culprits. This guide will help you fix these common problems.
Replacing Batteries In Remote Controls
A dead battery is a frequent cause of remote control failure. Follow these steps to replace the batteries:
- Open the battery cover on the remote.
- Remove the old batteries carefully.
- Insert new batteries, ensuring correct polarity.
- Close the battery cover securely.
Use CR2032 lithium batteries for most Liftmaster remotes. Always keep spare batteries handy.
Resetting The Access Panel
If the access panel is not working, a reset might help. Here’s how you can reset it:
- Locate the reset button on the access panel.
- Press and hold the reset button for 10 seconds.
- Release the button and wait for the panel to reboot.
Once reset, the panel should work as expected. If not, check the wiring and connections.
For more detailed troubleshooting, refer to the user manual that came with your Liftmaster gate opener.
Obstruction And Sensitivity Adjustments
Having trouble with your Liftmaster gate opener? Obstruction and sensitivity adjustments can help. These steps ensure smooth operation and safety. Below, find detailed guidance on clearing gate path obstructions and tweaking sensitivity settings.
Clearing Gate Path Obstructions
First, check for any objects blocking the gate’s path. Even small items can cause issues. Look for rocks, sticks, or toys near the gate. Remove any debris you find. Also, inspect the gate tracks for dirt or leaves. Clean these areas to prevent further problems.
Sometimes bushes or branches can obstruct the gate. Trim any plants growing too close. Keep the area around the gate clear. This helps the gate move freely without interruptions.
Tweaking Sensitivity Settings
If the gate still struggles, adjust the sensitivity settings. Find the control panel on your Liftmaster opener. Look for the sensitivity knobs. These knobs usually have labels like “Open” and “Close”.
Turn the knobs slightly to adjust the sensitivity. For a gate that stops too easily, increase the sensitivity. Turn the knob clockwise. If the gate doesn’t stop when it should, decrease the sensitivity. Turn the knob counterclockwise.
After each adjustment, test the gate’s operation. Open and close the gate several times. Ensure the gate moves smoothly and stops when needed. Repeat these steps until the gate operates perfectly.
Remember to keep safety in mind. Don’t set the sensitivity too high. The gate should stop if it encounters resistance. This prevents damage and ensures safety.
Gears And Mechanical Components
Liftmaster gate openers rely on several gears and mechanical components to function smoothly. Proper maintenance of these parts can extend the lifespan of your gate opener. This section will cover the key aspects of keeping these components in top shape, focusing on lubricating moving parts and checking for worn-out components.
Lubricating Moving Parts
Lubrication is essential for the smooth operation of your gate opener. Regularly apply a high-quality lubricant to the moving parts. This reduces friction and prevents wear and tear.
- Use a silicone-based lubricant for the best results.
- Avoid using grease, as it can attract dirt and debris.
- Lubricate the gears, chains, and hinges.
- Check the manufacturer’s guide for recommended lubrication intervals.
Checking For Worn-out Components
Worn-out components can lead to operational issues. Regular inspections can help identify parts that need replacement.
- Check the gears for signs of wear or damage.
- Inspect the chains for rust and stiffness.
- Look at the hinges to ensure they are not bent or broken.
- Replace any worn-out parts immediately to avoid further damage.
Here is a quick reference table for common issues and their solutions:
| Issue | Solution |
|---|---|
| Gears grinding | Lubricate gears or replace if worn |
| Chain stiffness | Apply lubricant or replace chain |
| Hinge noise | Lubricate hinges or tighten bolts |
Electronic Components And Wiring
Understanding the electronic components and wiring of your Liftmaster gate opener is crucial. Problems often arise from faulty connections or damaged circuit boards.
Inspecting Wires And Connections
Start by inspecting all wires and connections. Loose or damaged wires can cause the gate opener to malfunction.
- Check for any signs of wear or tear on the wires.
- Ensure all connections are tight and secure.
- Look for any corrosion on the connectors.
Use a multimeter to test the continuity of the wires. A broken wire will not allow current to pass through.
Next, inspect the control panel. Ensure all wires are properly connected and not loose. A loose wire can disrupt the flow of electricity.
Troubleshooting Circuit Boards
If the wires are fine, the issue might be with the circuit board. The circuit board controls the functions of the gate opener.
- Open the control box and locate the circuit board.
- Check for any visible signs of damage or burnt components.
- Use a multimeter to test the voltage at various points on the board.
If you find any damaged components, they may need to be replaced. Sometimes a simple reset can solve the problem. Follow these steps:
- Turn off the power to the gate opener.
- Wait for 30 seconds.
- Turn the power back on and test the gate opener.
If the problem persists, the circuit board may need professional repair. Always consult the user manual for specific troubleshooting steps.
Professional Help Vs. Self-troubleshooting
Troubleshooting a Liftmaster gate opener can be tricky. Deciding between professional help and self-troubleshooting can make a big difference. Both options have their own benefits. Understanding these can help you make the right choice.
When To Call A Technician
Some problems need a skilled technician. Call a technician if:
- The gate opener does not respond at all.
- You hear unusual noises from the motor.
- The gate moves unevenly or gets stuck.
- The remote control fails to operate the gate.
Technicians have the tools and experience. They can diagnose issues quickly. They also ensure safety during repairs.
Benefits Of Professional Maintenance
Professional maintenance offers several benefits:
- Extended Lifespan: Regular check-ups can extend the life of your gate opener.
- Safety: Technicians ensure all safety features work properly.
- Warranty Protection: Professional service keeps your warranty valid.
- Peace of Mind: Knowing your gate is in good hands can reduce stress.
Preventive Measures And Regular Maintenance
Keeping your Liftmaster gate opener in top condition involves regular care. Regular maintenance helps prevent unexpected breakdowns. Simple steps can extend the lifespan of your gate opener.
Setting A Maintenance Schedule
Setting a maintenance schedule ensures your gate opener works well. Plan to check your gate opener every three months. This routine helps catch small problems early.
| Task | Frequency |
|---|---|
| Lubricate moving parts | Every 3 months |
| Inspect electrical connections | Every 6 months |
| Test safety features | Every month |
Long-term Care For Your Gate Opener
Long-term care involves deeper checks and possible part replacements. Watch for unusual sounds from your gate opener. Strange noises can signal a problem.
- Check for rust and wear on metal parts.
- Replace batteries in remote controls once a year.
- Ensure the gate moves smoothly without jerking.
It’s important to keep the area around the gate clean. Debris can interfere with the gate’s operation. Trim any plants or bushes near the gate. This prevents blockages and ensures smooth functioning.
Frequently Asked Questions
Why Is My Liftmaster Gate Opener Not Working?
Your Liftmaster gate opener might not work due to power issues or misaligned sensors.
How Do I Reset My Liftmaster Gate Opener?
Press and hold the reset button for 10 seconds to reset your Liftmaster gate opener.
What Causes Liftmaster Gate Opener To Beep?
A beeping Liftmaster gate opener usually indicates low battery or an obstruction in the gate’s path.
How To Troubleshoot Liftmaster Gate Opener Sensors?
Ensure sensors are clean, aligned, and free from obstructions to troubleshoot your Liftmaster gate opener sensors.
Why Does Liftmaster Gate Opener Stop Halfway?
A Liftmaster gate opener stopping halfway could be due to track obstructions or sensor misalignment.
Conclusion
Troubleshooting your Liftmaster gate opener doesn’t have to be daunting. Follow our tips to keep it running smoothly. Regular maintenance can prevent many common issues. Keep your gate opener in top condition and enjoy seamless operation. For persistent problems, consult a professional.
Your gate’s functionality is worth the effort.