
Perform a power reset on your HP Photosmart 7520 printer by disconnecting the power cord, unplugging it from the wall outlet, and reconnecting it. If your printer is not printing or producing blurry documents, it may be due to clogged printheads or excess ink.
To resolve this issue, clean the printhead using HP’s cleaning solution or remove the excess ink. Additionally, you can try resetting the printer by following the steps outlined in the hidden service menu or using a hard reset. Troubleshooting the HP Photosmart 7520 printer can also be done using HP’s printer diagnostics tool or identifying specific error codes displayed.
If these steps do not resolve your issue, try reinstalling or reconnecting the printer using the driver reinstallation tool or consider using HP’s print driver removal tool.
Performing A Power Reset
Contents
If you are experiencing issues with your Hp Photosmart 7520, performing a power reset may resolve the problem. To do this, simply disconnect the power cord from the printer and wall outlet, then plug it back in and turn the printer on.
Performing a Power Reset on your HP Photosmart 7520 is a simple yet effective solution to several printer problems, including network connectivity issues, error messages, and more. Here are the steps to perform a power reset:
Disconnect The Power Cord
To begin, with the printer turned on, disconnect the power cord from the rear of the printer.
Unplug The Power Cord From The Wall Outlet
Next, unplug the power cord from the wall outlet to ensure that the printer is not receiving any power.
Plug The Power Cord Back Into The Wall Outlet
Reconnect the power cord to the wall outlet. Ensure that the power source is working correctly and that the power cord is securely plugged in.
Reconnect The Power Cord To The Printer
Connect the power cord back to the printer. Ensure that it is firmly in place and correctly connected.
Turn On The Printer
Finally, turn on the printer. The printer will undergo a power reset, which may take a few seconds.
By performing a power reset, the printer is refreshed and often resolves any errors that occurred. This process, if done correctly, can help ensure a smoother printing experience.
Cleaning Ink Cartridges
If you are facing issues with the printing quality of your HP Photosmart 7520 printer, it may be due to clogged ink cartridges. You can follow various troubleshooting techniques available on the internet, including power reset, print quality report, and cleaning the printhead.
These techniques can help you resolve the problem and improve the ink efficiency.
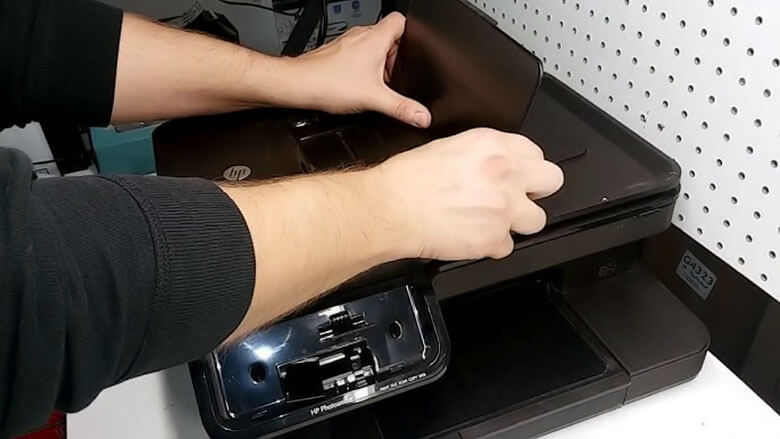
Remove Ink Cartridge Carriage
One of the ways to troubleshoot your HP Photosmart 7520 printer and improve your printing quality is to clean the ink cartridges to remove the excess ink. Begin by removing the ink cartridge carriage from the printer. To do this, turn on the printer and open the cartridge access door. Wait for the carriage to move to the cartridge replacement position. Then, press the front of the ink cartridge to release it and gently pull it towards you to remove it from the printer.
Rinse The Cartridge Under Running Water
After removing the ink cartridges, rinse them under running water to remove any leftover ink and debris that may be clogging the print head. Hold the cartridge under a gently flowing stream of water with the nozzles facing down, and make sure that the water does not touch the contacts or nozzles of the cartridge. Gently move the cartridge back and forth for about 30 seconds to enable the water to clean the print head.
You can also use distilled water or a cleaning agent specially made for cleaning printer ink cartridges. After rinsing, gently pat the cartridge dry with a lint-free cloth or let it air-dry for several minutes.
Final Thoughts
Cleaning the ink cartridges can be a simple and effective way of troubleshooting your HP Photosmart 7520 printer. By following the above steps, you can free your cartridges of any clogs or excess ink to ensure that your printer delivers optimal print quality. Remember to also replace the cartridges that are running low on ink to maintain your printer’s performance.
HP Photosmart 7520 Troubleshooting Ink Issues
Having ink issues with your HP Photosmart 7520? Try resetting your printer by disconnecting the power cord, plugging it back in and turning it on. You can also try cleaning the printhead or rinsing ink cartridges under running water.
Troubleshooting Ink Issues with HP Photosmart 7520 Printer
HP Photosmart 7520 Printer is a popular choice for both professional and personal use. However, just like any other electronic gadget, this printer is also prone to several issues that may arise at any point in time. One such common issue is the ink-related problem. Ink issues can significantly impact the quality of the print, and at times, it can even stop printing altogether. Therefore, it’s essential to learn how to troubleshoot ink issues with the HP Photosmart 7520 Printer. In this section, we’ll explore some of the most common ink problems and how to resolve them in easy steps.
Clogged Printhead
One of the most common ink issues with HP Photosmart 7520 Printer is the clogged printhead. If the printhead is clogged, your printer will fail to produce the desired print quality. The good news is that this issue can be fixed with a few simple steps. Here’s how you can do it:
- Turn on your printer and open the ink cartridge access door.
- Remove the affected ink cartridge carefully.
- Soak a small piece of lint-free cloth in water or distilled water.
- Wipe the printhead with the damp cloth very gently.
- Reinstall the ink cartridge, and you’re good to go!
Blurred Documents and Faded Images
If you’re experiencing blurred documents or faded images, it indicates that it’s time to clean the printhead and remove the excess ink. Here’s how you can clean the printhead:
- Load plain white paper into the input tray of your printer.
- Press the “Setup” button on the control panel.
- Scroll to the “Tools” option and press “OK.”
- Select “Clean Printhead.”
- Wait for the printer to complete the cleaning process.
- Print a quality report to verify if the problem is fixed.
Black or Color Ink Not Printing
If your HP Photosmart 7520 Printer is not printing black or color ink, it can be frustrating. Here are some quick tips to resolve the issue:
- Remove the ink cartridge in question and inspect it.
- Check if the protective tape is still covering the ink nozzle. If yes, remove it.
- Check if the ink level is adequate to print. If it’s not, replace the ink cartridge.
- If the ink level is adequate, try cleaning the printhead.
Examining the Black Cartridge
If none of the above steps work, the next thing you should do is examine the black cartridge. Here’s how:
- Remove the black cartridge from your printer.
- Turn it upside down and examine the contact points.
- If you find any cracks or damages, consider replacing the cartridge.
- If the cartridge looks fine, clean it with a damp cloth.
By following these simple steps, you can troubleshoot ink issues with your HP Photosmart 7520 Printer and enjoy high-quality prints once again.
Using Printer Diagnostics Tool
To troubleshoot the HP Photosmart 7520 printer, you can use the printer diagnostics tool provided by HP. This tool helps to identify and solve issues with printer performance and print quality. Additionally, performing a power reset or cleaning the printhead can improve ink efficiency and resolve printing problems.
Finding And Solving Printer Issues
If you are facing issues with your HP Photosmart 7520 printer, using the printer diagnostics tool can help you find and troubleshoot the issue. The tool provides a detailed report of the printer’s performance status that includes connectivity status, ink levels, and print quality issues.
Steps To Use Printer Diagnostics Tool
- Turn on the printer and ensure that it is connected to your computer or mobile device.
- Open the HP Print and Scan Doctor application, or go to the HP support page to download and install it.
- Select the printer model and click on the ‘Start’ button to run the diagnostics test.
- Follow the on-screen instructions and answer the prompts to diagnose the issue in your printer.
- If the tool identifies any issue, it will provide you with troubleshooting steps to resolve the issue.
- Try printing a test page to ensure that the issue is resolved.
Using the printer diagnostics tool, you can troubleshoot several issues such as the printer not printing, connectivity issues, paper jams, carriage jams, and more. If the issue persists even after running the diagnostic test, you can contact HP support for further assistance.
In Conclusion
Using the printer diagnostic tool can save you time and effort in finding and resolving printer issues. It is an effective way to identify and troubleshoot the issues that may be affecting your printing experience. Run the diagnostics tool regularly to keep your printer in optimal condition.
Reinstalling The Printer Driver
Reinstalling the printer driver can be the solution to some ink-related problems. If you are not able to print documents despite the cartridges being full of ink, it could be a sign that you have a clogged printhead. By reinstalling the printer driver, you can fix the issue and enjoy better ink efficiency.
Using the Driver Reinstallation to Fix Ink Problems
If you are experiencing issues with your HP Photosmart 7520 printer, such as not being able to print documents, blurry images, or faded printouts, it might be time to reinstall the printer driver. Here is how:
- Start by removing the existing printer driver from your computer. Go to the Control Panel, click on “Devices and Printers,” and select your printer. Right-click on the printer and choose “Remove device.”
- Next, go to the HP website and navigate to the Drivers and Downloads page for your printer model. Download the latest version of the printer driver software.
- Open the downloaded file and follow the installation instructions carefully. Make sure to connect your printer to the computer during the installation process.
- Once the driver is installed, restart the computer and your printer. Test the printer to see if it is working correctly.
By using the driver reinstallation method, you can fix ink-related issues like the printer not printing despite having ink in the cartridges, as well as resolve blurry or faded printouts. This method is also useful for clearing clogs blocking the ink flow and improving ink efficiency.
In conclusion, reinstalling the printer driver is an easy way to fix ink-related issues with your HP Photosmart 7520 printer. It is essential to follow the instructions carefully to ensure that the driver installation is successful. By doing so, you can enjoy better printing quality and efficiency from your printer.
Checking For Error Messages
When troubleshooting the HP Photosmart 7520, it is important to check for error messages displayed on the printer’s LCD screen or blinking lights indicating specific issues. Restarting the printer and ensuring all connections are secure can also help resolve any problems.
Blinking Lights Or Specific Error Codes
If your HP Photosmart 7520 is displaying blinking lights or specific error codes, then there may be a problem that needs to be resolved. Some common error codes include “Ink System Failure,” “Print carriage jam,” and “Paper jam.” If you see an error message, you can try resolving it by checking the display for any specific instructions. In some cases, you may need to restart the printer or contact customer support.
When you encounter a problem with your HP Photosmart 7520, checking for error messages can be crucial in identifying and resolving the issue. The printer display may show a message or code that indicates what the problem is, such as low ink levels or a paper jam. By checking for error messages, you can troubleshoot the problem and find a solution.
Ensuring Proper Connection
One of the primary reasons for error messages in HP Photosmart 7520 is an incorrect or loose connection. Ensure that the printer’s power cable is correctly connected to the power source and the printer’s rear’s electrical socket. Likewise, check the integrity of the USB and Ethernet connections between the printer and the computer.
Resetting The Printer
If you’ve tried all the methods but still having issues, resetting the printer to its default settings may be helpful. There are two types of reset methods: soft and hard. A soft reset entails restarting the computer and the printer, while a hard reset involves clearing the printer memory. The soft reset is the quickest and easiest way to reset the printer, while the hard reset is a more time-consuming solution.
Removing The Hp Print Driver
When it comes to troubleshooting a printer, removing the printer driver is often the first step. The HP Photosmart 7520 is no exception, and there are a few ways to do this. In this article, we’ll cover two methods. One is using the HP Print Driver Removal Tool, and the other is doing it manually.
Using HP Print Driver Removal Tool
The HP Print Driver Removal Tool is a quick and easy way to remove old and corrupted printer drivers. This tool removes both the driver and any leftover files that may be causing issues. Here’s how:
- Go to the start menu and search for “programs and features” or “add or remove programs.”
- Find your HP printer driver and select “uninstall.”
- Download the HP Print Driver Removal Tool from the HP website.
- Run the tool and follow the prompts to remove the driver completely.
It’s important to note that you should only use this tool if you’re experiencing issues with your printer driver. If your printer is working correctly, there’s no need to use this tool.
Manually Removing the Printer Driver
If you prefer a more manual approach, you can remove the printer driver by following these steps:
- Go to the start menu and search for “devices and printers.”
- Find your HP printer and right-click on it.
- Select “remove device.”
- Go to the start menu and search for “print management.”
- Double-click on “print servers” and then double-click on your computer name.
- Right-click on the printer driver you want to remove and select “remove driver package.”
- Follow the prompts to remove the driver.
This method may take a bit longer, but it’s just as effective as using the HP Print Driver Removal Tool.
In conclusion, removing the HP printer driver is an essential step in troubleshooting your HP Photosmart 7520 printer. Whether you choose to use the HP Print Driver Removal Tool or manually remove the driver, make sure to follow the instructions carefully to ensure a successful removal.
Frequently Asked Questions
How Do I Reset My Hp Photosmart 7520 Printer?
To perform a power reset on your HP Photosmart 7520 printer, follow these steps: With the printer on, disconnect the power cord from the back of the printer, and from the wall outlet. Then plug the power cord back into the wall outlet and reconnect it to the printer.
Finally, turn the printer on.
Why Is My Hp Printer Not Printing Even Though It Has Ink?
If your HP printer is not printing despite having ink, it’s possible the printhead is clogged. Faded or blurry documents also indicate excess ink. Try cleaning the printhead for better ink flow or perform a power reset by unplugging and plugging the power cord, then turning the printer on again.
How To Do A Hard Reset On Hp Photosmart Printer?
For a hard reset on an HP Photosmart printer, follow these steps:
- With the printer turned on, disconnect the power cord from the rear of the printer.
- Unplug the power cord from the wall outlet.
- Wait for 60 seconds.
- Plug the power cord back into the wall outlet.
- Reconnect the power cord to the printer.
- Turn the printer on.
Why Has My Hp Printer Suddenly Stopped Working?
If your HP printer has suddenly stopped working, it may require a hard reset. Turn off your printer and unplug it from the power source. Wait for a few minutes and plug it back in. It could also be due to clogged printheads which can be cleaned by removing the excess ink.
If these methods do not work, consult the HP Support Community for further troubleshooting.
Conclusion
Troubleshooting your HP Photosmart 7520 may seem daunting, but with the right resources and steps, it can be easily resolved. By accessing the hidden service menu, resetting the printer, clearing trapped air, or removing and rinsing ink cartridges, you can overcome issues such as cartridge errors and poor print quality.
If all else fails, HP’s printer diagnostics tool may identify and solve any lingering concerns. Remember to perform a power reset or hard reset when necessary, and keep your printhead clean for better ink efficiency.