
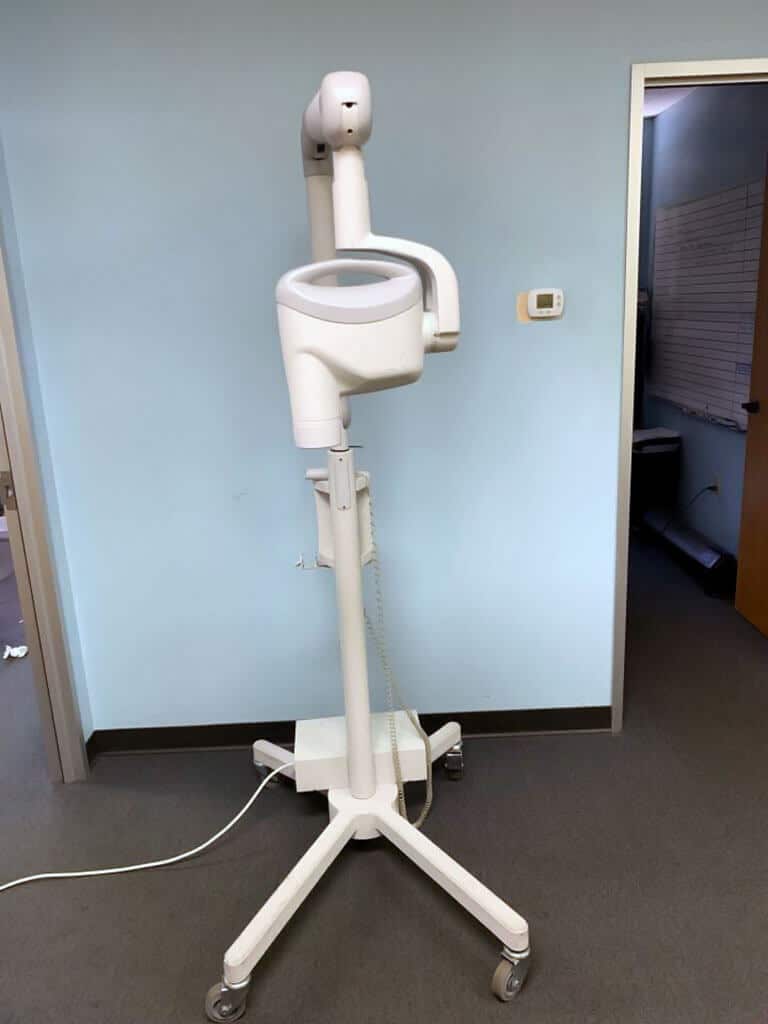
Ensure the Progeny Dental X-Ray machine is plugged in and turned on. Check for error codes and follow the manual.
Progeny Dental X-Ray machines are essential for accurate dental imaging. Troubleshooting these devices ensures smooth operations in dental clinics. Common issues include power problems, error codes, and image quality concerns. Always start with basic checks like power supply and connections.
Refer to the user manual for specific error codes and solutions. Proper maintenance and periodic calibration can prevent many issues. If problems persist, contact technical support for assistance. Regular training for staff on troubleshooting techniques can also be beneficial. Keeping the machine in optimal condition ensures reliable performance and high-quality dental images.
Common Progeny Dental X-ray Issues
Contents
- 1 Common Progeny Dental X-ray Issues
- 2 Initial Diagnostic Steps
- 3 Quick Fixes For Power-related Problems
- 4 Improving Image Quality
- 5 Software Glitches And Solutions
- 6 Hardware Troubles And Workarounds
- 7 User Error And Training
- 8 When To Call For Professional Service
- 9 Frequently Asked Questions
- 10 Conclusion
Experiencing issues with Progeny dental X-ray systems can be frustrating. Common problems often interrupt workflows and impact patient care. Understanding these issues and their solutions can save time and ensure the equipment runs smoothly.
Power Disruptions
Power disruptions are a frequent issue with Progeny dental X-ray systems. These disruptions can lead to unexpected shutdowns or failures to start. Here are some common power-related issues:
- Power Supply Failure: Ensure the power supply is stable and consistent. Check for loose cables and secure connections.
- Blown Fuses: Inspect the fuses for any signs of damage. Replace any blown fuses immediately.
- Battery Problems: For portable units, check the battery health. Replace old or weak batteries to ensure reliable performance.
Image Quality Concerns
Image quality is crucial for accurate diagnostics. Poor image quality can result from various issues. Addressing these concerns promptly is essential:
- Calibration Errors: Regularly calibrate the X-ray machine. Follow the manufacturer’s guidelines for calibration procedures.
- Sensor Malfunction: Inspect the sensor for any signs of wear or damage. Replace faulty sensors to maintain image clarity.
- Improper Exposure Settings: Adjust the exposure settings according to the patient’s size and the area being examined. Incorrect settings can lead to overexposed or underexposed images.
| Issue | Possible Cause | Solution |
|---|---|---|
| Power Disruptions | Loose cables, blown fuses, weak batteries | Check connections, replace fuses, replace batteries |
| Image Quality Concerns | Calibration errors, sensor malfunction, improper settings | Calibrate machine, inspect and replace sensor, adjust settings |
By addressing these common issues, you can ensure your Progeny dental X-ray system operates efficiently. This will improve patient care and streamline your dental practice workflow.
Initial Diagnostic Steps
Troubleshooting a Progeny dental X-ray system can seem daunting. Start with basic diagnostic steps to simplify the process. These steps will help identify common issues and fix them quickly. Follow our guide to ensure your X-ray system runs smoothly.
Assessing Error Messages
Error messages are the first clues when diagnosing issues. Check the display screen for any error codes. Write down the exact wording of the error message. Consult the user manual for the meanings of these codes. This helps you understand the problem better.
Some common error codes may relate to sensor faults, software glitches, or calibration issues. Look for patterns or recurring error messages. This information can be crucial for identifying the root cause. If the manual doesn’t help, contact Progeny support for further assistance.
Checking Power Supply And Connections
A stable power supply is crucial for your X-ray system. Ensure the unit is properly plugged in. Check the power cable for any signs of damage. A loose connection can cause intermittent issues.
Verify that all connections are secure. Inspect the cables connecting the sensor and the computer. Loose or damaged cables can lead to errors. Use replacement cables if you suspect a fault.
If the system still doesn’t power on, check the circuit breaker. Ensure it hasn’t tripped. Reset it if necessary. This simple step can often resolve power issues.
Experiencing power-related issues with your Progeny Dental X-Ray unit can be frustrating. These problems can disrupt workflow and cause delays. Here, we provide simple troubleshooting steps. These steps can quickly resolve common power issues.
Resetting The X-ray Unit
Sometimes, a simple reset is all it takes. Follow these steps to reset your unit:
- Turn off the X-Ray unit using the main power switch.
- Wait for 30 seconds to allow the system to completely power down.
- Turn the unit back on and check if the problem persists.
A reset can fix many minor glitches. Make sure to perform this step first.
Inspecting Circuit Breakers And Fuses
Power issues could also stem from tripped circuit breakers or blown fuses. To inspect these components:
- Locate the main electrical panel in your clinic.
- Check if any circuit breakers are in the “off” position.
- If a breaker is off, switch it back to the “on” position.
- Inspect the fuses for any signs of damage or burning.
- If a fuse is blown, replace it with a new one of the same rating.
| Component | Action |
|---|---|
| Circuit Breaker | Switch to “on” position |
| Fuse | Replace if damaged |
Circuit breakers and fuses protect your X-Ray unit. Regularly check them to prevent power issues.
Improving Image Quality
Achieving clear and accurate dental X-ray images is essential. It helps in proper diagnosis and treatment planning. Poor image quality can lead to misdiagnosis. Follow these tips to improve the quality of your Progeny dental X-rays.
Adjusting Exposure Settings
The right exposure settings are crucial for high-quality images. You need to balance between underexposure and overexposure.
- Check the default settings: Ensure the machine settings are correct.
- Adjust the kVp and mA: These control the image contrast and density.
- Set the exposure time: Ensure it’s neither too short nor too long.
Refer to the manufacturer’s manual for optimal settings. Each model might have slight variations. Consistently follow the recommended guidelines for the best results.
Cleaning And Maintenance Tips
Regular cleaning and maintenance ensure clear images. Dust and debris can affect image quality.
| Component | Cleaning Frequency | Cleaning Method |
|---|---|---|
| Sensor | Daily | Use a soft cloth and disinfectant |
| Tube Head | Weekly | Wipe with a damp cloth |
| Cables | Monthly | Inspect and clean with a dry cloth |
Ensure to follow these cleaning tips to maintain optimal performance. Proper cleaning prevents image distortions and prolongs equipment life.
Always use recommended cleaning agents. Avoid harsh chemicals that could damage components.
Software Glitches And Solutions
Progeny Dental X-ray systems are crucial in dental diagnostics. But, like all tech, they face software glitches. Addressing these issues promptly ensures smooth operations. Below are steps to tackle common software problems.
Restarting The System
Sometimes, a simple system restart can fix software glitches. Follow these steps:
- Turn off the Progeny Dental X-ray machine.
- Wait for 30 seconds.
- Turn the machine back on.
Restarting helps clear temporary bugs. If the problem persists, consider the next step.
Updating Imaging Software
Outdated software can cause many problems. Ensure your imaging software is up to date.
Follow these steps to update:
- Open the software settings menu.
- Look for the update option.
- Click on “Check for Updates”.
- If an update is available, follow the prompts to install it.
Keep your software updated for optimal performance. Regular updates fix bugs and improve functionality.
Below is a table summarizing the key steps:
| Step | Action |
|---|---|
| Restarting | Turn off, wait, turn on |
| Updating | Check settings, update software |
These solutions can resolve most Progeny Dental X-ray software issues. Ensure regular updates for seamless operations.
Hardware Troubles And Workarounds
Progeny Dental X-Ray machines are vital for dental imaging. But hardware issues can disrupt operations. This guide helps troubleshoot common hardware problems. Following these steps ensures your equipment runs smoothly.
Replacing Faulty Components
Sometimes, components fail and need replacing. Identifying faulty parts is crucial. Check the power supply first. A failing power supply can cause many issues.
Next, inspect the X-ray tube. A malfunctioning tube might produce weak images. If the tube is damaged, replace it with a compatible one.
Use the table below to identify and replace common faulty components:
| Component | Issue | Solution |
|---|---|---|
| Power Supply | Machine won’t turn on | Replace power supply |
| X-ray Tube | Weak or no images | Replace X-ray tube |
| Cables | Intermittent power | Replace cables |
Tightening Loose Connections
Loose connections can cause many problems. Regular checks can prevent downtime. Inspect all cables and connectors for tightness.
Use a screwdriver to tighten any loose screws. Ensure all connectors are firmly attached. Loose connections can lead to intermittent issues.
Follow these steps to tighten connections:
- Turn off the machine.
- Unplug all cables.
- Check each connector for tightness.
- Use a screwdriver to tighten any loose screws.
- Reconnect all cables securely.
- Turn on the machine and test.
By keeping connections tight, you can maintain a reliable X-ray machine. Regular maintenance is key to preventing hardware troubles.
User Error And Training
Dealing with Progeny Dental X Ray issues can be challenging. Often, the cause is user error. Proper training can reduce these errors. This section covers common mistakes and best practices for technicians.
Common Operator Mistakes
Many problems arise from simple operator errors. Here are some common mistakes:
- Incorrect positioning of the patient or X-ray sensor.
- Improper exposure settings leading to unclear images.
- Not following manufacturer guidelines for equipment handling.
- Failing to check for software updates regularly.
Avoiding these mistakes can improve the quality of your X-ray images.
Best Practices For Technicians
Technicians should follow best practices to ensure optimal performance:
- Regular training sessions for all operators.
- Always verify the positioning of the patient and sensor.
- Ensure the exposure settings match the patient’s needs.
- Follow a maintenance schedule for the equipment.
- Keep the software updated to the latest version.
Adhering to these practices helps in minimizing user errors and ensuring high-quality X-rays.
| Common Mistake | Best Practice |
|---|---|
| Incorrect positioning | Verify patient and sensor position |
| Improper exposure settings | Match settings to patient needs |
| Not following guidelines | Follow manufacturer guidelines |
| Ignoring software updates | Regularly update software |
When To Call For Professional Service
Progeny Dental X-ray machines are reliable and efficient. Yet, complex issues can arise. Knowing when to call for professional service is crucial. Early intervention helps maintain the equipment’s longevity. Below, you’ll find guidance on recognizing complex issues and who to contact.
Recognizing Complex Issues
Some problems are easy to fix. Others need professional help. Here are some signs you need expert assistance:
- Machine Won’t Turn On: If the machine does not start, call a technician.
- Unusual Noises: Strange sounds may indicate internal problems.
- Image Quality Issues: Blurry or distorted images require expert diagnosis.
- Error Codes: Displaying error codes often means deeper issues.
- Software Problems: Frequent crashes or software errors need professional attention.
Contact Information And Warranty Claims
Having the right contact information is essential. Here’s a quick reference guide:
| Service Type | Contact Information |
|---|---|
| Technical Support | 1-800-555-1234 or support@progenydental.com |
| Warranty Claims | 1-800-555-5678 or warranty@progenydental.com |
Keep your warranty information handy. You might need it for claims. Document all issues in detail. This helps the service team address your concerns quickly.
Frequently Asked Questions
How To Fix A Blurry Dental X-ray?
Ensure the sensor is properly positioned and stable. Check the exposure settings for accuracy.
Why Is My Dental X-ray Machine Not Working?
Verify power connections and software updates. Check for error messages and consult the user manual for troubleshooting steps.
What Causes Dark Spots On Dental X-rays?
Dark spots may indicate overexposure or sensor issues. Adjust settings and inspect the sensor for damage.
How To Resolve A Software Error In Progeny X-ray?
Restart the software and computer. Check for software updates and reinstall if necessary.
Why Are My Dental X-rays Overexposed?
Overexposure can be due to incorrect settings or sensor issues. Adjust exposure settings and inspect the sensor.
Conclusion
Mastering Progeny Dental X Ray troubleshooting ensures efficient and accurate diagnostics. By following these tips, you can minimize downtime. Regular maintenance and understanding common issues will keep your equipment in top shape. Stay proactive, and your practice will benefit from smooth, reliable operations.
Troubleshooting becomes easier with experience and knowledge.