
Is your AcuRite weather station’s outdoor sensor suddenly not working? You rely on it to keep an eye on outdoor conditions, but now it’s showing dashes or no readings at all.
That’s frustrating, especially when you need accurate weather info right outside your door. Don’t worry—this problem is more common than you think, and there are simple steps you can take to get your sensor back online quickly. You’ll discover easy fixes, smart troubleshooting tips, and what to watch out for so your AcuRite outdoor sensor can start delivering reliable data again.
Keep reading to solve the issue and take full control of your weather monitoring!

Check Sensor Placement
Proper placement of your Acurite Weather Station outdoor sensor is vital for accurate readings and consistent signal transmission. Incorrect positioning can cause the sensor to stop working or show incorrect data.
Check the location carefully before concluding that the sensor is faulty. Small adjustments can improve its performance significantly. Focus on avoiding obstacles that interfere with signals and environmental factors that affect sensors.
Avoid Metal Surfaces
Never place the sensor directly on metal surfaces. Metal can block or weaken the wireless signal between the sensor and the indoor display.
Even small amounts of metal nearby can cause connection problems. Use plastic or wooden mounting options instead. This simple change often restores proper communication.
Maintain Line Of Sight
Ensure the sensor has a clear line of sight to the indoor display unit. Walls, thick trees, or large objects can block signals.
Keep the sensor within the recommended distance, usually about 100 to 300 feet, depending on the model. Avoid placing it behind windows or inside metal enclosures.
Inspect Batteries
When your Acurite Weather Station outdoor sensor stops working, the batteries are often the main cause. Inspecting the batteries is a simple but important step. Old or weak batteries can cause connection problems. Check the battery condition before moving on to other fixes. Proper battery care ensures the sensor sends accurate data to the indoor display.
Replace With Fresh Alkaline Batteries
Always use fresh alkaline batteries for your outdoor sensor. These batteries provide stable power for consistent sensor performance. Weak or drained batteries cause signal loss and errors. Replace all batteries at the same time to avoid uneven power. This step often solves most sensor issues quickly.
Avoid Rechargeable Batteries
Do not use rechargeable batteries in your Acurite outdoor sensor. Rechargeable batteries usually have lower voltage than alkaline ones. Lower voltage can cause the sensor to stop sending data. The sensor needs steady power to work well. Use only recommended alkaline batteries for best results.
Check For Corrosion
Look inside the battery compartment for corrosion or rust. Corrosion blocks electrical contact and stops power flow. Clean any corrosion gently with a cotton swab and vinegar. Make sure the battery contacts are dry before reinserting batteries. Regularly check for corrosion to keep your sensor working longer.
Sync Sensor And Display
Syncing the outdoor sensor with the indoor display is essential for your Acurite weather station to work correctly. Without proper sync, the display may show dashes or no readings at all. This issue often happens after changing batteries or moving the units. A simple sync process usually restores the connection and accuracy.
Follow easy steps to check and align the sensor with the display. This ensures both devices communicate properly and deliver accurate weather data.
Match A-b-c Switch Settings
Both the outdoor sensor and the indoor display have an A-B-C switch inside their battery compartments. This switch controls the wireless channel they use to communicate. Both units must have the same letter selected to sync correctly.
Open the battery compartments and check the switch position. If the sensor is set to “A,” the display must also be set to “A.” If they do not match, the signal will not connect.
After adjusting the switches, replace the batteries and place the sensor near the display. Give the units a few minutes to sync and update the readings.
Perform Hard Reset
A hard reset can fix syncing problems that a simple switch match does not solve. Begin by removing the batteries from both the outdoor sensor and the indoor display. Unplug the display’s power cord if it has one.
Leave the units without power for about one minute. This allows the devices to clear any stored errors and reset their internal systems.
After one minute, reinstall the batteries and plug in the display. Place the sensor close to the display to help them find each other quickly. The display should start showing updated weather information within a few minutes.
Test Wireless Signal
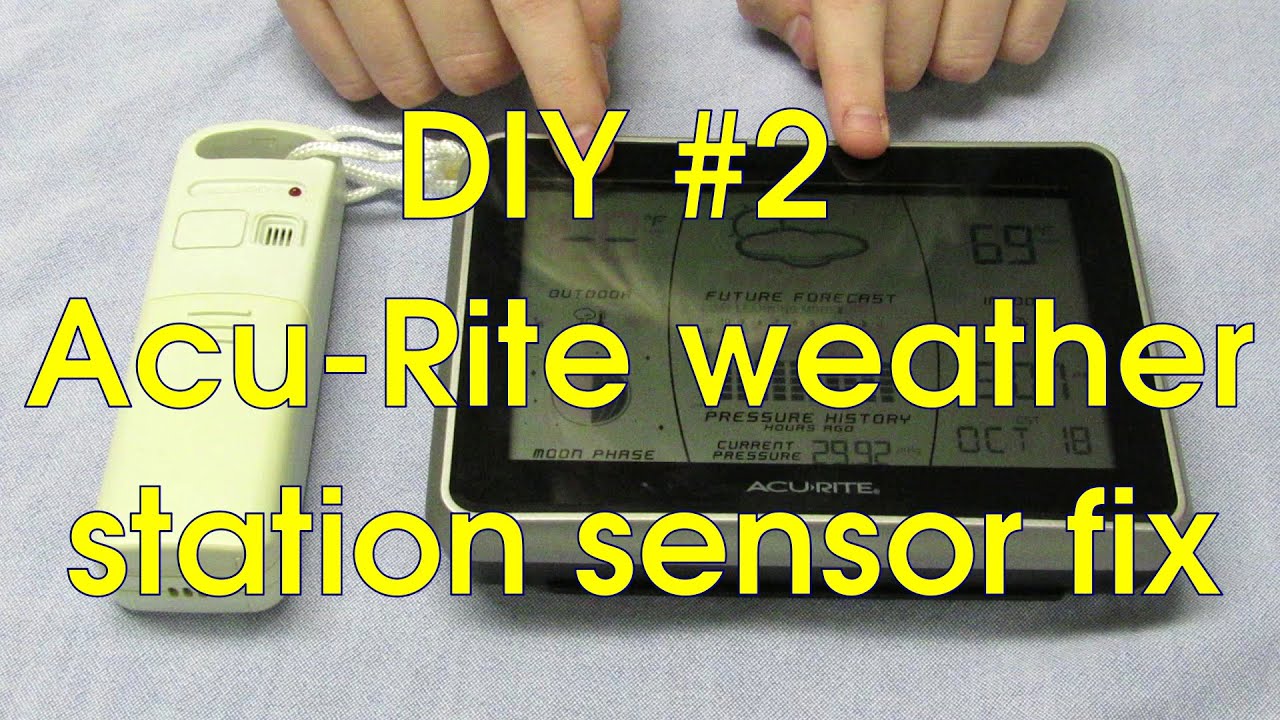
Testing the wireless signal is a key step to fix an Acurite weather station outdoor sensor not working. The outdoor sensor sends data to the indoor display through a wireless connection. If this connection is weak or broken, the sensor will not work properly. Checking the signal strength helps find the cause of the problem. It also guides you to the right fix for better performance.
Reduce Distance Between Units
One common reason for signal failure is the distance between the sensor and the display. The farther apart they are, the weaker the signal becomes. Place the outdoor sensor closer to the indoor display. Keep both units within 100 to 300 feet of each other, depending on model specifications. Walls, trees, and other obstacles can also reduce signal strength. Moving the units closer ensures a stronger, more reliable connection.
Remove Signal Interference
Wireless signals can be blocked or weakened by interference from other devices. Common culprits include Wi-Fi routers, cordless phones, and microwaves. Keep the sensor and display away from these electronics. Metal objects and thick walls can also disrupt signals. Avoid mounting the sensor on metal surfaces, as this can block transmission. Clear the area around both units for the best wireless performance.
Examine Sensor For Damage
Examining your AcuRite weather station outdoor sensor for damage is a key step in troubleshooting. Physical issues can stop the sensor from sending data. Small problems often cause big failures. Careful inspection can reveal hidden faults. This check ensures the sensor stays reliable and accurate. Here are simple ways to spot damage.
Check Battery Compartment
Start by opening the battery compartment carefully. Look for loose or missing batteries. Ensure batteries fit snugly without gaps. Weak contact can stop the sensor from working. Check for broken clips or connectors inside the compartment. Damaged parts may prevent power flow. Replace worn out batteries with fresh ones. Use only recommended battery types for best results.
Look For Moisture Or Corrosion
Moisture can enter the sensor and cause corrosion. Check inside the battery compartment and sensor casing. Rust or white powdery residue shows corrosion. Corrosion blocks electrical connections and drains batteries quickly. Wipe the area with a dry cloth if small spots appear. Severe corrosion may need sensor replacement. Keep the sensor dry and well-sealed to avoid this damage.
Replace Faulty Components
Replacing faulty components is essential when your AcuRite weather station outdoor sensor stops working. The sensor may fail due to worn-out parts or damage. Identifying and swapping out these components can restore accurate weather readings. This process ensures your device works efficiently without needing a full replacement.
Start by pinpointing the malfunctioning parts. Common issues include dead batteries, corroded contacts, or broken sensors. Once you know which components are faulty, ordering the right replacements is the next step. Properly replacing parts helps maintain your station’s reliability over time.
Order Replacement Parts
Order parts that match your AcuRite model exactly. Use the product number to avoid compatibility issues. Buy batteries, sensors, or cables from trusted retailers or the official AcuRite website. Avoid generic parts that may not fit or work properly.
Check the condition of replacement parts before installation. New batteries should be fresh and from a reliable brand. Sensors must be designed for outdoor use and match your station’s specifications. Correct parts prevent further problems and ensure smooth operation.
Contact Acurite Support
Contact AcuRite support if you struggle to identify the faulty parts. Their team can guide you on which components to order. They also provide troubleshooting tips to fix sensor issues quickly.
Use AcuRite’s customer service for warranty questions or repair advice. Support agents can help you determine if your sensor needs repair or replacement. This step saves time and prevents buying unnecessary parts.
Frequently Asked Questions
Why Is My Acurite Not Reading Outside Temperature?
Your AcuRite may not read outside temperature due to weak batteries, signal interference, or incorrect A-B-C switch settings. Check for corrosion, ensure sensor and display share the same channel, avoid metal mounting surfaces, and perform a reset by removing batteries and power.
Replace damaged sensors if needed.
How Do I Reconnect My Outdoor Sensor To My Weather Station?
Remove batteries from both the sensor and display. Unplug the display’s power cord. Wait 10 seconds, reinstall batteries, and plug in the display. Ensure both units share the same A-B-C channel. Place the sensor away from metal surfaces and replace batteries if needed.
How To Reset Acurite Outdoor Sensor?
To reset your AcuRite outdoor sensor, remove batteries from both sensor and display. Unplug the display, wait 10 seconds, then reinstall batteries and plug it back in. Ensure both units share the same A-B-C switch setting to restore connection and proper syncing.
How Do I Reset My Outside Temperature Sensor?
To reset your outside temperature sensor, remove batteries from both sensor and display. Unplug the display’s power cord. Wait one minute, reinstall batteries, and plug in the display. Ensure both units share the same A-B-C setting for proper syncing.
Why Is My Acurite Outdoor Sensor Not Connecting?
The sensor may not connect due to mismatched A-B-C switch settings. Check both sensor and display switches match exactly. Also, weak batteries can cause connection issues.
Conclusion
Troubles with your Acurite outdoor sensor can feel frustrating. Start by checking the batteries and connection settings. Make sure the sensor and display share the same ABC code. Keep the sensor away from metal surfaces that block signals. A simple reset often solves many issues.
If problems persist, inspect for corrosion or damage. Replacing old batteries with fresh alkaline ones helps too. When all else fails, consider contacting Acurite support or replacing the sensor. Taking these steps can bring your weather station back to life quickly.
Don’t give up—your weather data is worth it.