
Have you just replaced your AirTag battery and found that it’s suddenly not working? You’re not alone, and it’s incredibly frustrating when a simple battery swap turns into a problem.
Whether your AirTag won’t connect, won’t beep, or just seems unresponsive, there are a few common issues that could be causing this. But don’t worry—you don’t have to toss your AirTag or head straight to the Apple store. You’ll discover easy, practical steps to get your AirTag back to working perfectly.
Keep reading to solve the problem quickly and get back to tracking what matters most.
Common Battery Issues
Replacing the battery in your AirTag might seem simple. Yet, some common battery issues can stop it from working correctly. These problems often cause frustration but are easy to fix. Understanding these issues helps you get your AirTag running fast again.
Blocked Bitterant Coating
Some batteries come with a bitterant coating. This coating blocks the AirTag from making contact. It stops the device from turning on after a battery change.
Use rubbing alcohol to wipe both sides of the battery. Let the battery dry completely before reinstalling it. This removes the coating and restores contact.
Improper Battery Seating
Placing the battery incorrectly is a common mistake. The battery must sit firmly in its slot. If loose, the AirTag will not detect it.
Remove the battery and place it back carefully. Push until you hear the chime sound. This confirms proper seating. Then, lock the cover by twisting it clockwise.
Device Glitches
Sometimes, the AirTag itself may glitch. These glitches can stop it from recognizing the new battery. A quick reset often solves this problem.
Take the battery out and put it back five times. This resets the AirTag’s internal connection. After that, try pairing the device again.
Preparing The Battery
Preparing the battery properly is key to fixing an AirTag that won’t work after a battery change. Sometimes, the new battery has a protective coating that blocks the connection. Cleaning the battery contacts helps ensure a strong electrical flow. Both steps are simple but vital for your AirTag’s performance.
Removing Protective Coatings
Some batteries come with a thin, clear coating to prevent short circuits. This coating can stop the AirTag from powering on. Remove it by gently scraping the battery surface with a fingernail or a soft cloth. Avoid using sharp tools that could damage the battery. Alternatively, rubbing the battery with a small amount of rubbing alcohol can dissolve the coating. Let the battery dry completely before inserting it into the AirTag.
Cleaning Battery Contacts
Dirty or oily battery contacts can cause connection issues. Use a cotton swab lightly dampened with rubbing alcohol to clean the metal contacts inside the AirTag. Wipe the contacts gently to remove dust and residue. Allow the contacts to dry fully before placing the battery back. Clean contacts help the AirTag detect the battery and work properly.
Battery Replacement Steps
Replacing the battery in your AirTag is a simple task, but it requires attention to detail. Following the correct steps ensures your AirTag works properly after the battery change. Small mistakes during replacement can cause connection issues or prevent the AirTag from powering on.
Below are the essential steps to replace the battery successfully. Each step focuses on handling your AirTag carefully to avoid common problems.
Opening The Airtag
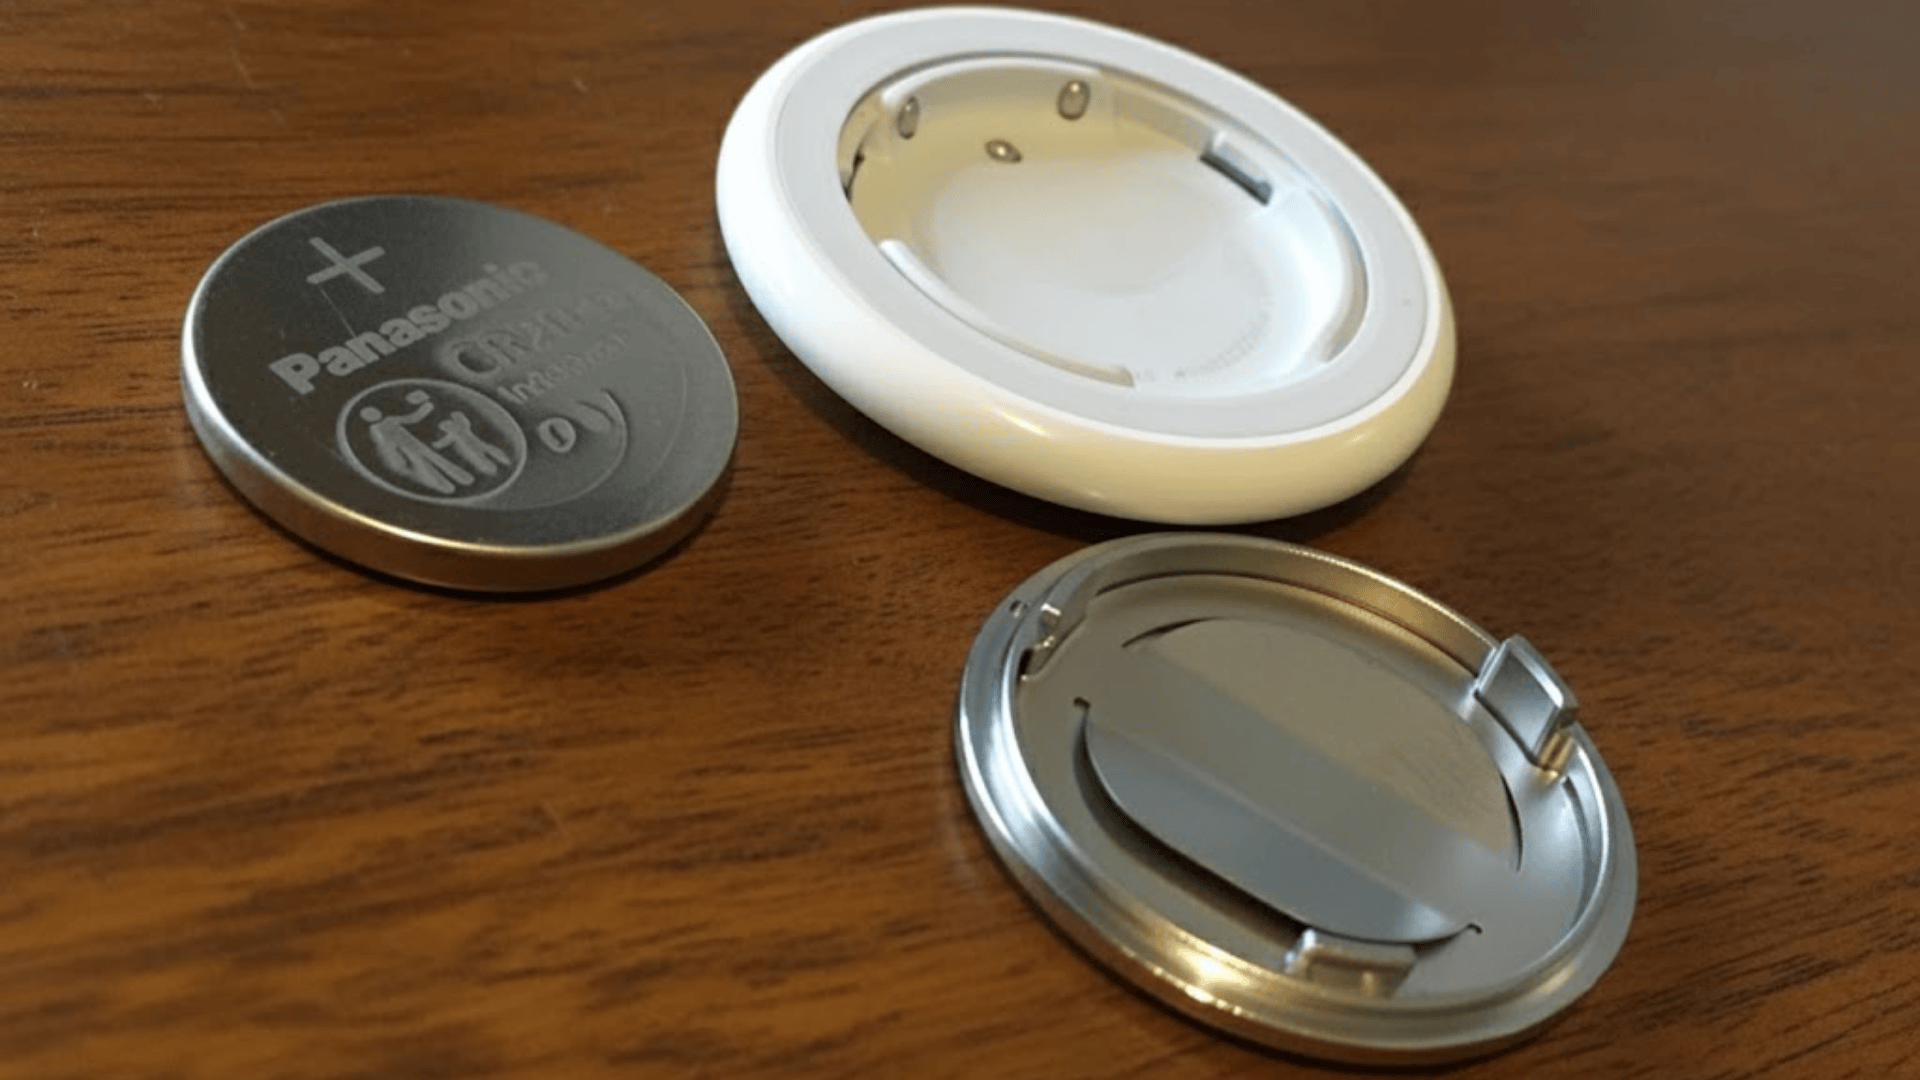
Hold the AirTag with the white side down. Press firmly and twist the metal back cover counterclockwise. The cover will release easily when twisted correctly. Avoid using sharp tools to prevent damage. Keep the cover and battery safe while you replace the battery.
Inserting The Battery Correctly
Use a new CR2032 battery with no bitterant coating. Place the battery with the positive (+) side facing up. Check that the battery sits flat inside the AirTag. Improper placement can stop the AirTag from working. If the AirTag does not chime, remove and reinsert the battery carefully.
Securing The Cover
Align the metal cover tabs with the AirTag slots. Press the cover gently and twist it clockwise until it locks. A secure cover ensures the battery stays in place. Test your AirTag to confirm it powers on and connects to your device. If it does not, repeat the steps to check for errors.

Credit: www.youtube.com
Resetting The Airtag
Resetting your AirTag can fix issues after changing the battery. Sometimes, the device does not recognize the new battery right away. A reset helps to restart the AirTag’s internal system. This process is simple and takes only a few minutes.
Removing And Reinstalling The Battery
Start by removing the AirTag’s back cover. Press down and twist it counterclockwise. Take out the old battery carefully. Place the new battery in with the positive side facing up. Make sure it sits flat and correctly inside the AirTag. Replace the cover and twist it clockwise until it locks.
Performing The Five-times Battery Reset
After installing the battery, remove it again. Put the battery back in and listen for a sound. Remove it once more. Repeat this process five times. This action resets the AirTag’s connection. Each time, the AirTag should chime when the battery is reinstalled.
Listening For The Chime
The chime sound confirms that the AirTag recognizes the battery. If you do not hear the chime, check the battery’s position again. Also, clean the battery with a cloth if needed. The coating on some batteries blocks the contact. The chime means the AirTag is ready to use.
Troubleshooting Connection Problems
After replacing your AirTag battery, it may not connect to your Apple device immediately. Connection problems can happen due to several reasons. Troubleshooting these issues helps restore the link and get your AirTag working again. Follow these simple steps to fix connection problems quickly.
Re-pairing With Your Apple Device
Remove the AirTag cover and take out the battery. Wait a few seconds, then reinsert the battery until you hear a chime. This sound means the AirTag is powered on. Place the cover back and twist it to lock. Open the Find My app on your iPhone or iPad. Hold the AirTag near your device and follow the on-screen instructions to pair it again.
Checking Bluetooth And Location Settings
Ensure Bluetooth is turned on in your device settings. Without Bluetooth, the AirTag cannot connect. Also, check Location Services in Settings. AirTags use location to update their status. Turn on Location Services if it is off. Restart your device to refresh these settings if needed.
Updating Ios For Compatibility
Keep your iPhone or iPad updated with the latest iOS version. Older software may cause connection issues with AirTags. Go to Settings > General > Software Update. Download and install any available updates. After updating, try pairing your AirTag again.
Credit: boomset.com
Handling Persistent Battery Alerts
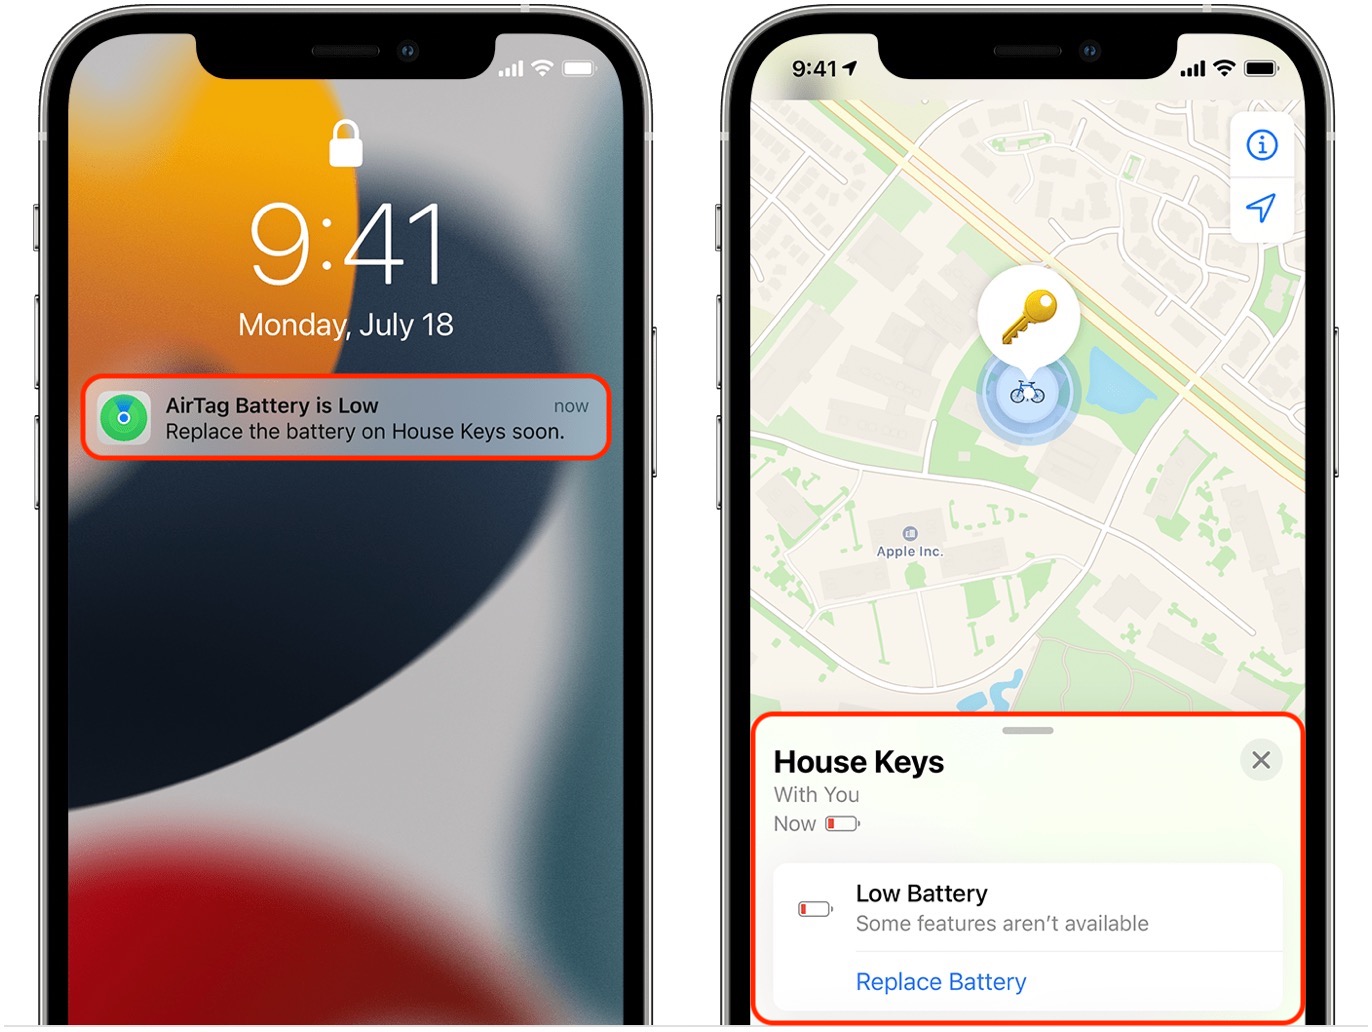
Persistent battery alerts on your AirTag can be frustrating after a fresh battery replacement. These alerts may not always mean the battery is truly low. Sometimes, the device sends false warnings due to small issues. Understanding these alerts and learning how to handle them helps keep your AirTag working smoothly.
Understanding False Low Battery Warnings
False low battery warnings happen when the AirTag misreads the battery status. A common cause is a thin coating on new batteries. This coating can stop the AirTag from detecting power properly. Another cause is poor battery contact inside the AirTag. Dirt or misalignment may block the connection. These issues trigger alerts even if the battery is fresh.
Restarting Your Device
Restarting the AirTag can clear glitches causing false alerts. Remove the battery and wait about 10 seconds. Reinsert the battery firmly until you hear the chime sound. Repeat this a few times if needed. This process resets the AirTag’s internal system. It often stops persistent battery warnings and restores normal function.
When To Replace The Battery Again
Replace the battery again if alerts continue after cleaning and restarting. Check the battery type and brand. Use a high-quality CR2032 battery without bitterant coating. Make sure the battery is inserted with the correct side facing up. If the AirTag still alerts low battery, the battery may be defective. Swap it out for a new one to ensure reliable performance.
Frequently Asked Questions
Why Is My Airtag Not Connecting After Changing The Battery?
Your AirTag may not connect after a battery change due to a bitterant coating on the battery. Clean both sides with rubbing alcohol, let dry, then reinstall. Ensure the battery sits correctly and reset the AirTag by removing and reinserting the battery five times until it chimes.
How Do I Reset My Airtag After Battery?
Remove the AirTag battery, then reinsert it five times until you hear a chime. Replace the cover and twist clockwise to lock. This resets your AirTag after a battery change.
How Do I Reset An Unresponsive Airtag?
To reset an unresponsive AirTag, remove its battery, then reinsert it five times until you hear a chime. Ensure the battery contacts are clean and properly seated. Replace the cover, twist it clockwise to lock, and try pairing the AirTag again.
Why Does My Airtag Not Beep After Replacing The Battery?
Your AirTag may not beep after battery replacement due to a bitterant coating on the battery, improper seating, or a device glitch. Wipe the battery with rubbing alcohol, ensure it fits correctly, and try resetting by removing and reinserting the battery multiple times.
Why Is My Airtag Not Working After Battery Replacement?
Your AirTag may not work if the battery contacts are dirty or coated. Ensure the battery is inserted correctly and try resetting the AirTag by removing and reinserting the battery multiple times.
Conclusion
Replacing your AirTag battery can sometimes cause connection issues. Check the battery contacts for any coating or dirt. Try removing and reinserting the battery several times to reset the device. Make sure the battery fits snugly and the cover is secured properly.
These simple steps often fix common problems quickly. Keep your AirTag clean and handle it gently during battery changes. With a little care, your AirTag will work smoothly again. Don’t give up—small fixes can make a big difference.