
Are you tired of weak water pressure every time you step into your shower? If your shower head feels more like a gentle drizzle than a refreshing spray, the culprit might be the flow restrictor inside it.
These small devices are designed to conserve water, but they can also leave you feeling less than satisfied with your shower experience. Luckily, you don’t have to settle for that. You’ll learn exactly how to remove your shower head flow restrictor safely and easily—boosting your water pressure and turning your daily shower into a powerful, enjoyable rinse.
Keep reading to discover simple steps you can follow right now to get the water flow you deserve.
Tools Needed
Removing a shower head flow restrictor requires only a few simple tools. These tools help you access and remove the restrictor safely and quickly. Having the right tools makes the job easier and prevents damage to your shower head.
Adjustable Wrench
An adjustable wrench helps loosen and tighten the shower head. It fits various sizes of shower arms. Use it carefully to avoid scratching the finish.
Needle-nose Pliers
Needle-nose pliers allow you to grip and pull out the small flow restrictor. Their thin tips fit into tight spaces. They give you control to remove the restrictor without breaking it.
Flathead Screwdriver
A flathead screwdriver helps pry out the restrictor if it is stuck. Use gentle pressure to avoid damaging the shower head parts. It can also remove washers or seals if needed.
Cloth Or Tape
Wrap a cloth or use painter’s tape around the shower head before using tools. This protects the surface from scratches and dents. It also provides extra grip for turning.
Bucket Or Towel
Place a bucket or towel under the shower head to catch any water. This keeps the area dry and clean while you work. It prevents water from dripping onto the floor.
Locate The Flow Restrictor
Locating the flow restrictor is the first step to improving your shower’s water pressure. This small part controls how much water flows through the shower head. Finding it is simple and requires just a few steps.
Most flow restrictors sit inside the shower head, near where it connects to the water pipe. They are often plastic or rubber pieces designed to limit water flow to save water and energy.
Start by unscrewing the shower head from the shower arm. Turn it counterclockwise using your hand or a wrench. Use a cloth to protect the finish from scratches if using tools.
Check Inside The Shower Head
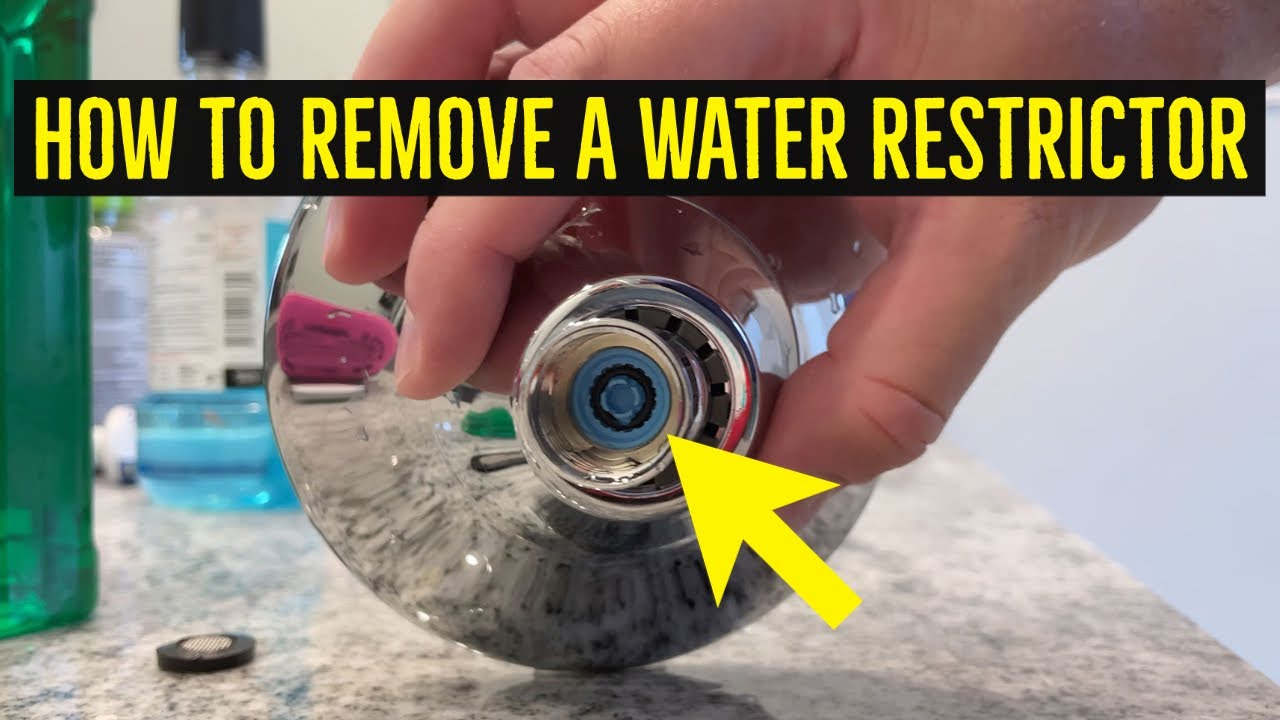
Look inside the opening of the shower head. The flow restrictor usually looks like a small, round disk or a plastic ring. It may be white, black, or colored plastic.
Identify The Flow Restrictor
The flow restrictor often sits behind a small mesh screen or gasket. It may be held in place by a clip or simply fit inside the opening. It blocks some water to reduce pressure.
Remove The Shower Head
Removing the shower head is the first step to access the flow restrictor. This step allows you to reach the internal parts easily. It also prevents damage to the shower head during the process.
Make sure you have the right tools ready. Usually, a wrench or pliers will do the job. Protect the finish of your shower head by wrapping it with a cloth before using tools.
Turn Off The Water Supply
Stop water flow by turning off the main water valve or the shower valve. This prevents water from spraying out when removing the shower head. It also keeps the area dry and safe.
Loosen The Shower Head
Grip the shower head gently with your hand or use a wrench. Turn it counterclockwise to unscrew it from the pipe. If it feels stuck, apply a little force but avoid over-tightening.
Protect The Shower Arm
Wrap the shower arm with a cloth or tape before using pliers. This stops scratches or dents on the metal. Hold the shower arm steady while turning the shower head.
Remove The Shower Head Carefully
Once loose, unscrew the shower head completely by hand. Set it down on a soft surface to avoid damage. Check inside the opening for the flow restrictor after removal.
Credit: www.youtube.com
Access The Restrictor
Accessing the flow restrictor is the first step in removing it from your shower head. The restrictor is usually inside the shower head, near the connection point. You need to carefully open this part to reach it.
Before you start, gather basic tools like pliers and a cloth. Protect the shower head’s finish by wrapping it with the cloth. This prevents scratches during removal.
Remove The Washer Or Screen
Unscrew the shower head from the pipe carefully. You may need to twist it counterclockwise by hand or use pliers. Keep a cloth between the pliers and shower head to avoid damage.
Once removed, look inside the shower head’s opening. You will find a rubber washer or a small screen. Remove this part carefully to expose the restrictor behind it.
Keep the washer or screen safe. You may want to reinstall it later for a good seal.
Identify The Restrictor Type
Flow restrictors come in different shapes. Most are small plastic discs or rings with tiny holes. Some look like small mesh filters or rubber parts.
Look closely to see if the restrictor is clipped in or fixed tightly. Some can be pulled out easily. Others may need gentle prying with a small tool.
Knowing the type helps choose the best way to remove it without breaking the shower head.
Extract The Flow Restrictor
Extracting the flow restrictor is the key step to improve your shower’s water pressure. The flow restrictor limits water flow to save water. Removing it allows more water to pass through. This can make your shower feel stronger and more refreshing. You will need some simple tools and careful handling.
Pull Out Easy Restrictors
Some flow restrictors are easy to remove by hand. First, unscrew the shower head from the pipe. Look inside the opening. The restrictor often looks like a small plastic disc or a screen.
Try to pull it out gently with your fingers or use a small tool like tweezers. If it comes out easily, clean it and set it aside. You can reinsert it later if needed.
Remove Stuck Restrictors
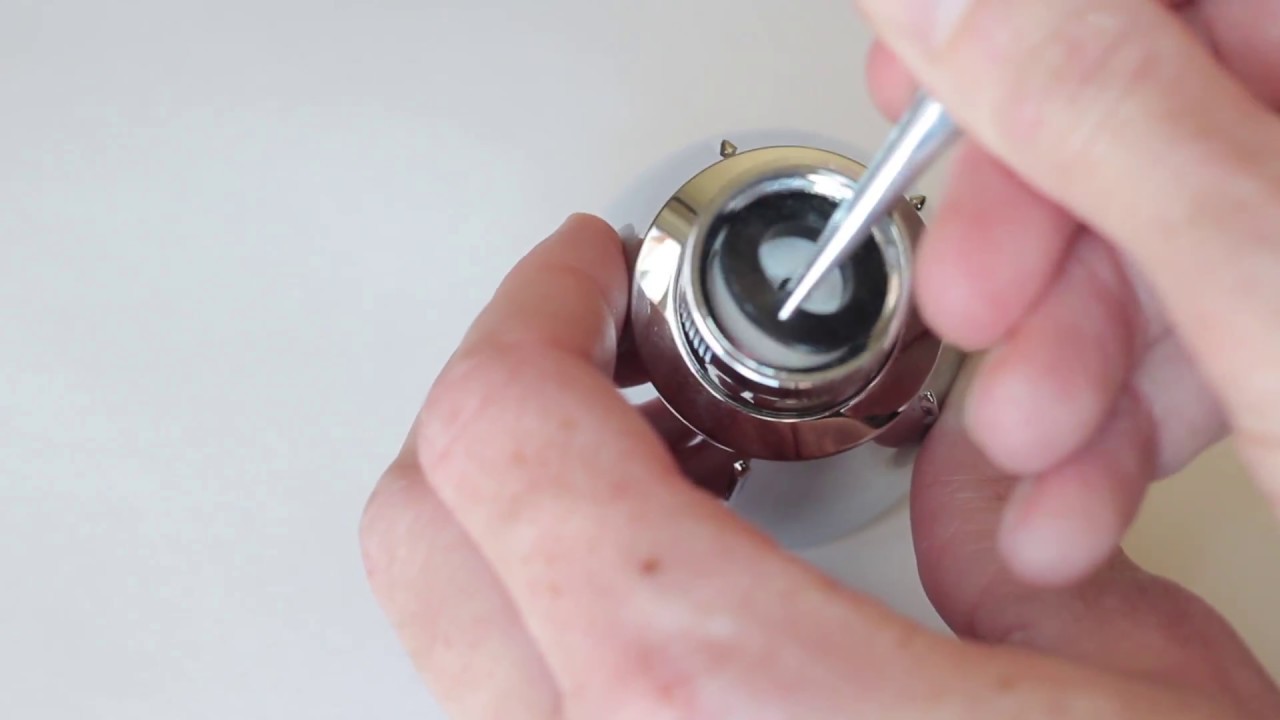
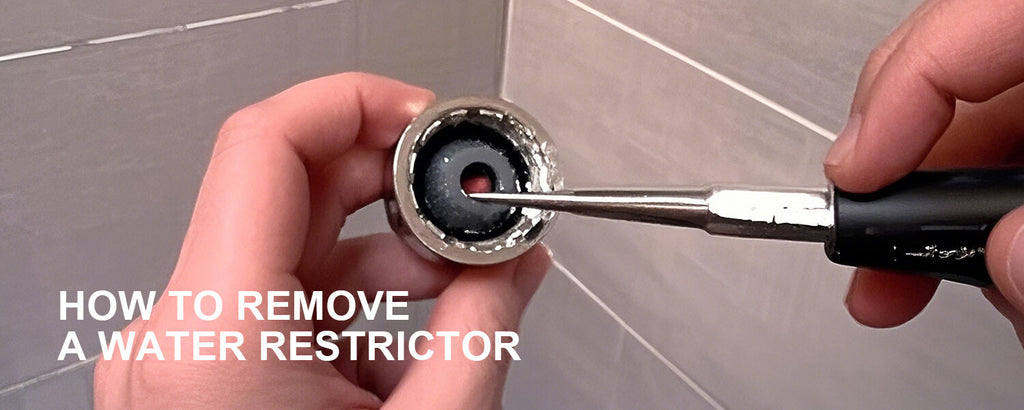
Some restrictors stick tightly inside the shower head. Use needle-nose pliers or a small flathead screwdriver. Insert the tool carefully between the restrictor and the shower head walls.
Gently pry or wiggle the restrictor out. Do not use too much force to avoid damage. Soaking the shower head in vinegar for 30 minutes can help loosen mineral build-up. This makes removing the restrictor easier.
Credit: www.youtube.com
Reassemble The Shower Head
After removing the flow restrictor, reassembling the shower head is the next step. Proper reassembly ensures a secure fit and prevents leaks. Take care to replace small parts correctly for smooth operation. Follow these simple steps to put your shower head back together.
Replace Washer And Screen
Start by inspecting the washer and screen inside the shower head. These parts stop leaks and catch debris. If they look worn or damaged, replace them with new ones. Place the screen first, then the washer on top. Proper positioning is key to avoid drips.
Use Plumber’s Tape
Wrap plumber’s tape around the shower arm threads. This tape seals the connection and prevents water leaks. Wrap it clockwise three to four times for a tight seal. Smooth the tape with your fingers to ensure it sticks well.
Attach Shower Head
Now, screw the shower head back onto the shower arm. Turn it clockwise by hand until snug. Use a wrench to tighten it slightly more. Avoid overtightening to prevent damaging the threads. Check for leaks by turning on the water and watching closely.
Check Water Pressure
Checking water pressure is a key step before removing a shower head flow restrictor. It helps you understand if low water flow is due to pressure or the restrictor itself.
Water pressure affects how strong your shower feels. Low pressure might cause weak water flow, even without a restrictor. High pressure means the restrictor is more likely the issue.
What Is Water Pressure?
Water pressure is the force that pushes water through pipes. It is measured in pounds per square inch (PSI). Most homes have pressure between 40 and 60 PSI. If pressure is too low, shower flow will be weak.
How To Measure Water Pressure
Use a water pressure gauge to check pressure. Attach it to a faucet near your shower. Turn the water on fully and read the gauge. Note the PSI number for comparison.
What Pressure Level Is Ideal For Showers?
Shower heads work best with pressure between 45 and 60 PSI. Below 40 PSI, water flow feels weak. Above 60 PSI, pipes may get damaged over time.
Next Steps Based On Pressure Results
If water pressure is low, removing the restrictor might not help. Consider fixing your home’s pressure first. If pressure is normal or high, removing the restrictor can improve flow.
Legal And Environmental Considerations
Removing a shower head flow restrictor can improve water pressure. Still, it is important to consider legal and environmental factors. These restrictors help save water and meet local laws. Ignoring these rules can cause fines or penalties. Understanding the regulations protects you and the environment.
Water Conservation Regulations
Many states and cities have water conservation rules. These rules limit the amount of water a shower head can use. Removing the flow restrictor may break these laws. It can lead to higher water use and waste. Water-saving devices help reduce water bills and protect resources. Always check local regulations before making changes.
Local Water Flow Requirements
Local governments set water flow limits for fixtures like shower heads. These limits help control water pressure and reduce waste. Flow restrictors are designed to meet these standards. Removing them might cause your shower to exceed allowed flow rates. This can lead to legal issues and increased water costs. Know your area’s flow requirements before removing any parts.
Tips For Maintaining Shower Performance
Maintaining your shower’s performance ensures a steady and enjoyable water flow. Regular care prevents buildup that can block water paths. Simple steps keep your shower head working well after removing a flow restrictor. A clean and well-handled shower head lasts longer and works better.
Regular Cleaning
Clean your shower head often to stop mineral buildup. Soak it in vinegar for 30 minutes to dissolve deposits. Use a soft brush to gently scrub nozzles and holes. Rinse thoroughly with water after cleaning. This keeps water flowing smoothly and maintains pressure.
Avoiding Damage
Handle your shower head carefully to avoid cracks or breaks. Do not use sharp tools when removing the restrictor. Avoid harsh chemicals that can damage the finish or internal parts. Tighten connections by hand, not with excessive force. Proper care prevents leaks and extends the shower head’s life.
Credit: www.rbrohant.com
Frequently Asked Questions
Can A Flow Restrictor Be Removed From A Shower Head?
Yes, you can remove a flow restrictor from a shower head by unscrewing it and carefully pulling out the plastic restrictor inside.
Is It Illegal To Remove A Shower Flow Restrictor?
Removing a shower flow restrictor may violate local water conservation laws. Check your area’s regulations before removal. Non-compliance could lead to fines or legal issues.
How To Make A Low Flow Shower Head More Powerful?
Unscrew the shower head and locate the flow restrictor inside. Use pliers or a screwdriver to carefully remove it. Reattach the shower head for increased water pressure.
Do All Shower Heads Have Water Restrictors In Them?
Not all shower heads have water restrictors, but most modern models include them to conserve water and meet regulations.
What Is A Shower Head Flow Restrictor?
A flow restrictor limits water flow to save water and energy. It reduces water pressure in your shower head. Many shower heads include this small device inside.
Conclusion
Removing the flow restrictor can improve your shower’s water pressure. Take care not to damage any parts during removal. Remember, some areas have rules about water usage. Check local laws before making changes to your shower head. A higher water flow means a better shower experience.
Simple tools and steps make this task easy to do. Enjoy stronger water pressure while saving water wisely.