
Is your Honda HRX217 self-propelled mower suddenly not moving forward on its own? You’re not alone, and it can be frustrating when your reliable mower stops doing the job it’s built for.
But before you think about costly repairs or a replacement, there are simple fixes you can try yourself. Whether it’s a stretched cable, a worn belt, or something stuck in the gears, knowing where to look can save you time and money.
You’ll discover easy steps to diagnose and fix why your Honda HRX217 self-propelled feature isn’t working, so you can get back to mowing your lawn with less effort. Keep reading—your mower’s smooth ride is just a few tweaks away!
Common Causes For Self-propel Failure
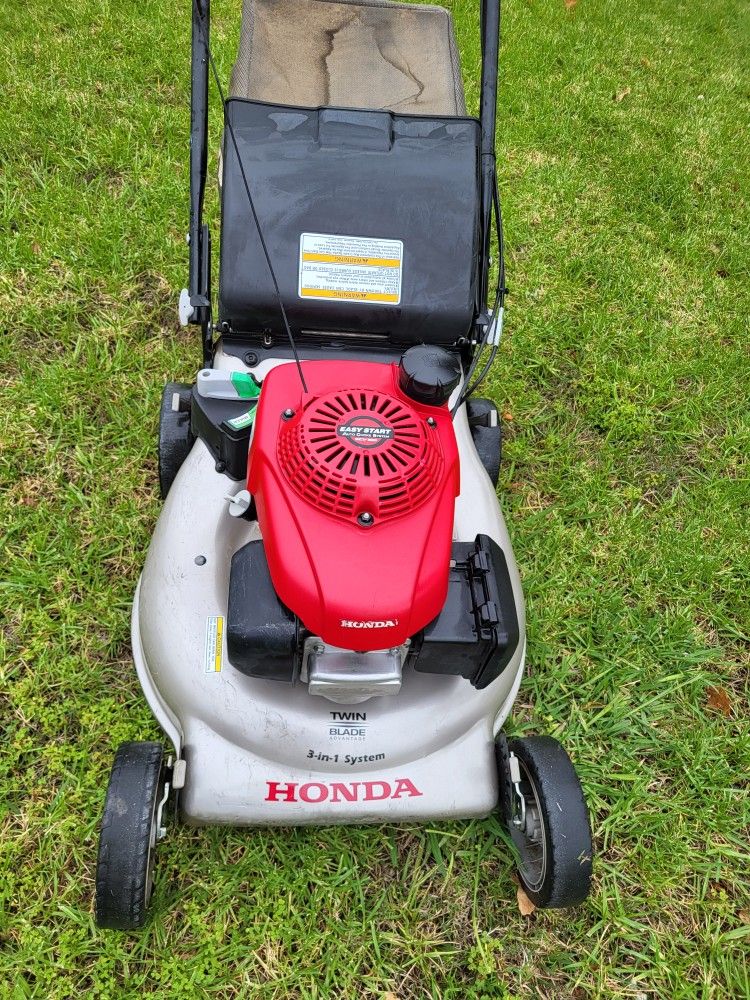
The Honda HRX217 self-propelled mower offers great ease for lawn care. Sometimes, the self-propel feature stops working. This issue often comes from common mechanical problems. Knowing these causes helps in quick troubleshooting and repair.
Stretched Drive Cable
The drive cable can stretch over time. This stops the transmission from fully engaging. The mower should move forward when you press the lever. The rear wheels should spin freely when pulled backward. If not, the cable may need adjustment or replacement.
Worn Or Slipped Drive Belt
The drive belt can wear out or slip off the pulley. This prevents power from reaching the wheels. Turn off the engine and disconnect the spark plug before checking. Remove the belt cover to inspect the belt. Cracks, glazing, or looseness means it must be replaced.
Seized Rear Wheel Gears
Honda mowers use gears on the rear wheels. Grass clippings, rust, or old grease can cause them to seize. This stops the wheels from spinning properly. Cleaning and greasing the gears often solves this problem. It keeps the self-propel feature working smoothly.
Low Transmission Fluid Or Worn Clutches
A groaning noise or weak self-propel at all speeds signals transmission issues. Low hydrostatic fluid or worn clutches cause this problem. Usually, this needs a service center visit. Proper fluid levels and clutch condition are vital for self-propel function.
Credit: www.nilds.gov.ng
Checking And Adjusting The Drive Cable
Checking and adjusting the drive cable on your Honda HRX217 self-propelled mower is essential. A properly adjusted cable ensures smooth operation and prevents the mower from failing to self-propel. The drive cable connects the handle lever to the transmission, controlling the power to the wheels. Over time, this cable can stretch or become loose, causing performance issues.
Signs Of A Stretched Cable
A stretched drive cable will cause the mower to lose power during operation. The self-propel may not engage fully or feel weak. You might notice the rear wheels spin freely when pulling the mower backward. If the mower doesn’t move forward even when the lever is pressed, the cable could be too loose or stretched.
Step-by-step Cable Adjustment
First, turn off the mower and disconnect the spark plug for safety. Locate the drive cable near the handle and the transmission. Loosen the lock nut on the cable adjuster. Pull the cable tight by turning the adjuster until the cable has no slack but is not overly tight. Tighten the lock nut to secure the cable in place. Make sure the lever moves smoothly without resistance.
Testing Cable Engagement
Start the mower and press the self-propel lever. The mower should move forward smoothly. Release the lever and check that the wheels stop driving but still spin freely when moving the mower backward. If the wheels don’t spin freely, the cable might be too tight. Adjust the cable again to find the right tension for proper engagement.
Inspecting And Replacing The Drive Belt
Inspecting and replacing the drive belt is a key step to fix a Honda HRX217 self-propelled mower. A worn or broken belt stops the mower from moving forward. Regular checks keep your mower running smoothly. This section guides you through accessing, inspecting, and replacing the belt safely.
How To Access The Drive Belt
First, turn off the mower and disconnect the spark plug wire. This prevents accidental starts. Next, remove the belt cover located near the mower deck. Use a screwdriver to take off the screws holding the cover. Carefully lift the cover to expose the drive belt and pulleys. Now you can see the belt clearly for inspection or replacement.
Identifying Belt Wear And Damage
Check the belt for cracks or fraying edges. Look for shiny, glazed spots that show slipping. Also, see if the belt feels loose or stretched. A damaged belt cannot turn the mower wheels properly. Any signs of wear mean the belt needs replacement. Do not try to fix a cracked or loose belt.
Safe Belt Replacement Procedure
Before starting, wear gloves to protect your hands. Remove the old belt by sliding it off the pulleys. Note the belt’s path to install the new one correctly. Place the new belt on the pulleys, following the same route. Make sure it fits tight and smooth without twists. Reattach the belt cover and secure it with screws. Reconnect the spark plug wire and test the mower’s self-propel feature. A new belt restores proper movement and power.
Cleaning And Maintaining Rear Wheel Gears
Cleaning and maintaining the rear wheel gears of your Honda HRX217 self-propelled mower is essential. Dirt, grass, and old grease can build up and cause the gears to seize. This stops the mower from moving forward on its own.
Regular maintenance keeps the gears working smoothly. It also extends the life of the mower. Follow these simple steps to clean and care for the rear wheel gears properly.
Removing Grass And Debris
Turn off the mower and disconnect the spark plug for safety. Use a brush or cloth to clear away grass clippings and dirt from the gears. Make sure to remove all debris stuck between the teeth of the gears. This prevents jamming and improves gear movement.
Greasing The Gear System
Apply a thin layer of high-quality grease to the gear teeth. Use grease designed for outdoor equipment to resist water and dirt. Greasing reduces friction and wear on the gears. It also helps keep the gears from rusting.
Preventing Gear Seizure
Check the gears regularly for signs of rust or dryness. Clean and grease them at least once a season. Avoid washing the mower with a high-pressure hose near the gears. This can wash away grease and cause rust. Store the mower in a dry place to protect the gears from moisture.
Hydrostatic Transmission Issues
The Honda HRX217 self-propelled mower relies on a hydrostatic transmission to move smoothly. This transmission uses fluid to transfer power from the engine to the wheels. Problems with this system often cause the mower to stop propelling. Understanding hydrostatic transmission issues helps keep your mower running well.
Hydrostatic transmission problems show up in different ways. Often, low transmission fluid causes the mower to move slowly or not at all. Other times, worn internal parts might make strange noises or reduce power. Regular checks and maintenance keep these problems at bay.
Recognizing Low Fluid Symptoms
Low hydrostatic fluid is a common cause of transmission trouble. The mower may feel weak or slow when you try to move it. You might hear a groaning sound from the transmission. The self-propel function could feel uneven or stop working entirely. These signs mean the fluid level needs checking or refilling.
When To Visit A Service Center
Some transmission problems require expert help. If the mower keeps making noise after adding fluid, it may mean worn clutches inside. Strange smells or leaks are also warning signs. A service center can inspect and fix complex issues safely. Avoid using the mower until a professional checks it.
Transmission Fluid Maintenance Tips
Check the transmission fluid regularly to avoid problems. Use only the recommended fluid type for your Honda mower. Change the fluid as stated in the owner’s manual. Keep the area around the transmission clean to prevent dirt from entering. Proper fluid care extends the life of the transmission and keeps your mower moving smoothly.

Credit: www.nilds.gov.ng
Additional Troubleshooting Tips
Additional troubleshooting can help you find why your Honda HRX217 self-propelled mower is not working. Simple checks often reveal problems that are easy to fix. Use these tips to narrow down the issue and get your mower moving again.
Testing Wheel Movement Backwards
Push the mower backward slowly. The rear wheels should turn freely without resistance. If the wheels drag or stick, the gears might be seized or clogged with debris. Clean the wheels and gears, then test again. This helps identify if the self-propel mechanism is stuck or blocked.
Listening For Unusual Noises
Start the mower and engage the self-propel lever. Listen closely for grinding, squeaking, or groaning sounds. Strange noises often point to worn belts, damaged gears, or low transmission fluid. These sounds give clues about which parts may need repair or replacement.
Checking Ratchet And Gear Engagement
Inspect the ratchet and gear system on the rear wheels. Dirt, grass, or rust can prevent the gears from catching and turning the wheels. Clean the parts and apply grease to ensure smooth engagement. Proper gear function is key to the self-propel system working correctly.
Tools And Safety Precautions
Before starting any repair on your Honda HRX217 self-propelled mower, having the right tools and following safety steps is crucial. Proper preparation prevents damage and keeps you safe. This section covers key tools and safety tips for effective and safe mower repair.
Disconnecting The Spark Plug
Always disconnect the spark plug before any repair. This stops the engine from accidentally starting. Remove the spark plug wire from the plug carefully. Secure it away from the plug to avoid contact. This simple step protects you from injury.
Using Proper Tools For Repairs
Use the correct tools to fix your mower. A socket set, screwdrivers, and pliers are usually needed. Avoid makeshift tools that can damage parts or cause injury. Using the right tools makes repairs faster and safer.
Personal Safety Guidelines
Wear gloves to protect your hands from cuts and dirt. Safety glasses shield your eyes from debris. Avoid loose clothing or jewelry that can get caught in moving parts. Work in a well-lit area to see clearly. These safety rules reduce accident risks.
Preventive Care For Self-propelled Mowers
Proper care keeps your Honda HRX217 self-propelled mower working smoothly. Regular maintenance prevents common problems that stop the mower from propelling. Simple checks and cleaning extend the mower’s life and save repair costs. Follow these steps to keep your mower in top shape.
Regular Cable And Belt Inspection
Check the self-propel cable for stretch or damage often. A stretched cable stops the transmission from engaging fully. Test the mower by pressing the drive lever; the rear wheels should move but spin freely backward. If the cable is fine, inspect the drive belt. Look for cracks, glazing, or slack. Replace any worn or loose belts to keep power flowing correctly.
Routine Cleaning And Lubrication
Keep the rear wheel gears clean and greased. Grass clippings, rust, and old grease can block the gears from spinning. Clean the gears carefully to remove buildup. Apply fresh grease to help the gears catch and the wheels spin smoothly. This prevents the mower from feeling weak or making groaning noises when in use.
Scheduled Transmission Fluid Checks
Hydrostatic transmission fluid wears down and leaks over time. Low fluid causes the self-propel to weaken or stop working. Check fluid levels regularly and top up as needed. If the mower makes groaning sounds or the drive feels weak in all speeds, the fluid might be low. Serious issues with clutches need professional repair.

Credit: www.youtube.com
Frequently Asked Questions
Why Is My Self-propelled Mower Not Propelling?
Your self-propelled mower may not propel due to a stretched cable, worn or slipped drive belt, or seized rear wheel gears. Check and adjust the cable, inspect and replace the belt if damaged, and clean or grease the rear wheel gears to restore proper function.
How Much Does It Cost To Fix A Self-propelled Lawn Mower?
Fixing a self-propelled lawn mower typically costs between $50 and $150, depending on parts and labor. Common repairs include replacing belts, cables, or transmission service.
How Do You Tighten The Self-propel Cable On A Lawn Mower?
Turn off the mower and disconnect the spark plug. Locate the self-propel cable and adjust the tension by tightening the cable’s adjustment nut until the drive engages properly without binding. Test the mower to ensure smooth operation and no slipping when pulling backward.
Is It Okay To Pull A Self-propelled Mower Backwards?
Pulling a self-propelled mower backward occasionally is okay, but avoid frequent or forceful reverse use. It may damage the drive system.
Why Is My Honda Hrx217 Self-propelled Mower Not Moving?
A stretched or loose drive cable often stops the mower from moving. Also, worn belts or dirty gears can block wheel movement.
Conclusion
Troubleshooting your Honda HRX217 self-propelled mower saves time and money. Check the drive cable tension first to ensure proper engagement. Inspect the drive belt for wear or slippage and replace if needed. Clean and grease the rear wheel gears to avoid clogs and rust buildup.
Listen for unusual transmission noises, which may signal low hydrostatic fluid or worn clutches. Regular maintenance keeps the mower running smoothly. Taking small steps can restore your mower’s self-propel function quickly and effectively. Don’t ignore minor issues—they often lead to bigger problems later.