
When your Hoover carpet cleaner not spraying water, it can feel incredibly frustrating, especially when you’re geared up to tackle stubborn stains. That moment when you pull the trigger and nothing happens can make you wonder if your trusty machine is broken or if a costly repair is on the horizon. But before you panic or rush to buy a new one, take a deep breath.
Often, the problem isn’t as severe as it seems. Many common spray issues can be resolved with simple troubleshooting steps you can perform right at home. This guide will walk you through diagnosing and fixing the most frequent culprits behind a non-spraying Hoover carpet cleaner, from airlocks to clogs and everything in between. You’ll gain the confidence to get your machine back in action, ensuring your carpets are spotless once more.
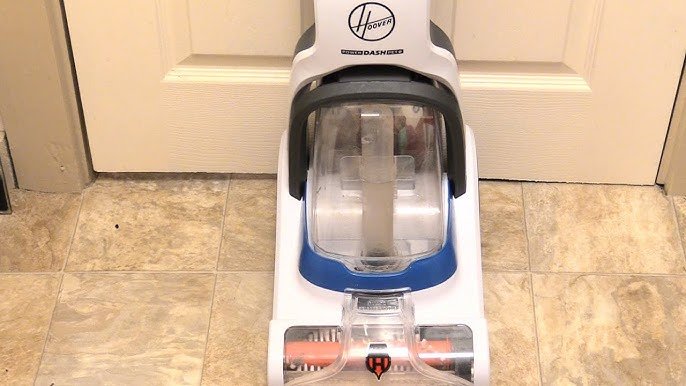
Understanding Your Hoover Carpet Cleaner’s Spray System
Your Hoover carpet cleaner relies on a sophisticated yet straightforward system to spray water and cleaning solution onto your carpets. Understanding the basics can help you pinpoint where things might be going wrong.
Essentially, the machine’s pump draws cleaning solution from the clean water tank. This solution then travels through internal hoses, past a spray trigger mechanism, and finally exits through small nozzles onto your carpet. Any disruption in this flow – be it air, a blockage, or a mechanical fault – will stop the spray.
Key Components Involved in Spraying Water
To effectively troubleshoot, it helps to know the main parts involved:
- Clean Water/Solution Tank: Holds the water and cleaning solution.
- Solution Hose: Carries the mix from the tank to the spray nozzles.
- Pump: Creates the pressure needed to push the solution.
- Spray Trigger: Activates the pump and opens the spray mechanism.
- Spray Nozzles: Small openings that disperse the solution onto the carpet.
- Gaskets and Seals: Prevent leaks and maintain pressure within the system.
If any of these components aren’t working correctly, you’ll likely find your hoover carpet cleaner not spraying water.
Initial Checks: The Quick Wins for No Spray
Before diving into more complex troubleshooting, let’s cover the absolute basics. These often overlooked steps can save you a lot of time and frustration.
Is Your Tank Full and Seated Correctly?
This might sound obvious, but it’s astonishing how often an empty or improperly seated tank is the culprit. The machine cannot spray if there’s no water to draw from.
- Check Water Level: Ensure the clean water tank is filled to the appropriate line with a mixture of water and Hoover-approved cleaning solution.
- Proper Seating: Make sure the tank is firmly pushed into place. You should hear a click or feel it lock securely. A loose tank can prevent the internal valve from opening, blocking water flow to the pump.
- Valve Inspection: Briefly check the small valve at the bottom of the clean water tank. It should move freely and not be clogged with dried solution.
Many people assume the tank is fine, but a slight misalignment is enough to stop the water.
Are You Using the Right Cleaning Solution?
Using non-approved or overly thick cleaning solutions can cause significant problems. Some detergents are not designed for carpet cleaners and can clog the fine spray nozzles or even damage the pump over time.
- Hoover-Approved Solutions: Always use cleaning solutions specifically formulated for Hoover carpet cleaners. These are designed to be the correct viscosity and won’t leave sticky residues.
- Dilution: If you’re mixing your own solution, ensure you follow the dilution instructions precisely. Too concentrated a solution can be too thick to spray properly.
This simple tip is often what most guides fail to mention, yet it’s a common cause of blockages.
Power and Settings: The Obvious But Overlooked
Double-check these fundamental aspects:
- Is the Machine On? Ensure the power switch is in the “On” position.
- Is it Plugged In? Confirm the power cord is securely plugged into a working outlet.
- Correct Mode: Some Hoover models have different modes (e.g., wash, rinse, dry). Ensure it’s set to the “Wash” or “Spray” mode.
Sometimes, the simplest explanations are the correct ones. It’s easy to overlook these basics in the heat of the moment.
Tackling Airlocks: The Silent Spray Killer
An airlock is one of the most common reasons your Hoover carpet cleaner not spraying water. It happens when air gets trapped in the solution hose or pump, preventing the water from flowing through.
What Exactly is an Airlock?
An airlock occurs when a pocket of air gets trapped within the liquid pathway of your carpet cleaner. Because the pump is designed to move liquid, it struggles to push through a compressible air bubble. This creates a vacuum or blockage, stopping the flow of water and cleaning solution to the spray nozzles.
Airlocks can form if the clean water tank runs dry during operation, if the machine is tilted excessively, or if a hose connection becomes temporarily loose, allowing air to enter the system.
Why Airlocks Happen
Understanding the causes can help prevent them:
- Running Dry: Operating the machine with an empty or nearly empty clean water tank is a primary cause. The pump sucks in air instead of water.
- Tilting the Machine: If you tilt the cleaner too much while moving it or when the tank is low, air can easily enter the pump or hose.
- Disconnecting Hoses: Anytime a hose is disconnected, air can enter the system. If not properly re-primed, an airlock can form.
Step-by-Step Guide to Clearing Airlocks
Clearing an airlock is usually a straightforward process. Here’s how to do it effectively:
Elevating the Machine and Hose
This method uses gravity to help dislodge trapped air. Lift your carpet cleaner onto a sturdy table or counter, ensuring the clean water tank is full.
Allow the spray hose (if detachable) to hang down into a bucket or sink. The idea is to create a downward slope, letting gravity pull the air pocket out of the hose and through the nozzles.
Priming the Pump Effectively
Once the machine is elevated, turn it on. Then, firmly press and hold the spray trigger for about 30-60 seconds. This action forces the pump to work continuously, attempting to push water through the system and expel any trapped air.
You might hear gurgling or sputtering noises at first, which indicate air is being cleared. Keep holding the trigger until you see a steady stream of water. If the spray is intermittent, turn the machine off and on a few times while holding the trigger to reset the pump and try again.
The “Disconnect and Reattach” Trick
For stubborn airlocks, especially in models with a removable solution hose, try this. Turn off and unplug the machine. Carefully disconnect the solution hose from the main unit.
Shake the hose gently to dislodge any air bubbles. Then, reconnect it firmly, ensuring a secure, airtight seal. Refill the clean water tank, then elevate and prime the pump again as described above. This often resets the system and helps clear the blockage.
Clogged Nozzles: When the Water Can’t Get Out
If your machine powers on, the pump sounds like it’s working, and you’ve ruled out airlocks, the next most likely culprit is clogged spray nozzles. These tiny openings are crucial for dispensing water evenly.
How Nozzles Get Clogged
Spray nozzles are surprisingly delicate and can become clogged for several reasons:
- Dried Cleaning Solution: If the machine isn’t rinsed properly after use, residual cleaning solution can dry and harden inside the nozzles.
- Debris and Lint: Tiny fibers, pet hair, or dirt particles can be drawn into the system and get stuck in the fine openings.
- Hard Water Deposits: In areas with hard water, mineral deposits (limescale) can build up over time, narrowing or blocking the nozzles.
This is a common issue that many users overlook, leading to uneven or no spray.
Identifying Clogged Nozzles
The signs of clogged nozzles are usually clear:
- Uneven Spray Pattern: Water only sprays from some nozzles, or the spray is weak and patchy.
- No Spray at All: If all nozzles are completely blocked, you’ll get no water output despite the pump working.
- Dripping Instead of Spraying: Water might just drip out slowly instead of being projected.
Cleaning Your Spray Nozzles: A Detailed Approach
Cleaning the nozzles requires a bit of care but is typically effective.
- Unplug the Machine: Always ensure the carpet cleaner is unplugged before performing any maintenance.
- Locate the Nozzles: The spray nozzles are usually found on the underside of the cleaning head.
- Use a Small Tool: Gently poke a thin, stiff wire, a straightened paperclip, or a sewing needle into each nozzle opening. Be careful not to enlarge the hole or damage the plastic. This helps dislodge any solid blockages.
- Brush and Rinse: Use an old toothbrush and warm water to scrub the nozzle area. For stubborn mineral deposits, a solution of equal parts white vinegar and warm water can be very effective. Let it soak for 10-15 minutes, then scrub.
- Test Thoroughly: After cleaning, reassemble the machine, fill the tank, and test the spray. You should see an even, strong spray pattern.
If cleaning doesn’t work, some models allow for nozzle replacement, which might be a good next step.
Hose and Connection Issues: More Than Just Airlocks
Beyond airlocks, the hoses and their connections themselves can be a source of trouble for a Hoover carpet cleaner not spraying water.
Inspecting the Hose for Damage
The solution hose, whether internal or external, can suffer wear and tear.
- Cracks or Kinks: Visually inspect the entire length of the hose for any visible cracks, punctures, or severe kinks. Even a small crack can cause a loss of pressure, preventing proper spray. Kinks, especially near connections, can restrict water flow entirely.
- Internal Blockages: Sometimes, debris can get stuck inside the hose itself, creating a partial or full blockage. If the hose is removable, disconnect it and try flushing it with warm water. You might be surprised what comes out!
A damaged hose often requires replacement, but a simple kink can be easily straightened.
Checking Hose Connections and Seals
Loose or worn connections are another common problem. The system relies on airtight and watertight seals to maintain pressure.
- Tighten Connections: Ensure all hose connections are securely tightened. If you have a removable accessory hose, check both ends.
- Inspect Gaskets and O-rings: Look for any visible damage, cracks, or wear on the rubber gaskets or O-rings at the connection points. These seals are vital for preventing air from entering and water from leaking. Worn seals can lead to pressure loss and no spray.
- Replace Worn Parts: If a gasket or O-ring is damaged, it needs to be replaced. These are usually inexpensive and readily available from Hoover parts suppliers.
A small leak at a connection point can significantly impact your machine’s spraying ability.
Pump Problems: When All Else Fails
If you’ve meticulously checked everything else – tanks, airlocks, nozzles, hoses, and connections – and your Hoover carpet cleaner not spraying water, the issue might lie with the pump itself.
Signs of a Failing Pump
A pump can fail in several ways:
- Motor Runs, No Spray: The machine powers on, you hear the motor working, but absolutely no water comes out, even after priming and checking for clogs.
- Weak or Intermittent Spray: Instead of a strong, consistent spray, you get a very weak trickle, or the spray starts and stops erratically.
- Unusual Noises: The pump might make grinding, whining, or unusually loud noises, indicating it’s struggling.
A completely silent pump when the trigger is pressed and the machine is on could also indicate an electrical issue with the pump motor.
Can You Fix a Failing Pump Yourself?
For most users, replacing a pump is a challenging DIY repair. It often involves disassembling a significant portion of the machine and dealing with electrical components.
- Limited DIY: Unless you have significant experience with appliance repair and access to specific parts, attempting a pump replacement might cause more harm than good.
- Professional Service: For pump issues, it’s often best to consult a professional repair service. They have the tools and expertise to diagnose and replace the pump safely.
- Cost-Benefit Analysis: Consider the age and cost of your machine. If it’s an older, less expensive model, the cost of a professional pump repair might approach the price of a new carpet cleaner.
In real-world use, a pump issue is usually the last resort diagnosis, as it’s the most complex to resolve.
Filter and Gasket Maintenance: Often Overlooked Heroes
While not directly part of the spray mechanism, certain filters and gaskets play a crucial role in the overall function and can indirectly affect water spray.
The Role of Filters in the Spray System
Some Hoover models incorporate small filters within the solution path, typically near the tank valve or before the pump. These are designed to catch debris before it reaches and clogs the pump or nozzles.
- Check for Blockages: Consult your owner’s manual to locate any solution pathway filters. Remove and inspect them for accumulated lint, dirt, or dried solution.
- Clean or Replace: Clean filters thoroughly under warm running water. If they are severely clogged or damaged, replacement might be necessary.
A blocked filter starves the pump of water, leading to a “no spray” situation.
Gaskets and O-rings: What They Do and Signs of Wear
Beyond the hose connections, gaskets and O-rings are found in various places where parts connect, such as around the clean water tank valve or within the spray head assembly.
- Maintain Pressure: Their primary job is to create a tight seal, preventing air from entering the system and maintaining the necessary water pressure for spraying.
- Signs of Wear: Look for rubber that appears cracked, brittle, stretched, or flattened. These are all signs of a worn-out seal.
- Replacement: If you find a worn gasket, replacing it is usually straightforward and can restore proper pressure and spray function.
Don’t underestimate the power of a tiny, worn-out rubber ring to disrupt your cleaning efforts.
Preventative Maintenance: Keeping Your Hoover Spraying Strong
The best way to avoid your Hoover carpet cleaner not spraying water is to practice consistent preventative maintenance. A little effort after each use goes a long way.
Regular Cleaning Habits After Each Use
This is perhaps the most critical step.
- Empty and Rinse Tanks: Always empty both the clean and dirty water tanks immediately after use. Rinse them thoroughly with warm water to remove any residue.
- Flush the System: Run a tankful of clean, warm water through the machine (without solution) to flush out any remaining cleaning solution from the hoses, pump, and nozzles. Spray until the water runs clear.
- Wipe Down Nozzles: Give the spray nozzles a quick wipe or brush to prevent solution from drying in them.
These simple steps prevent the buildup that causes most clogs and airlocks.
Using the Right Solution and Dilution
As mentioned before, stick to Hoover-approved cleaning solutions and follow dilution instructions precisely. Using too much detergent or the wrong type can cause foaming, sticky residues, and clogs.
Proper Storage
How you store your machine matters.
- Dry and Clean: Ensure the machine is completely dry before storing it. Store it in a clean, dry place where it won’t be exposed to extreme temperatures.
- No Water in System: Never store the machine with water or cleaning solution left in the tanks or internal system, as this can lead to mold, mildew, or mineral deposits.
Descaling for Hard Water Areas
If you live in an area with hard water, mineral buildup is a persistent threat. Periodically, you might consider running a tank of diluted white vinegar (following your manual’s guidance) through the machine to help dissolve limescale deposits.
Always flush with clean water afterward to remove any vinegar residue.
Common Mistakes People Make
Even experienced users can sometimes make simple errors that lead to spray problems.
- Ignoring the Owner’s Manual: Your manual contains model-specific troubleshooting and maintenance tips. It’s your first and best resource.
- Overfilling the Solution Tank: Filling past the maximum line can lead to leaks or improper priming.
- Not Cleaning After Every Use: This is the number one cause of dried solution clogs.
- Using Cold Water: While not always a direct cause of “no spray,” using cold water can be less effective at dissolving cleaning solution and dislodging dirt, potentially contributing to buildup over time. Warm (not hot) water is usually recommended.
- Forcing Connections: If a hose or tank isn’t fitting easily, don’t force it. There might be an obstruction or misalignment that needs to be corrected, preventing damage to seals.
Learning from these common pitfalls can save you a future headache and keep your machine running smoothly.
When to Seek Professional Help or Consider Replacement
Despite your best efforts, there might come a time when DIY troubleshooting isn’t enough. Knowing when to call in the experts or consider a new machine is crucial.
Troubleshooting Limits
If you’ve gone through all the steps outlined above – checking tanks, clearing airlocks, cleaning nozzles, inspecting hoses, and still your Hoover carpet cleaner not spraying water – then the issue might be deeper, possibly with the pump’s motor or internal electronics.
These types of repairs often require specialized tools and knowledge. Attempting them without the right expertise can void warranties, cause further damage, or even pose safety risks.
Cost-Benefit Analysis
Before committing to a professional repair, consider these factors:
- Age of the Machine: How old is your Hoover? Older machines might be nearing the end of their lifespan, and a repair might only extend it for a short period.
- Cost of Repair vs. New Machine: Get a quote for the repair. Compare this cost to the price of a brand-new carpet cleaner. Sometimes, especially with entry-level models, a new machine is a more economical choice in the long run.
- Warranty Status: Check if your machine is still under warranty. If so, contact Hoover customer service, as the repair might be covered.
Making an informed decision can save you money and ensure you have a reliable cleaning solution for your home.
Frequently Asked Questions
Why Won’t My Hoover Carpet Cleaner Dispense Water?
Your Hoover carpet cleaner may not dispense water primarily due to trapped air (an airlock), clogged spray nozzles, or an improperly seated clean water tank. Less commonly, a failing pump or blocked internal filter can be the cause. Always start by checking the tank and priming the pump.
How Do I Fix a Hoover Carpet Cleaner with No Spray?
To fix a Hoover with no spray, first ensure the clean water tank is full and securely seated. Next, clear any airlocks by elevating the machine and holding the spray trigger for 30-60 seconds to prime the pump. Finally, inspect and clean the spray nozzles for any clogs or dried solution, using a small pin if necessary.
Can Cleaning Solution Cause My Carpet Cleaner Not to Spray?
Yes, cleaning solution can definitely cause your carpet cleaner not to spray. Using overly concentrated, non-approved, or sticky cleaning solutions can lead to residues that clog the fine spray nozzles or even build up within the internal hoses and pump, restricting water flow. Always use Hoover-approved solutions and follow dilution instructions.
Where are the Spray Nozzles on a Hoover Carpet Cleaner?
On most Hoover carpet cleaners, the spray nozzles are located on the underside of the main cleaning head, positioned just in front of the rotating brushes or suction path. They are small openings designed to evenly distribute the water and cleaning solution onto the carpet fibers. They often require regular cleaning to prevent blockages.
How Do I Prevent Airlocks in My Hoover Carpet Cleaner?
Preventing airlocks is simple: always ensure your clean water tank is adequately filled before and during operation, avoiding letting it run completely dry. Also, avoid tilting the machine excessively while in use or during transport. Regularly flushing the system with clean water after each use helps maintain clear pathways and prevents air from getting trapped.
Is It Normal for a New Carpet Cleaner Not to Spray?
It’s not normal for a brand-new carpet cleaner to not spray, but it can happen due to initial airlocks in the system or improper setup. Ensure all tanks are correctly seated and filled, and then prime the pump by holding the spray trigger for an extended period. If the issue persists after these initial steps, contact customer support or return the unit.
Conclusion
Dealing with a Hoover carpet cleaner not spraying water can be a real headache, but as we’ve explored, many common causes have straightforward solutions. From ensuring your clean water tank is properly seated to tackling stubborn airlocks and diligently cleaning those tiny spray nozzles, most issues are within your power to fix.
Remember, consistent preventative maintenance – like flushing your machine after every use and using the right cleaning solutions – is your best defense against future spray problems. While pump issues might require professional attention, don’t let a little hiccup deter you from achieving sparkling clean carpets. With a bit of patience and these practical tips, you’ll have your Hoover spraying like new, making those stubborn stains a thing of the past. Happy cleaning!