
Getting your Brother printer connected to your Wi-Fi network doesn’t have to be confusing or frustrating. Whether you want to print documents from your laptop, smartphone, or tablet, a wireless connection makes everything easier and faster.
In this guide, you’ll find simple, step-by-step instructions to connect your Brother printer to Wi-Fi quickly—no technical jargon, no guesswork. By the end, you’ll be ready to print effortlessly from anywhere in your home or office. Let’s get your printer online and make printing stress-free!
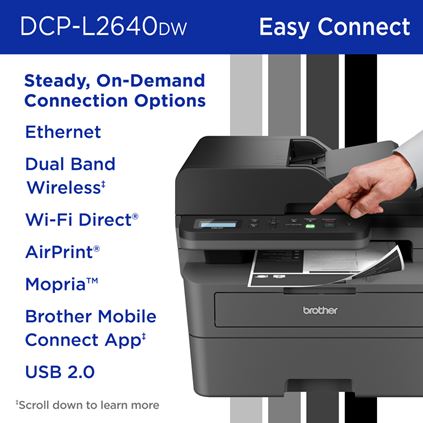
Prepare Your Brother Printer
Getting your Brother printer ready is the first step to connect it to Wi-Fi. This ensures a smooth setup and avoids errors later.
Start by checking your printer’s model and features. Then, power it on and reset network settings for a fresh start.
Check Printer Model And Features
Look at the label on your Brother printer to find its model number. It usually appears on the front or back.
Know your model to confirm it supports Wi-Fi. Some older models do not have wireless capability.
Check the user manual or Brother’s website to learn about your printer’s wireless features. This helps you use the right setup method.
Power On And Reset Network Settings
Turn on your Brother printer using the power button. Wait until it finishes starting up.
Resetting network settings clears old connections that may cause problems.
Press the Menu, Settings, or Home button on the control panel. Navigate to Network or WLAN settings.
Find and select the option for Network Reset or Reset Network Settings. Confirm to start the reset.
The printer will reboot or show a confirmation message when done. Your network settings are now cleared.
Connect Using Setup Wizard
Connecting your Brother printer to Wi-Fi using the Setup Wizard is simple and fast. The printer’s built-in menu guides you through every step. This method works well for most Brother models. It avoids technical terms and complex steps.
Follow these instructions carefully to get your printer online. Make sure your wireless network is active and you know the Wi-Fi password. Let’s begin.
Access The Control Panel Menu
First, power on your Brother printer. Locate the control panel screen. Press the Menu, Settings, or Home button. This opens the main menu where you can change printer settings.
Navigate To Network Settings
Use the arrow keys to scroll through the menu options. Find and select “Network” or “WLAN.” This area controls all wireless network settings for your printer.
Select Wireless Setup Wizard
Inside Network settings, look for “Setup Wizard.” Select it to start the wireless setup process. The printer will ask if you want to enable WLAN. Choose “Yes” to continue.
Choose Your Wi-fi Network
The printer scans for nearby Wi-Fi networks. A list appears on the screen. Use arrow keys to find your network’s name (SSID). Select your Wi-Fi network carefully.
Enter Wi-fi Password Manually
When prompted, enter your Wi-Fi password. Use arrow keys to select letters, numbers, and symbols. Move through characters one by one. Confirm the password by pressing OK or Yes.
The printer now connects to your Wi-Fi network. Wait a moment for confirmation on the screen. Your Brother printer is ready to use wirelessly.
Connect Using Wps Button
Connecting your Brother printer to Wi-Fi using the WPS button is fast and simple. This method avoids typing long passwords. It works if your router supports WPS (Wi-Fi Protected Setup).
WPS creates a secure connection between your printer and router with just a button press. No need to navigate complex menus or enter network keys.
Locate Wps Button On Router
Find the WPS button on your wireless router. It is usually labeled “WPS” or has a symbol with two arrows forming a circle. The button might be on the back or side of the router.
Check your router’s manual if you cannot spot it easily.
Activate Wps Mode On Printer
Turn on your Brother printer. Press the Menu or Settings button on the printer’s control panel.
Scroll to the Network or WLAN option. Select the WPS setup method from the list.
Choose the WPS Push Button option to start the connection process.
Press Wps Button On Router
Within two minutes of activating WPS on your printer, press the WPS button on your router. This action tells both devices to connect securely.
The printer will search for the router and join the network automatically. Wait a few moments for the connection to complete.
Once connected, your printer is ready to print over Wi-Fi without entering a password.
Set Up Wi-fi Direct
Setting up Wi-Fi Direct on your Brother printer allows you to print without a traditional Wi-Fi network. This feature creates a direct wireless connection between your printer and device. It is useful when no router is available or for quick printing tasks.
Follow these simple steps to enable Wi-Fi Direct and connect your device easily.
Enable Wi-fi Direct On Printer
Turn on your Brother printer. Press the Menu or Settings button on the control panel. Use the arrow keys to find the Network or WLAN option. Select Wi-Fi Direct. Choose Enable or On to activate Wi-Fi Direct. The printer will start broadcasting its own Wi-Fi signal.
Find Wi-fi Direct Network Name And Password
Once Wi-Fi Direct is enabled, go to the Wi-Fi Direct settings screen. Locate the network name (SSID) and password listed there. The SSID usually starts with “DIRECT-” followed by your printer model. Write down this network name and password exactly as shown.
Connect Device To Wi-fi Direct
On your computer, smartphone, or tablet, open the Wi-Fi settings. Look for the Wi-Fi Direct network name you noted earlier. Select this network. Enter the password when prompted. After connecting, your device can send print jobs directly to the Brother printer without a router.
Install Printer Drivers And Software
Installing the right drivers and software is essential to connect your Brother printer to Wi-Fi. These tools help your computer communicate with the printer properly. Without them, your printer may not work as expected or connect to your network.
The process starts with downloading the correct drivers for your printer model. Next, you run the full driver and software package. During setup, choose the wireless connection option to link your printer to Wi-Fi.
Download Drivers From Brother Website
Visit the official Brother website for the latest drivers. Enter your printer model in the search box. Select your operating system to find compatible drivers. Download the full driver and software package for your device. This ensures your printer works smoothly with your computer.
Run Full Driver And Software Package
Open the downloaded file to start installation. Follow the on-screen instructions carefully. Installing the full package includes drivers, utilities, and software needed for Wi-Fi setup. This step prepares your printer and computer for wireless connection.
Choose Wireless Connection During Setup
During installation, select the wireless connection type. The setup wizard will guide you through connecting to your Wi-Fi network. Enter your Wi-Fi network name and password when prompted. This links your Brother printer to your wireless network easily.
Connect Mobile Devices
Connecting your Brother printer to mobile devices lets you print directly from smartphones and tablets. This feature adds convenience and saves time. To get started, you need to install the right app and set up your printer with your wireless network. After setup, printing from mobile devices becomes simple and fast.
Download Brother Mobile Connect App
First, download the Brother Mobile Connect app from your device’s app store. The app works on both iOS and Android devices. It helps you find your printer and manage print jobs easily. Open the app and follow the instructions to connect it to your Brother printer.
Set Up Printer Via Wireless Router
Ensure your Brother printer is turned on and near your wireless router. Use the printer’s control panel to access network settings. Select the setup wizard and choose your Wi-Fi network from the list. Enter your Wi-Fi password carefully. The printer connects to your wireless router and becomes ready for mobile printing.
Print From Smartphones And Tablets
With your printer connected, open any document or photo on your phone or tablet. Tap the share or print option and select your Brother printer. Adjust print settings like pages and copies if needed. Tap print and watch your document come to life on paper. Printing from mobile devices has never been easier.

Troubleshoot Connection Issues
Connection problems can stop your Brother printer from working well with Wi-Fi. Fixing these issues helps get your printer online again. Follow simple steps to find and solve common connection problems fast.
Reset Network Settings On Printer
Start by resetting the printer’s network settings. This clears old Wi-Fi data. Press the Menu or Settings button on your printer. Find and select “Network” or “WLAN.” Choose “Network Reset” or “Reset Network.” Confirm the reset when asked. The printer will restart and clear saved networks. After that, try connecting to Wi-Fi again.
Check Wi-fi Signal And Router Settings
Weak Wi-Fi signals cause connection drops. Move your printer closer to the router. Avoid walls or metal objects blocking signals. Restart your router to refresh its settings. Check if the router’s Wi-Fi is on and working. Make sure no parental controls or firewalls block the printer. These can stop the printer from joining the network.
Update Printer Firmware
Outdated firmware can cause bugs and connection errors. Check Brother’s website for the latest firmware version. Download and install updates following the instructions. Updates improve performance and fix known issues. Keep your printer’s software current to avoid many problems.
Verify Device And Printer Are On Same Network
Both your printer and computer or phone must use the same Wi-Fi network. Sometimes devices connect to different bands, like 2.4 GHz or 5 GHz. Make sure both are on the same band and network name (SSID). Check your device’s Wi-Fi settings and printer network info. Mismatched networks stop printing and cause errors.
Frequently Asked Questions
How Do I Connect My Brother Printer To My Wi-fi?
Turn on your Brother printer and open the control panel menu. Select Network or WLAN, then Setup Wizard. Choose your Wi-Fi network and enter the password. Confirm to connect. Alternatively, use the WPS button on both printer and router to connect without entering a password.
How Do I Connect My Printer To A New Wi-fi?
Turn on your printer and open the control panel menu. Select Network or WLAN, then choose Setup Wizard. Pick your Wi-Fi network and enter the password. Confirm the connection. Alternatively, use the WPS button on your router and printer for quick setup.
How Do I Reset My Brother’s Wireless Printer To Connect To Wi-fi?
Turn on your Brother printer. Press Menu, select Network, then Network Reset. Confirm to reboot and clear Wi-Fi settings. Reconnect using Setup Wizard or WPS.
How Do I Get My Brother Printer Online Again?
Power on your Brother printer and open the Menu. Select Network or WLAN, then choose Setup Wizard. Enable WLAN, pick your Wi-Fi network, and enter the password. Confirm to reconnect. Alternatively, use the WPS button on your router and printer to connect quickly.
How Do I Connect My Brother Printer To Wi-fi?
Turn on the printer and open its menu. Select Network or WLAN, then choose Setup Wizard. Pick your Wi-Fi network and enter the password to connect.
Conclusion
Connecting your Brother printer to Wi-Fi makes printing easier and wireless. Follow simple steps on the printer’s control panel to set up the network. Use the Setup Wizard or the WPS button to connect quickly. Once connected, check that your computer or phone can find the printer.
This way, you can print documents without cables or hassle. Enjoy the convenience of wireless printing at home or work. Keep your printer’s manual handy for any troubleshooting needs. Staying connected keeps your printing smooth and stress-free.